How to Use Badger Maps' Admin Manage Fields Tool
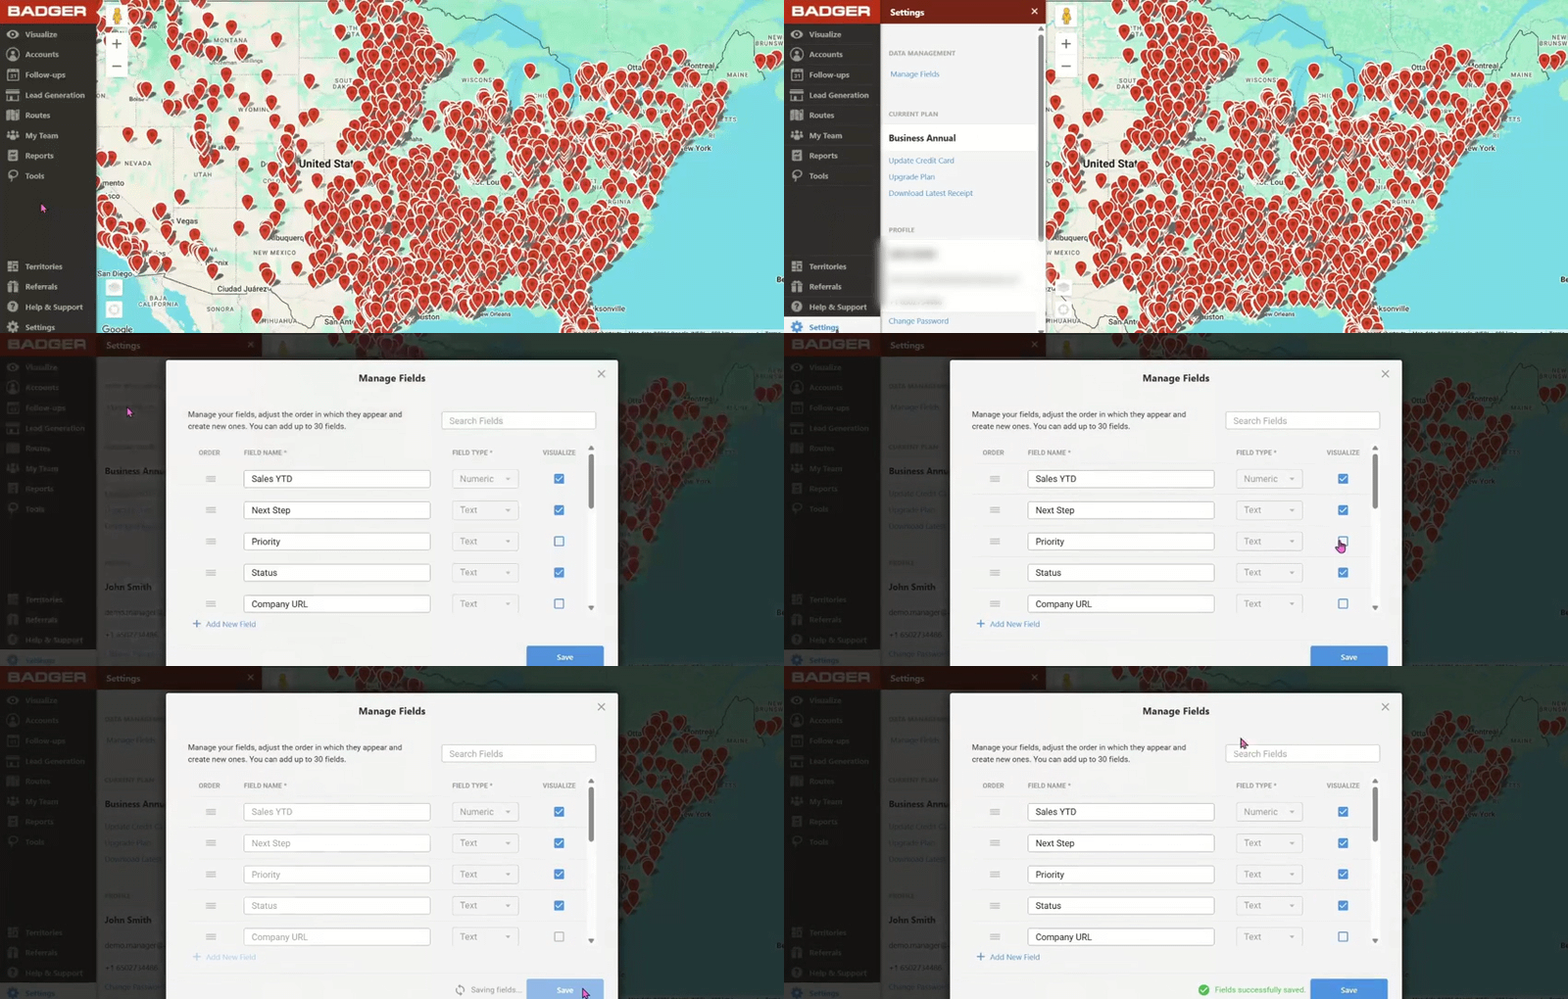
If you’re a team admin wanting to add new fields, edit them, rearrange them, and make them filterable, the Admin Manage Fields tool is the right one for you. It’s accessed through the Settings tab, and here’s how to use it:
Add a New Field
1. Go to Settings, and click Manage Fields.
2. Look for the + Add New Field button, and click it.
3. Enter the new field’s name under the Field Name field.
4. Select the Field Type (Text or Numeric).
5. Click the box on the Visualize field to make the field filterable. You can opt not to click on it if you don’t want the field to be filterable.
6. Click on Save when you’re done.
Edit a Field
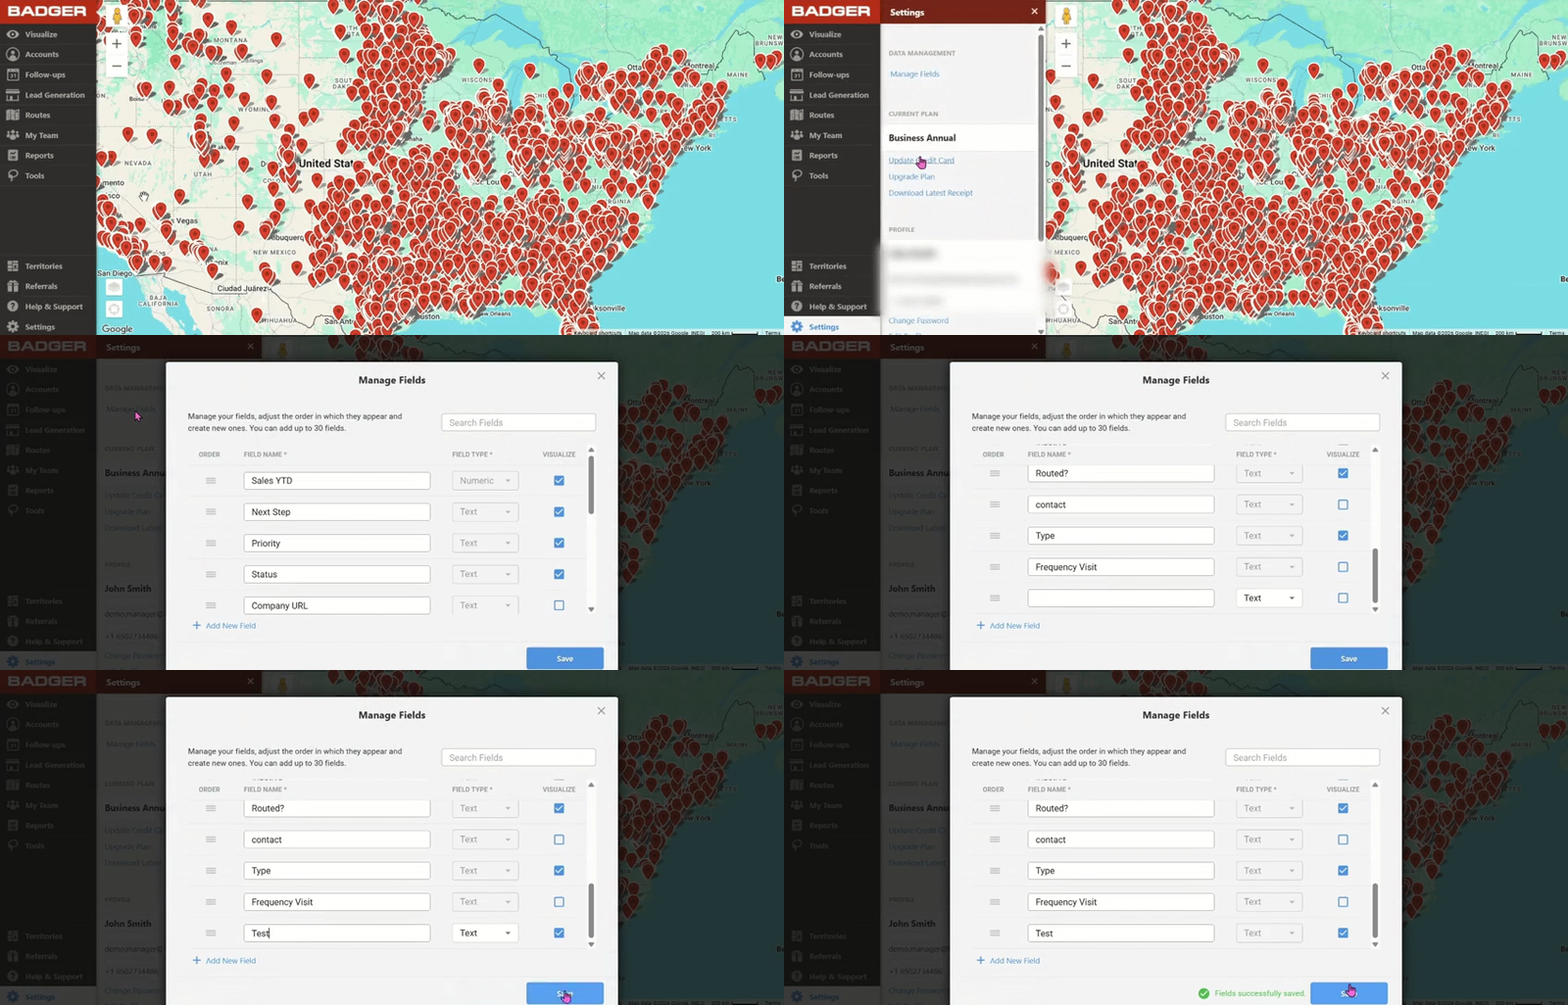
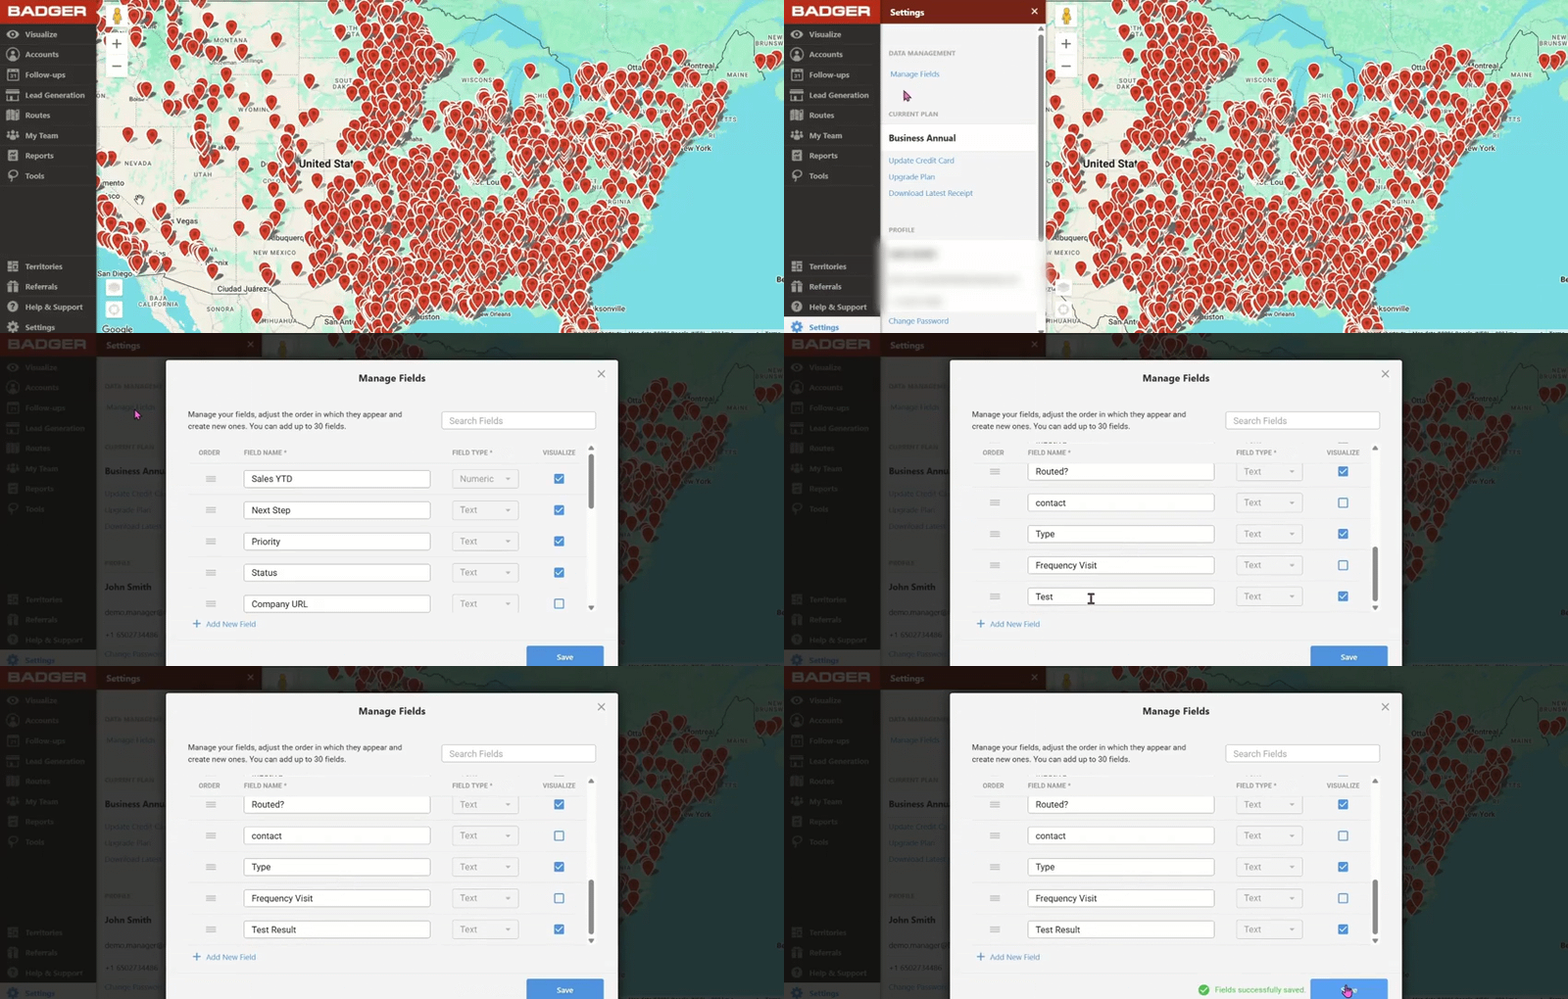
1. Go to Settings, then click Manage Fields.
2. Look for the field that you want to edit in the Field Name field, and type the new field name.
3. Click Save to save the changes.
Rearrange Fields
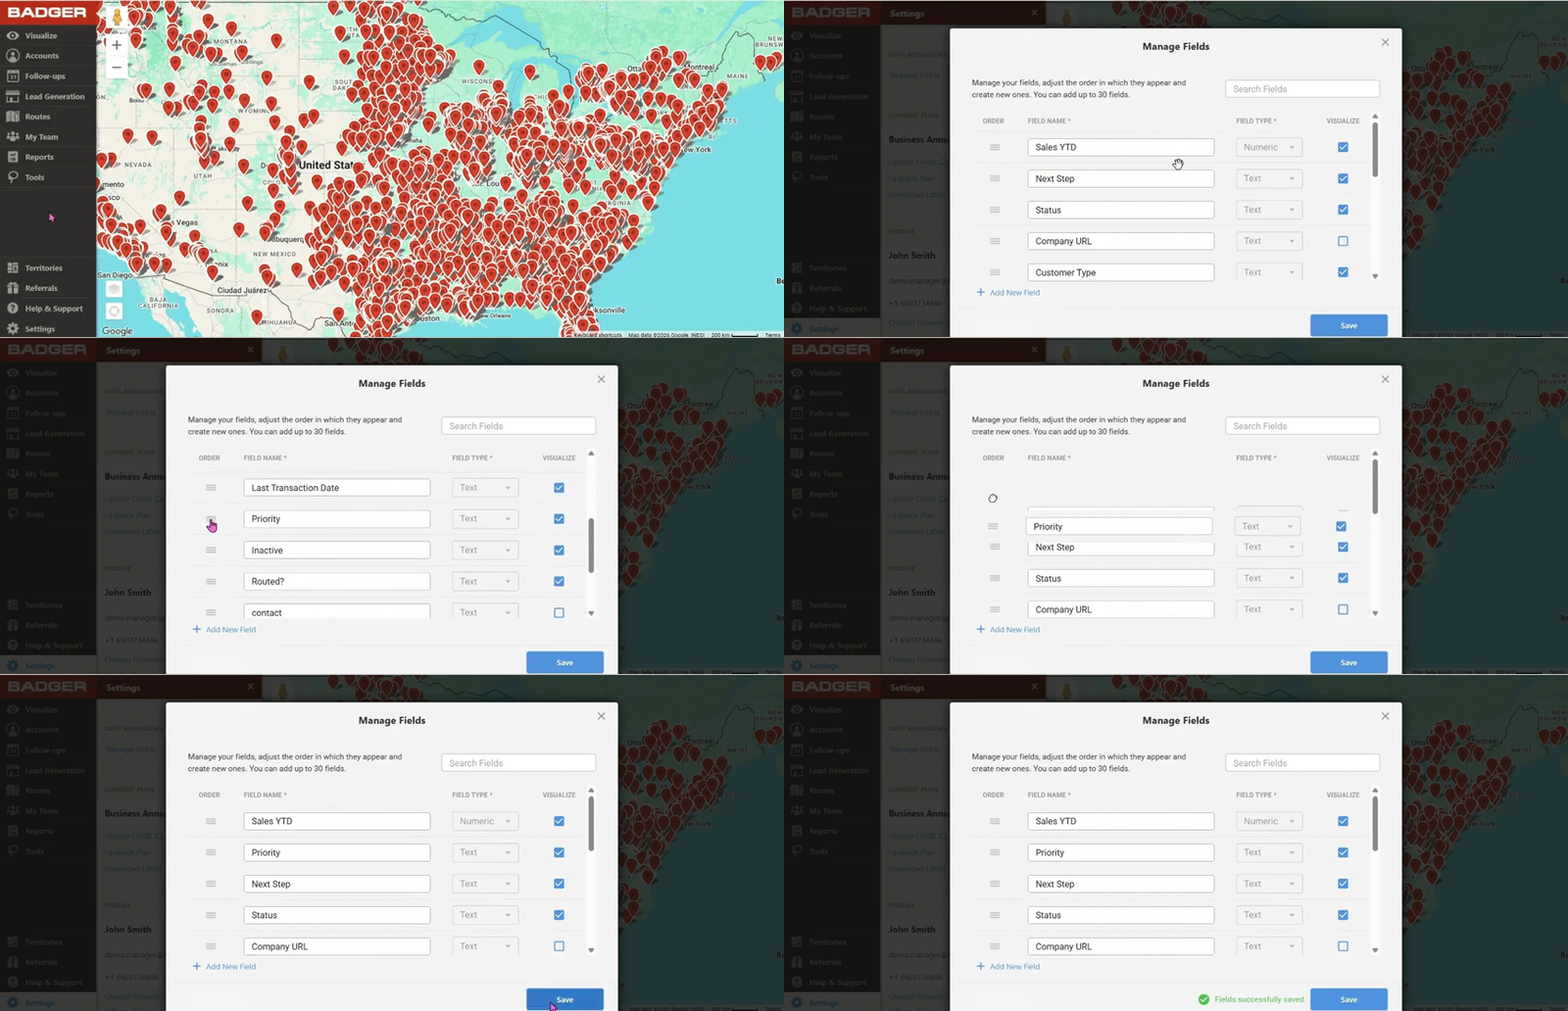
1. Go to Settings, then Manage Fields.
2. Choose the field that you want to move, click and hold the 3-line bar next to its name, and drag it to where you want to place it.
3. Click Save to save the update.
Make a Field Filterable
1. Go to Settings, and hit Manage Fields.
2. Look for the field, and put a check mark on the box under the Visualize field by clicking on it.
3. Click Save.