News: Now offering a 90-day money-back guarantee!
Learn more
News: Now offering a 90-day money-back guarantee!
Learn moreApart from the primary fields such as Account Name, Address, Phone Number and Email Address, you can also add your preferred details by creating custom fields. The custom fields can be uploaded or manually added on the web app by following these easy steps.
NOTE: If you want to delete a specific filter, follow the steps here. If you have misspelled or duplicate filters and you’re looking to update them, here’s a guide on how it’s done.
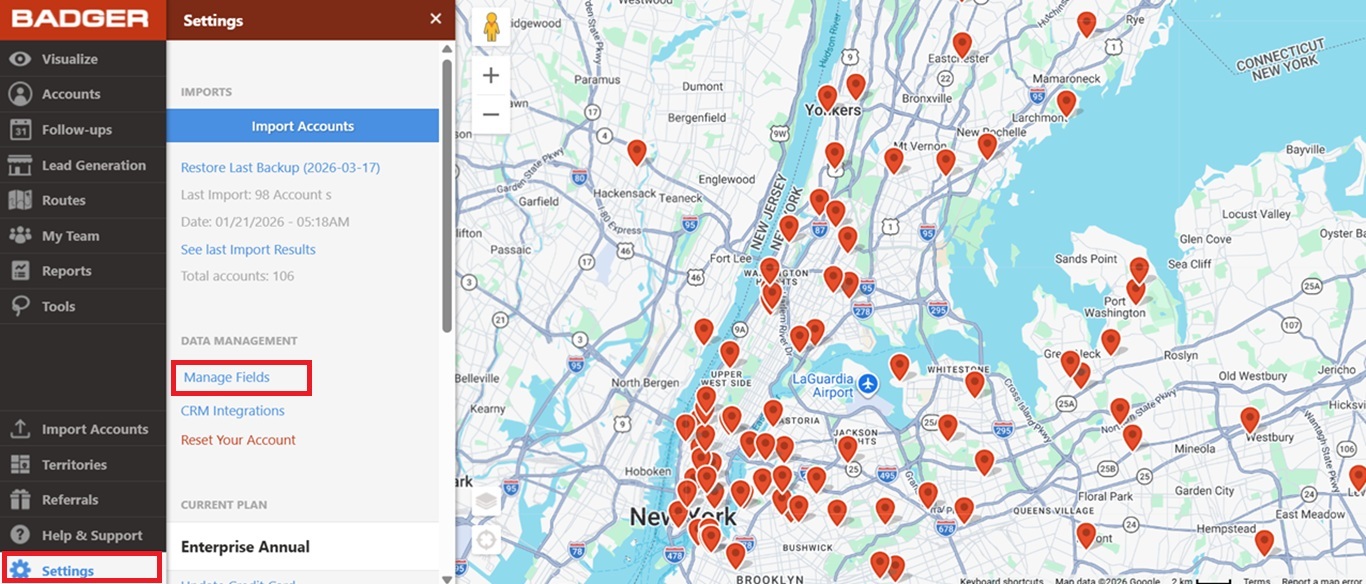
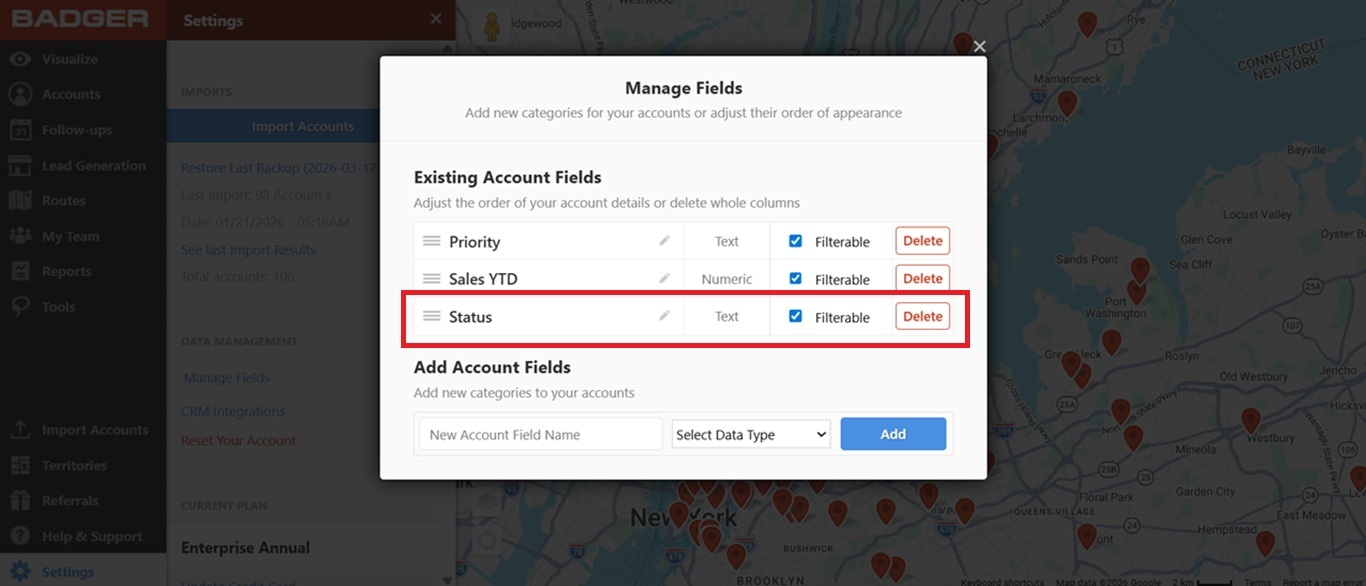
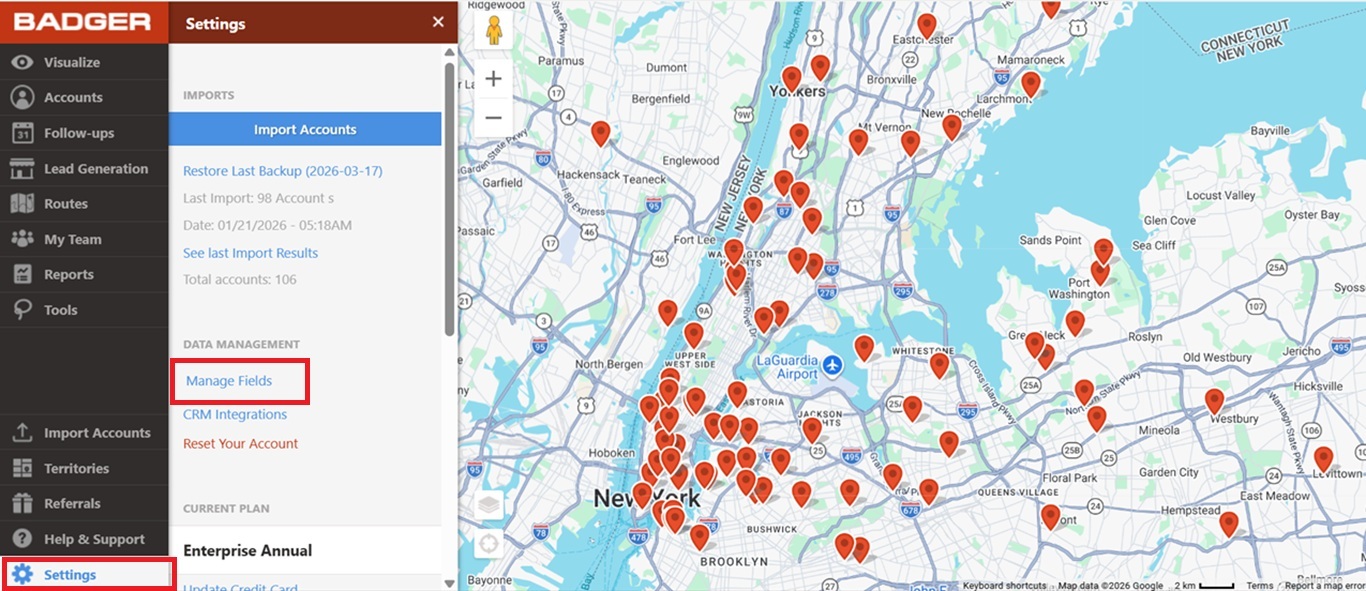
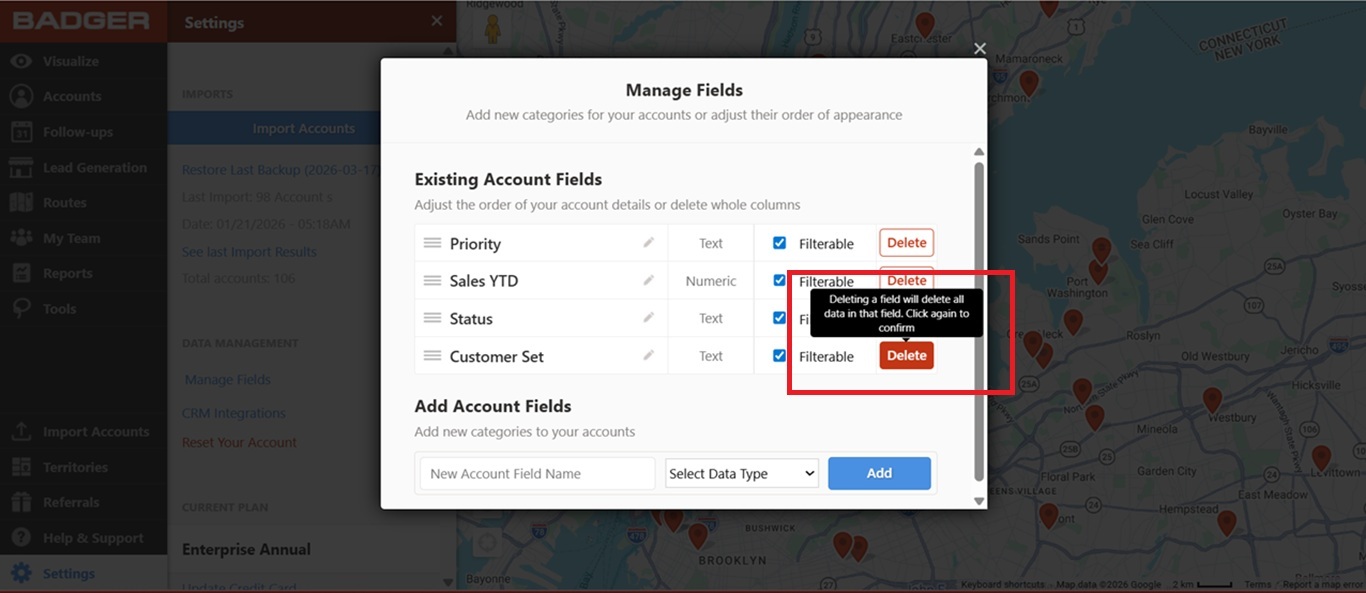
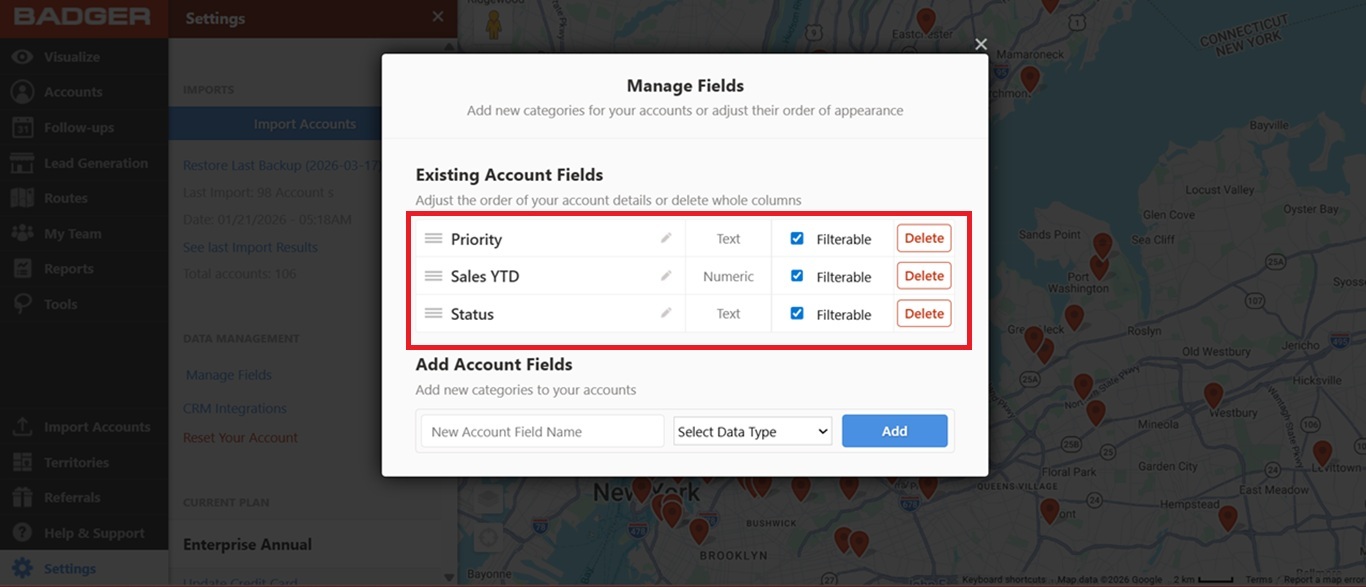
1. On the web app, go to the Settings menu, and click on Manage Fields.
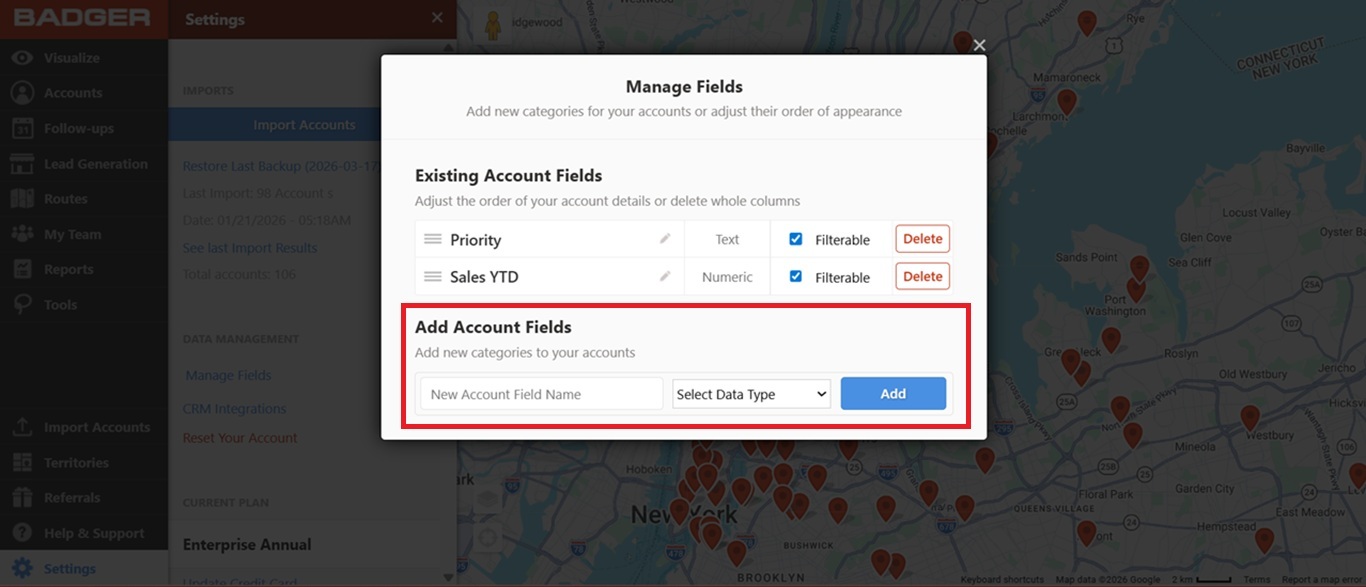
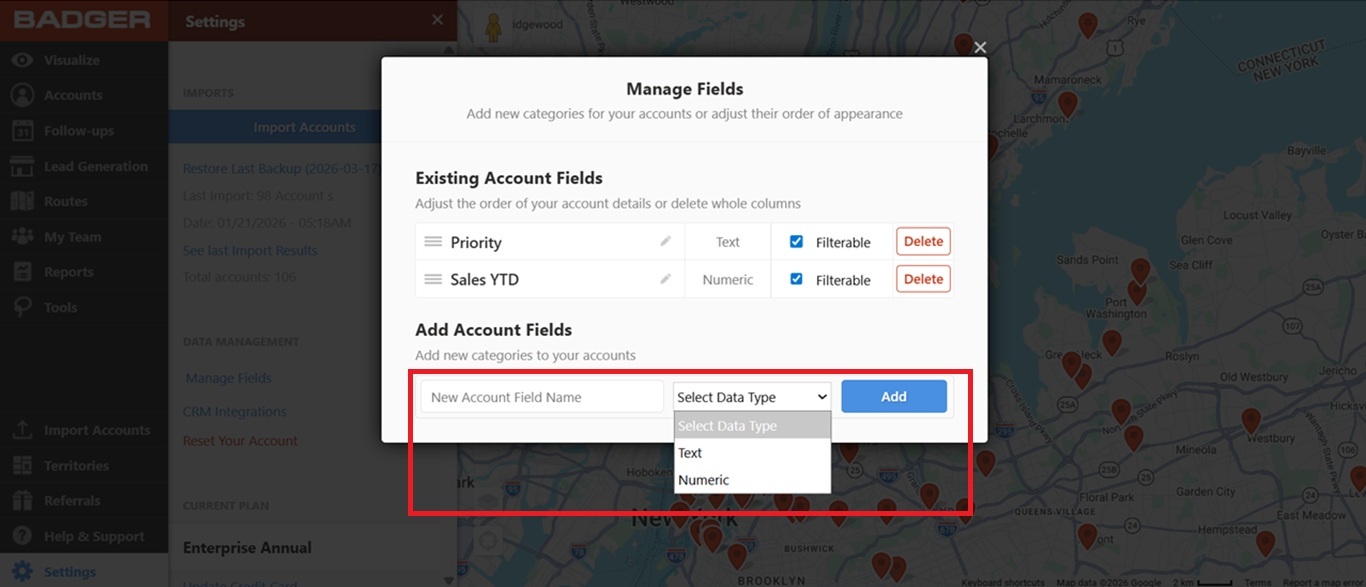
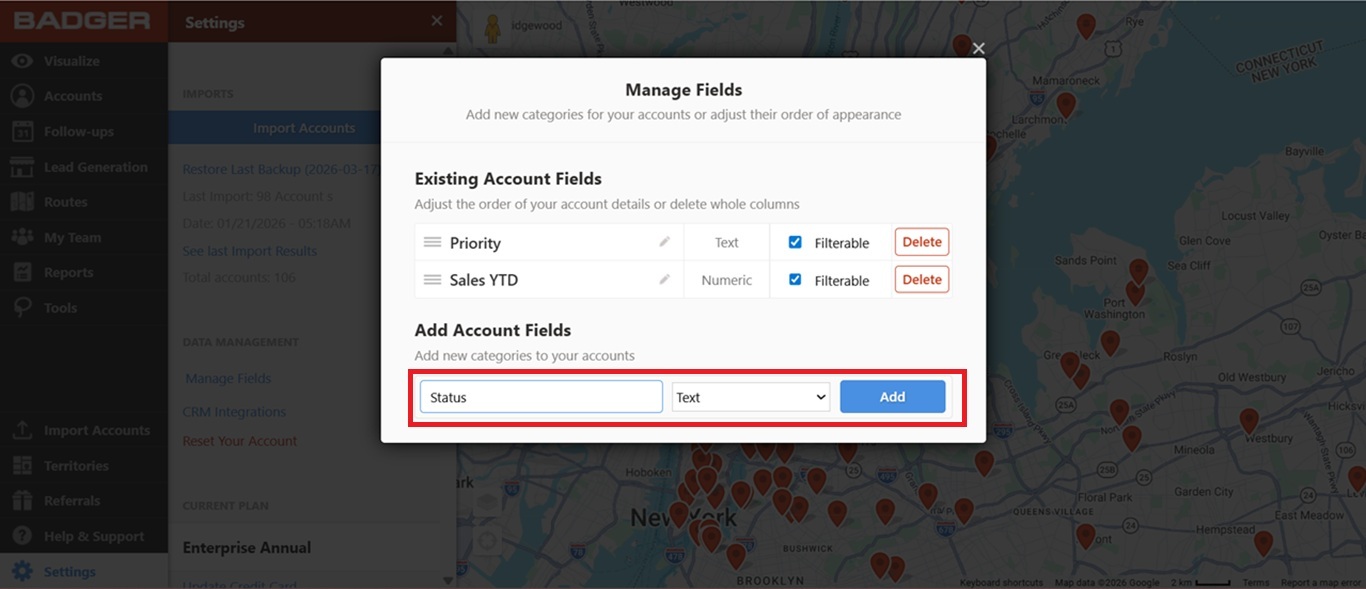
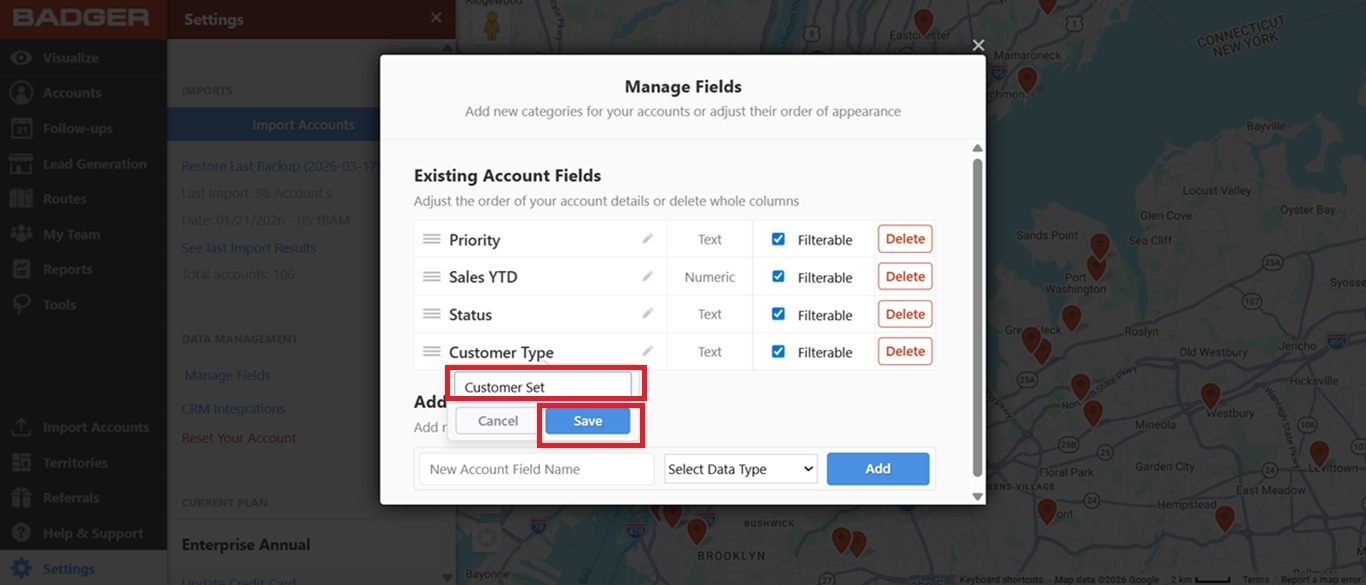
2. A Manage Fields box will pop up. Just scroll to the bottom to see the option to add a custom field. Choose which data type you want to use - Text or Numeric, and click on Add. A text data type would be something like “Priority.” A numeric data type would be for something like “Sales YTD.”
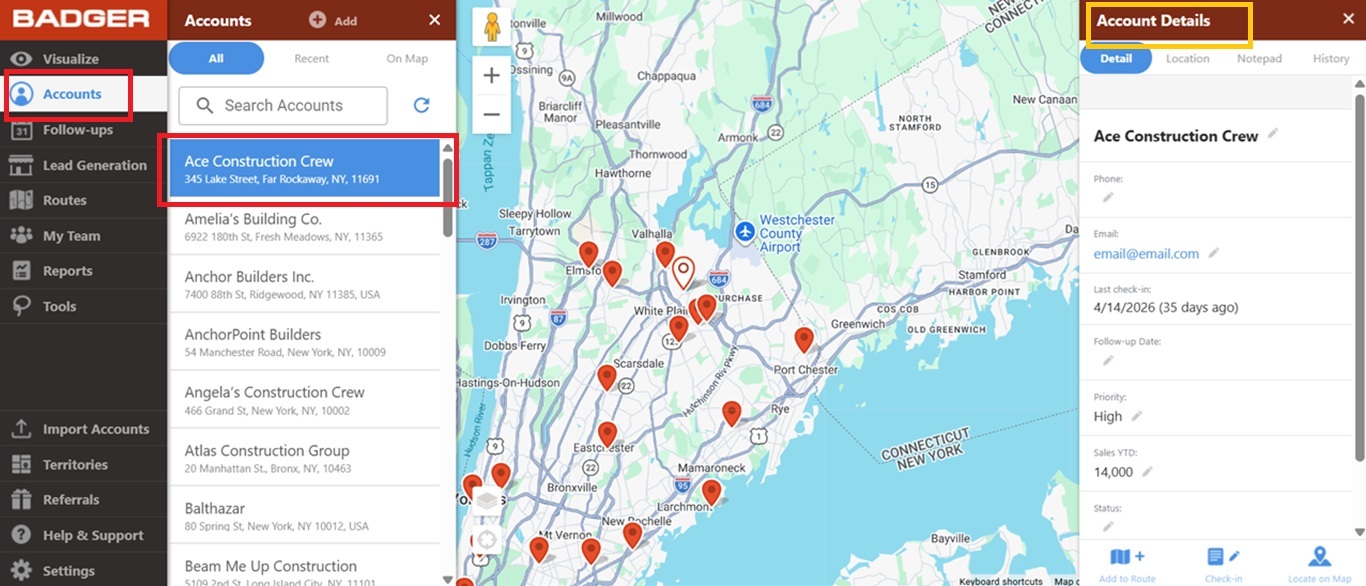
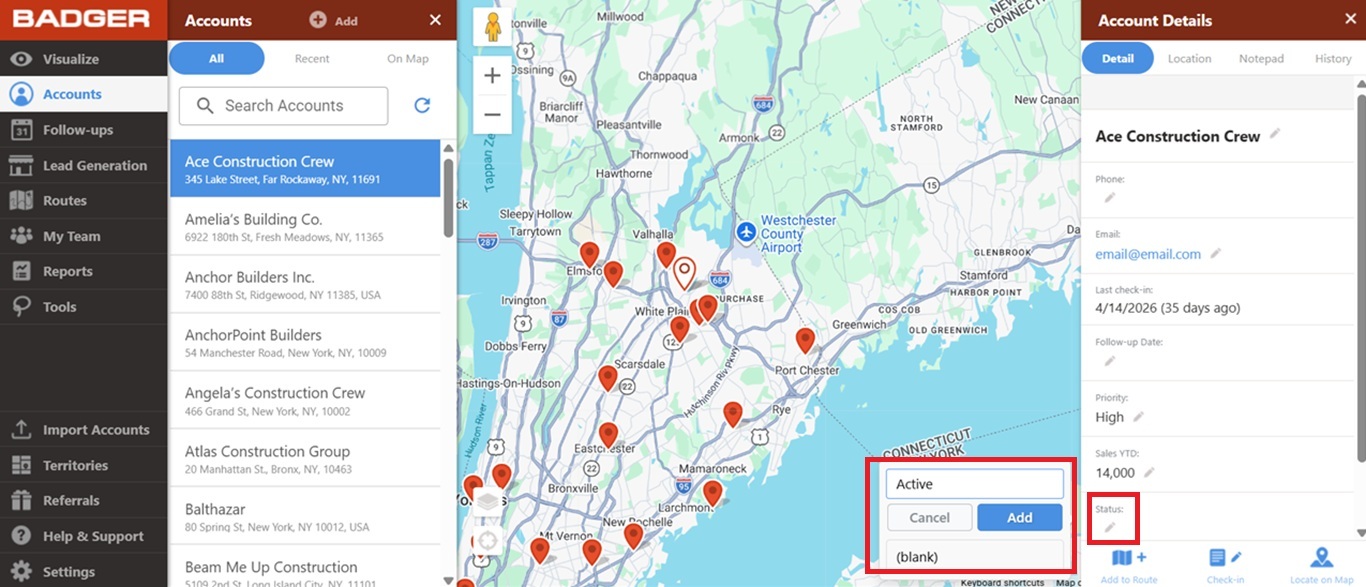
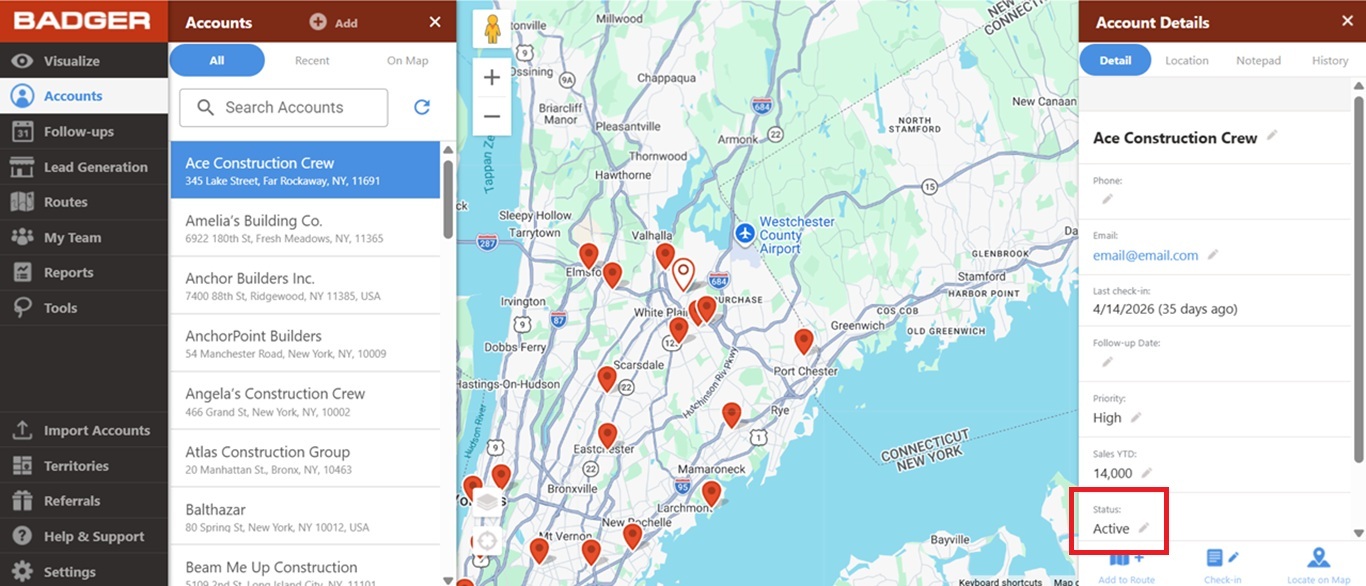
3. Once saved, go to the Accounts tab, choose any account, and under the Account Details panel, look for the added field. It will usually appear at the bottom. You can add a value from there and save the changes.
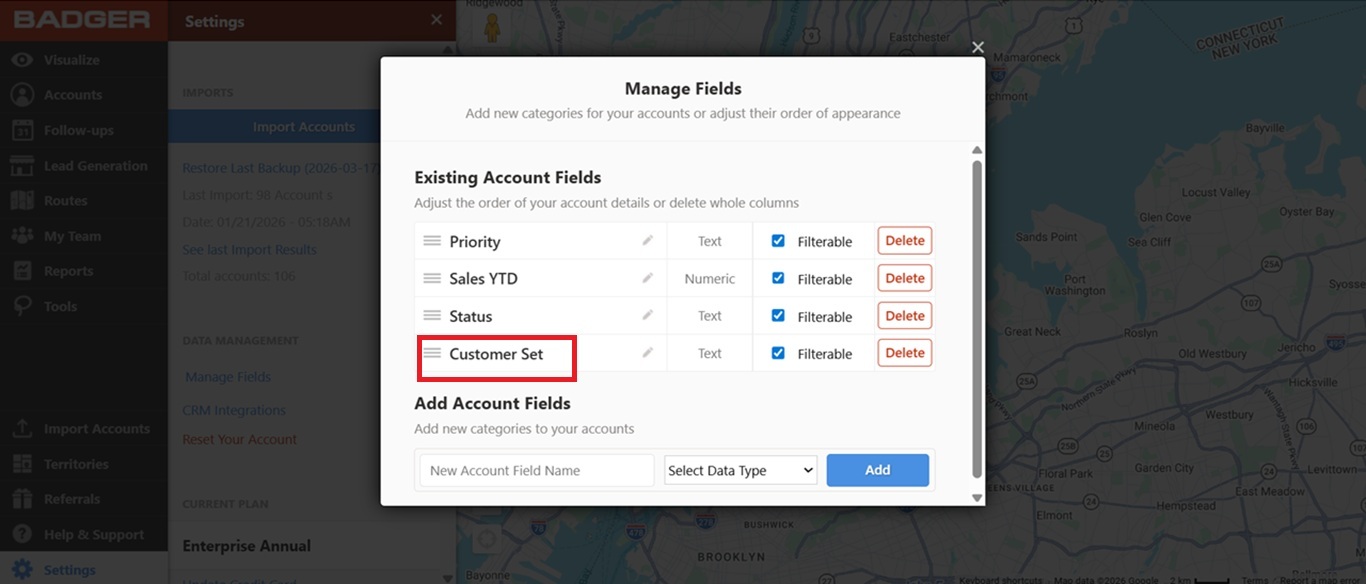
4. To edit a field name, you just have to go to Manage Fields, choose which field you’d like to edit, click the pencil icon at the right side of the field name, type the new name, and hit the Save button to save the changes.

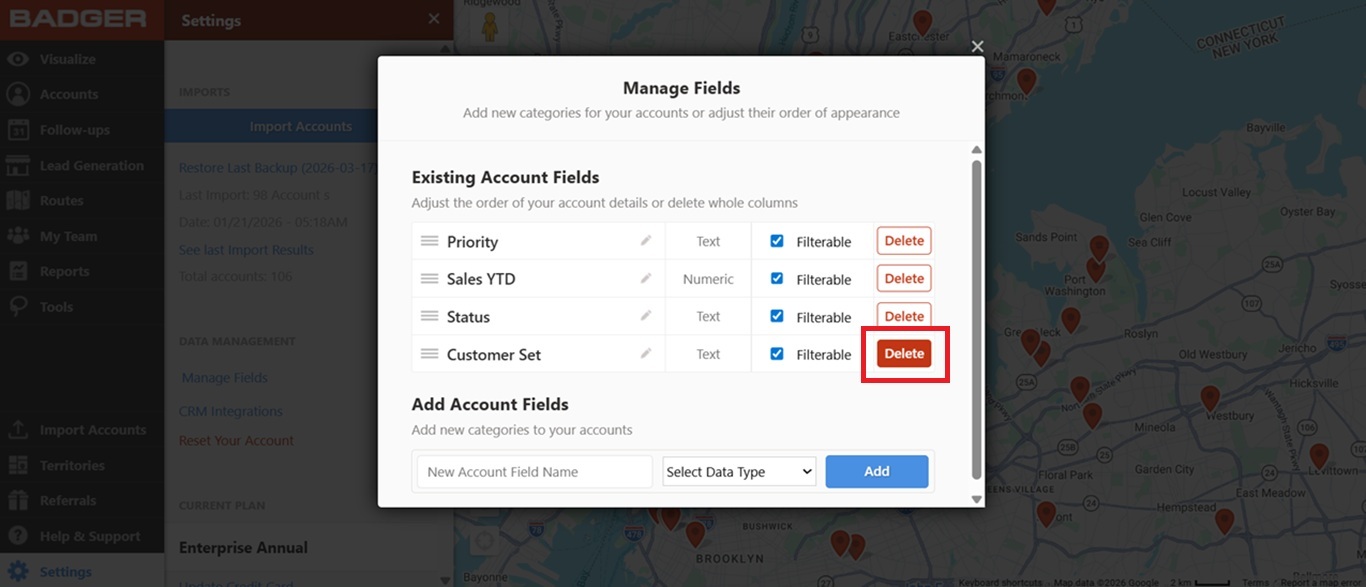
5. You can remove a custom field by going to the Manage Fields link under Settings. Just double-click on the Delete button found on the right side of each field name. Please note that this action will also remove all info associated with the deleted field.

NOTE: You can easily mass update a new field using the Lasso tool. More information about how to mass update with the Lasso tool can be found here.
Looking for our logo?
Grab a Zip packed with our logo in PNG and EPS formats.