How to Install Badger Maps from the Salesforce AgentExchange
Connecting Badger Maps to Salesforce is easy. You can install Badger Maps from the Salesforce AgentExchange and set up the integration yourself. If you need help customizing it to fit your needs, just reach out to us—we’re happy to help! Here’s how to get started.
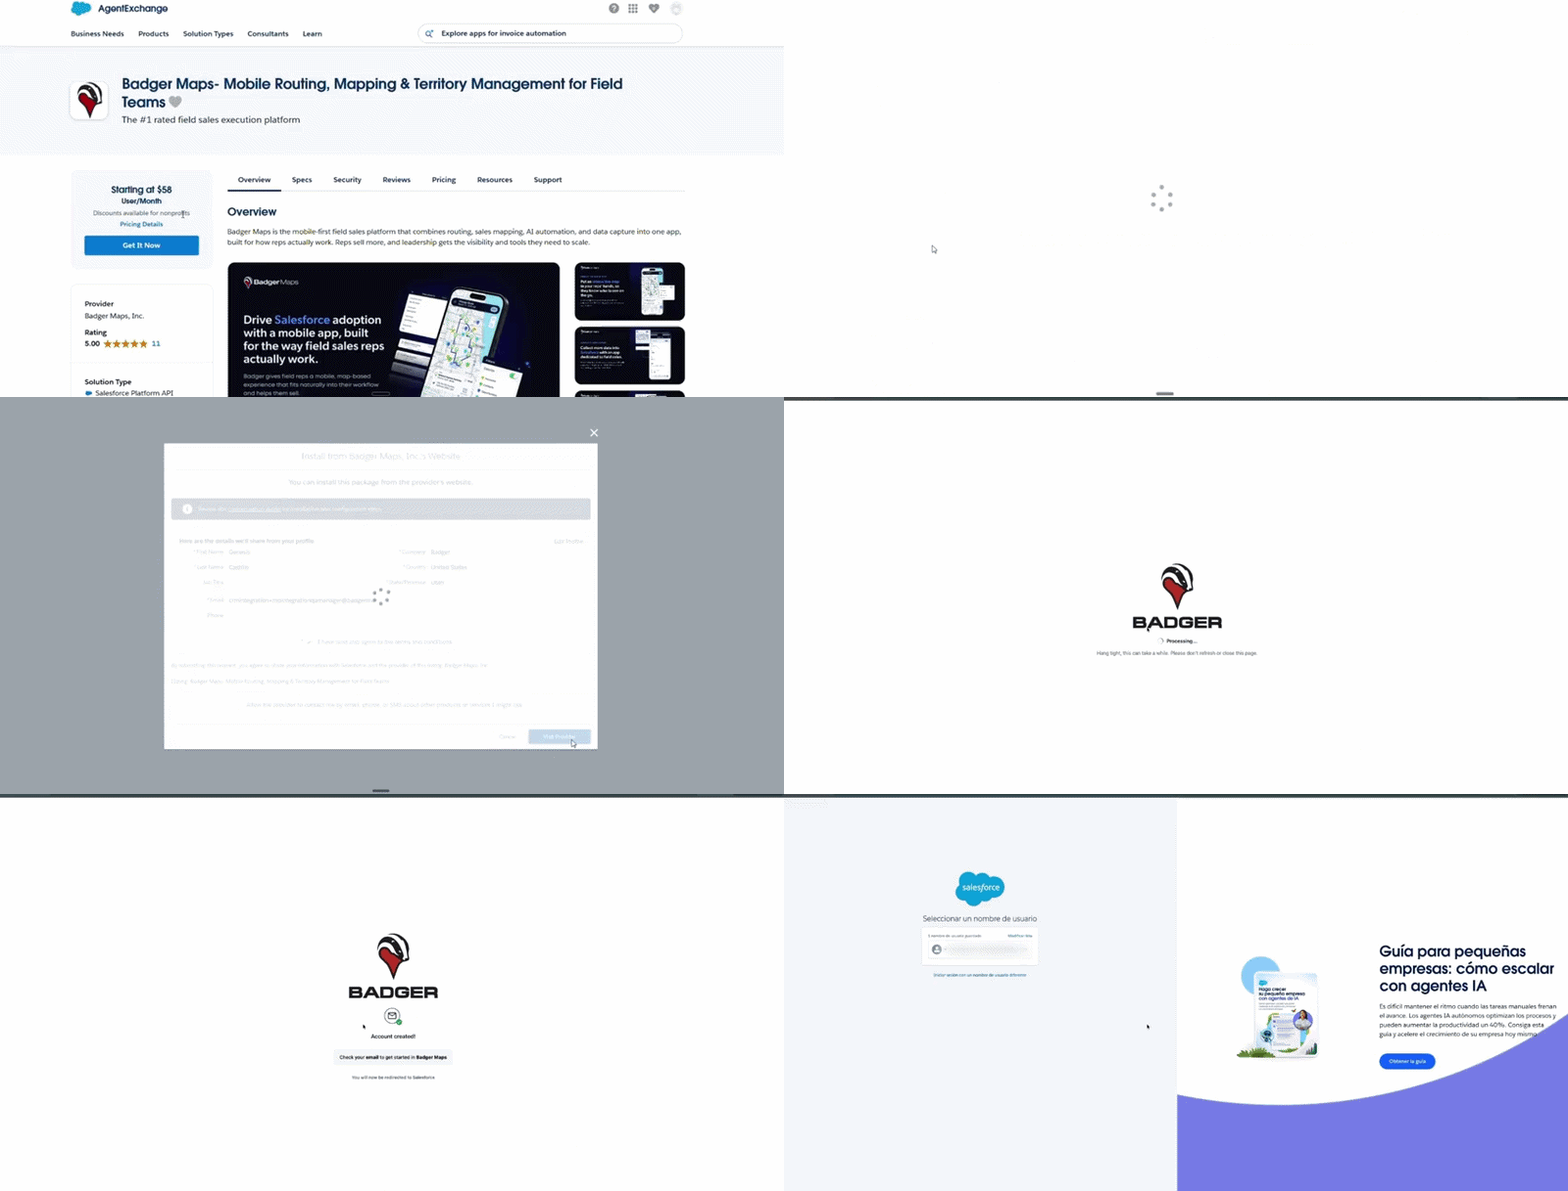
1. Open up Salesforce AgentExchange, look for Badger Maps, and click Get It Now.
2. Agree to the terms and conditions, and click Visit Provider.
3. After that, you’ll see the Badger Maps logo while the installation processes.
4. Once done, you’ll see a message that says, “Account created!”, and you’ll be redirected back to Salesforce.
5. After the installation is done, check your email to set your Badger password. Note that the link in the email to set your new password will expire in 3 days.
6. You’ll also get a separate email confirming the integration and sync with Badger has completed.


