News: Now offering a 90-day money-back guarantee!
Learn more
News: Now offering a 90-day money-back guarantee!
Learn more1. There are 4 ways to add an account to your route.
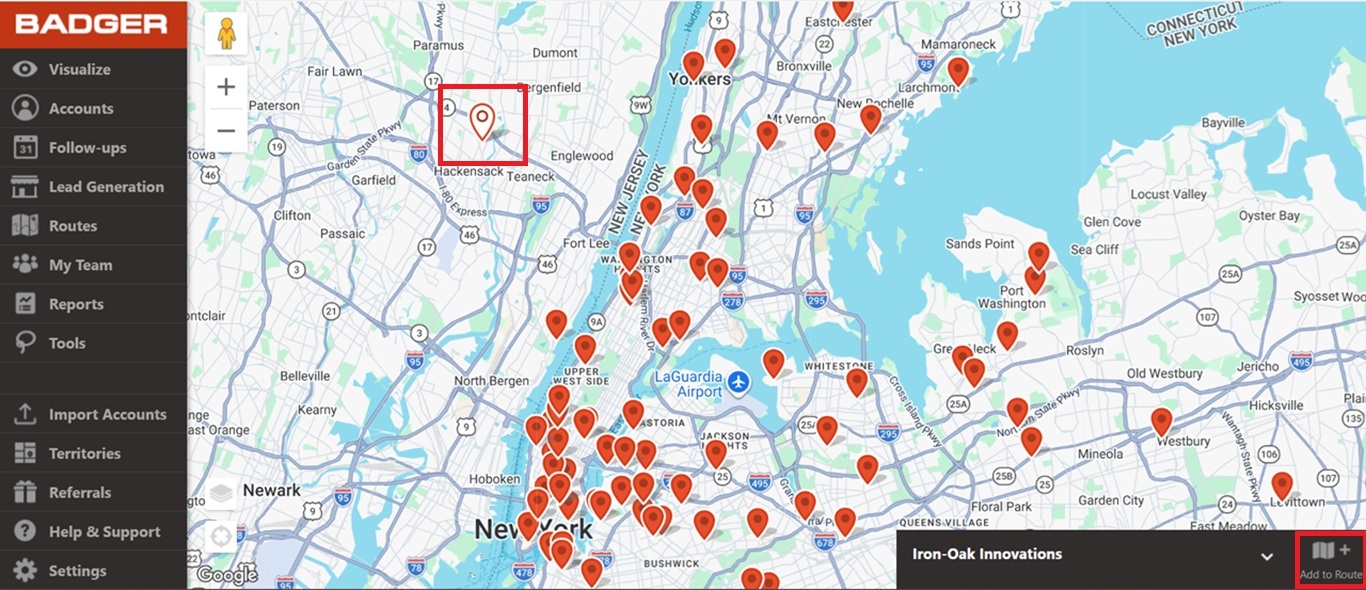
a. Click on any pin associated with an account/lead on the map. Then, click Add to Route found on the lower right corner of the screen.
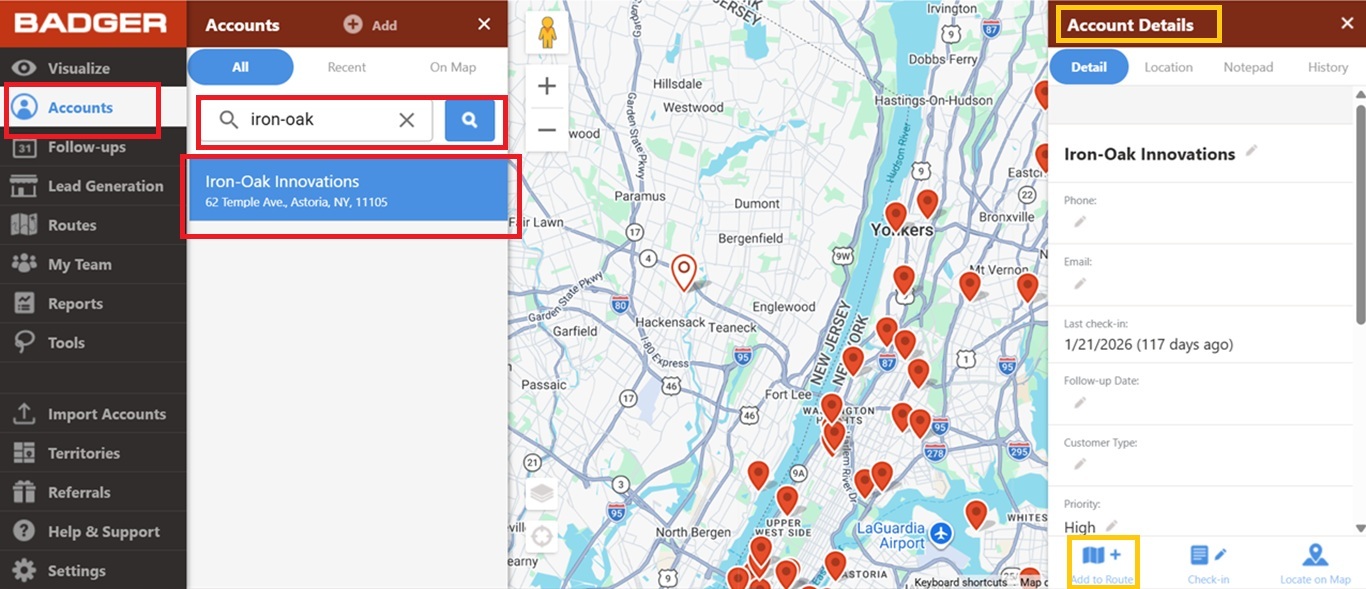
b. You can also add stops when you go to Accounts, then type in the name of the account that you want to add in your route, click on it, and tap Add to Route on the Account Details page.
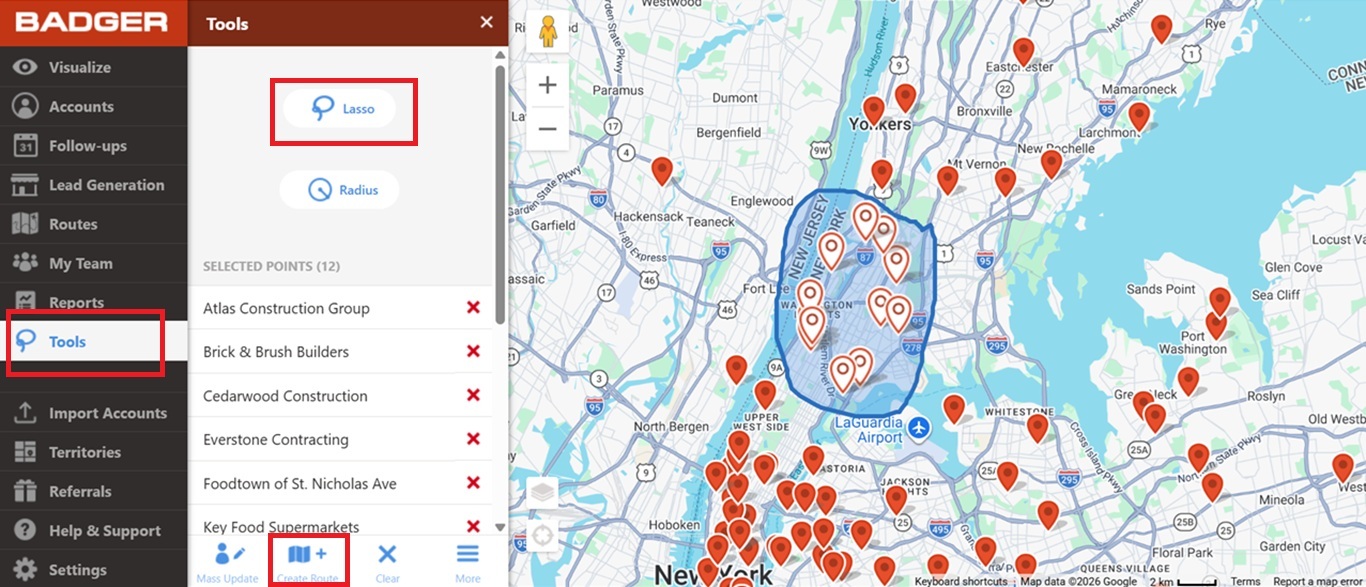
c. If you want to create a route in a particular area, you can use the Lasso tool to draw around the group of accounts that you need. See here to know more about the Lasso tool.
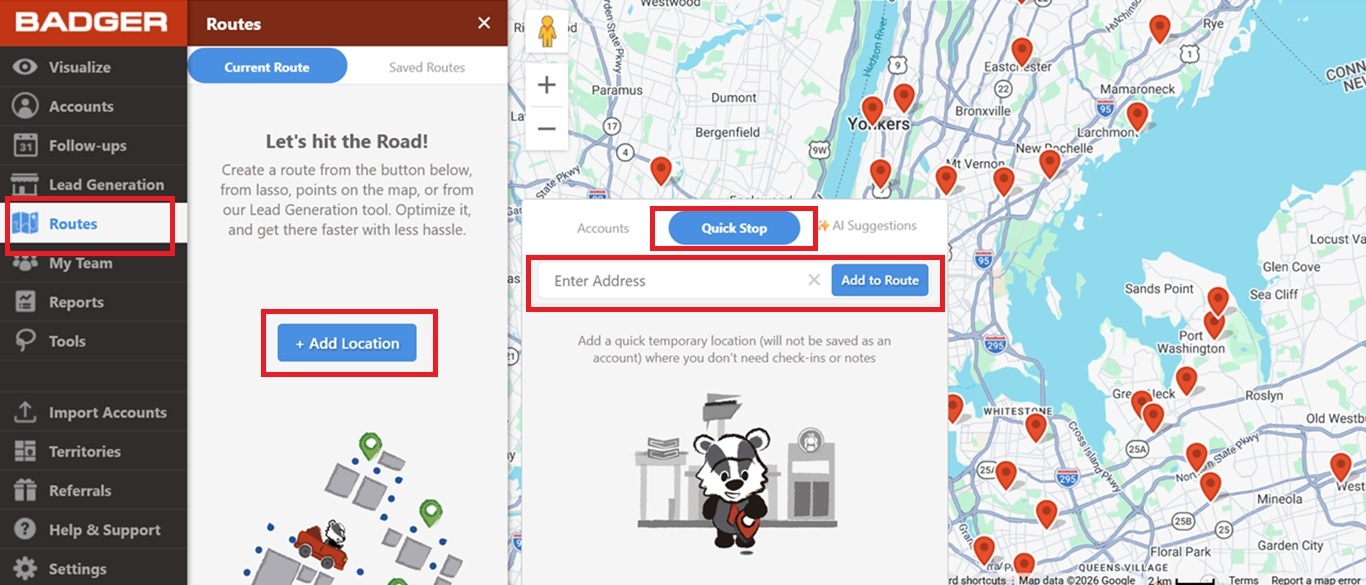
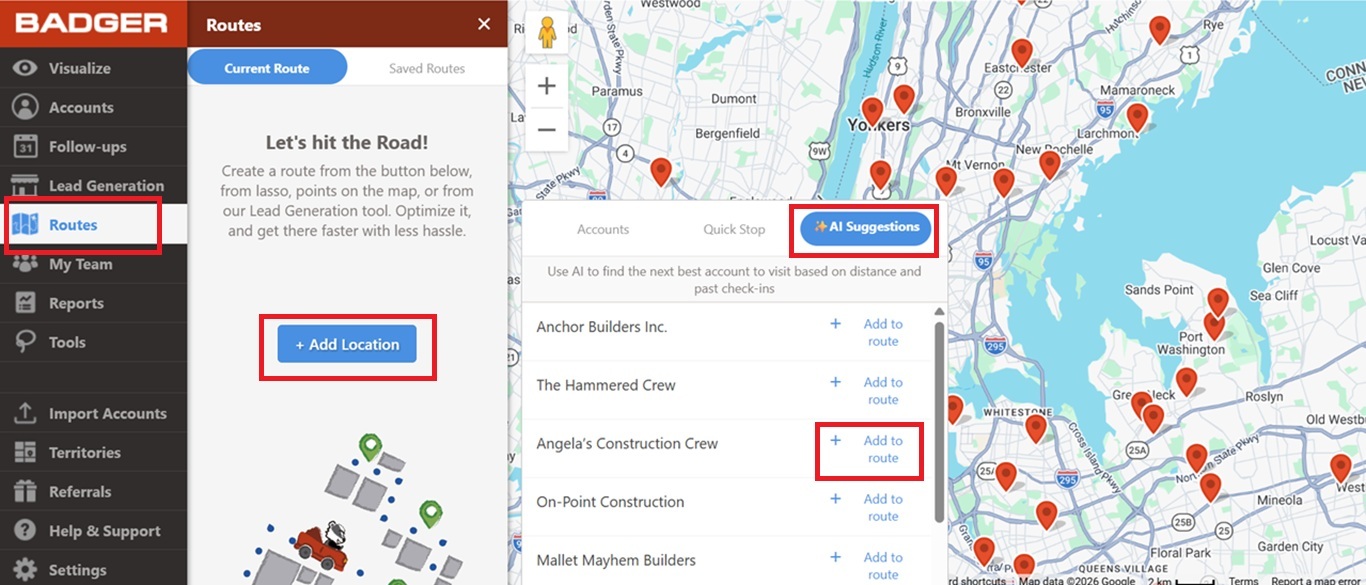
d. Another option is to go to the Routes menu to Add Location by doing any of the following:
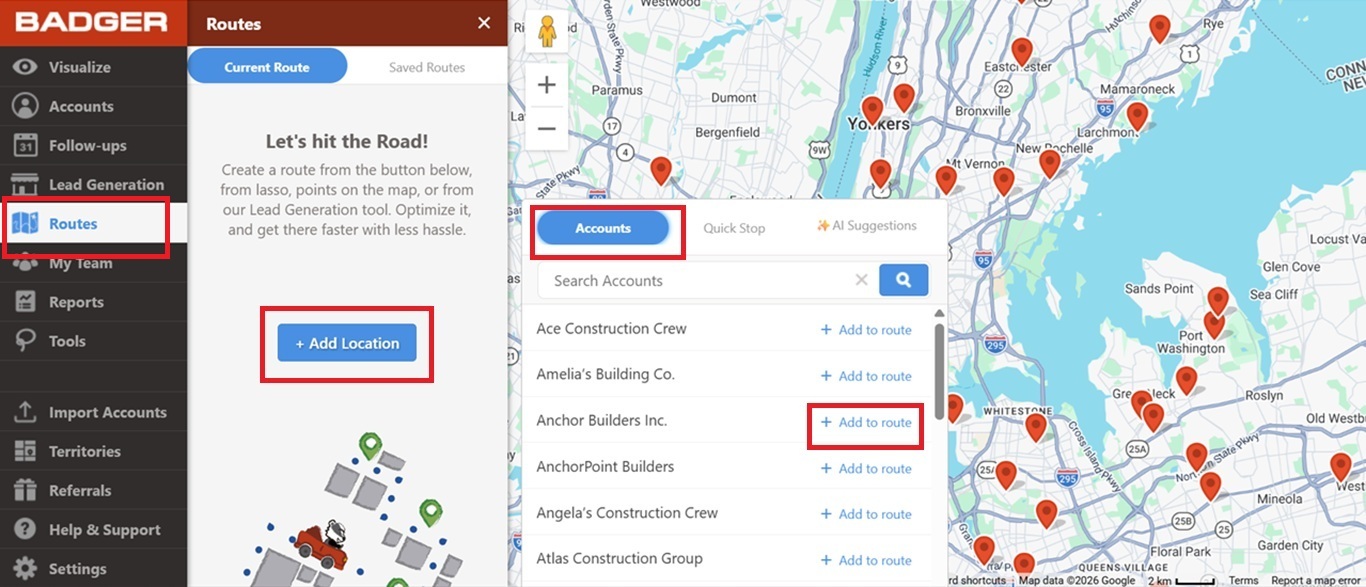
Note: The Check-in feature doesn’t work on Quick Stops. You will need to save them as accounts first.
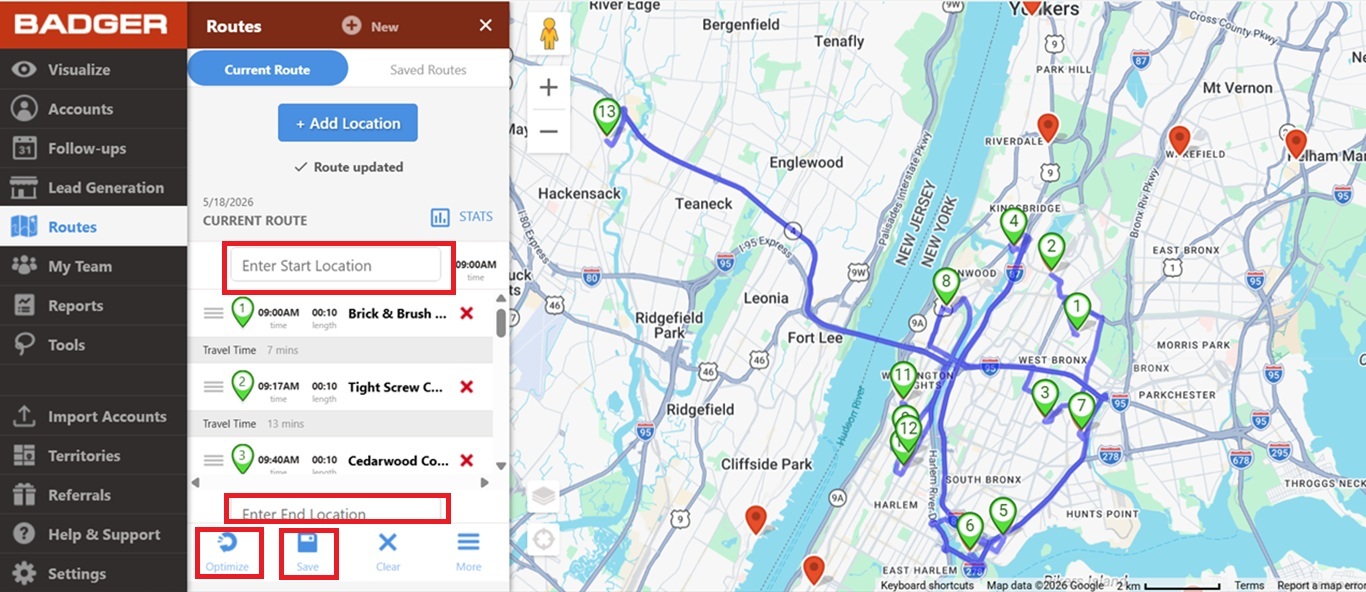
2. Once you have added the accounts to the route, you can now add your Start and End Locations. Click on each box and type in the address. Do not forget to click on the Optimize button at the bottom to obtain the most efficient route from one stop to another. Then click the Save button beside it to start saving your route.
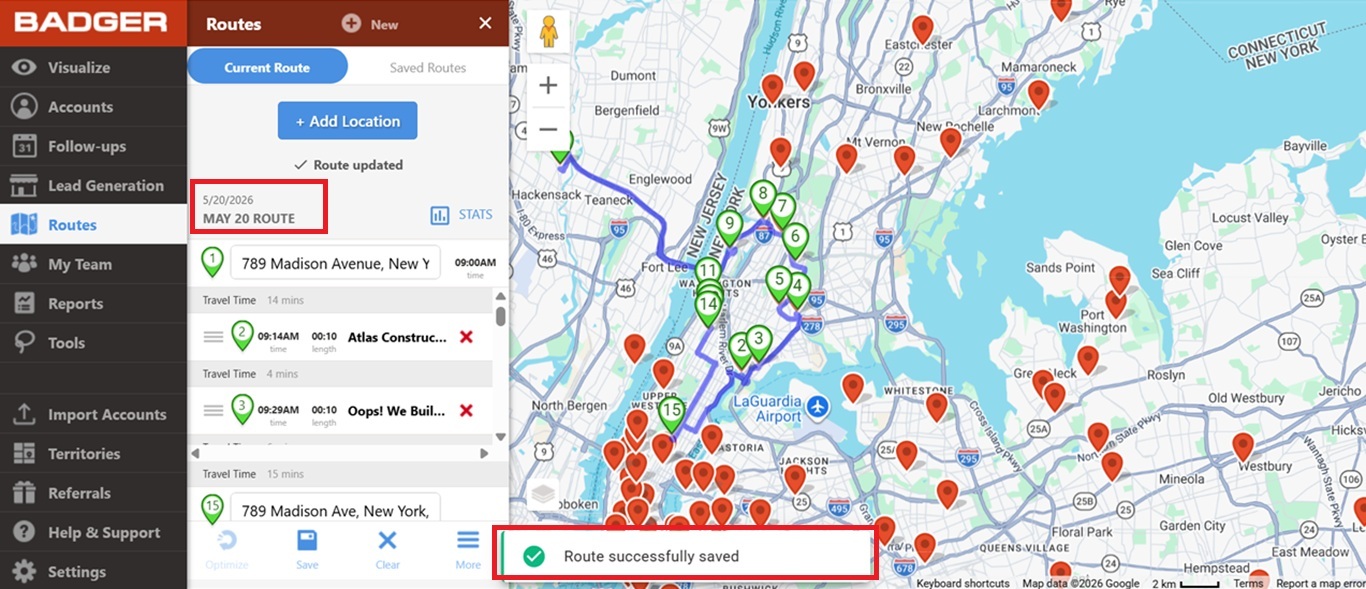
You will be prompted to add a route name and date, and click the Save button at the bottom to save the route.

The route is now saved.
Here's a video on how to create a route on the web app:
Looking for our logo?
Grab a Zip packed with our logo in PNG and EPS formats.