News: Now offering a 90-day money-back guarantee!
Learn more
News: Now offering a 90-day money-back guarantee!
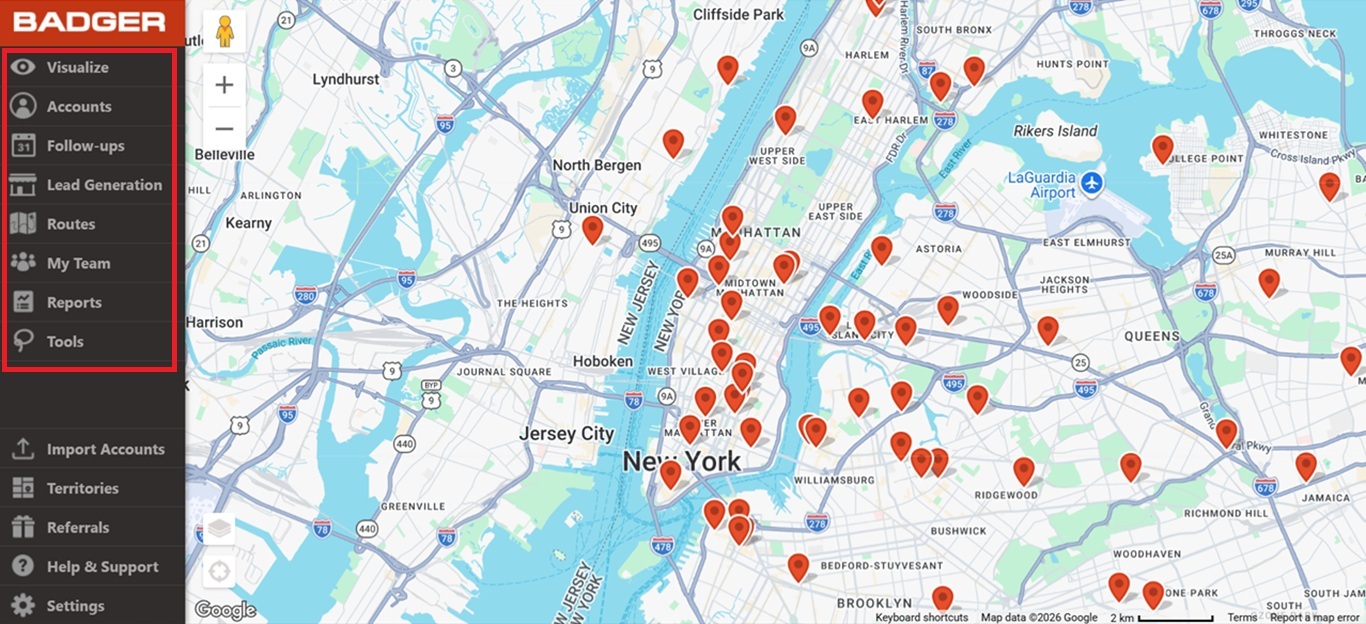
Learn more1. On the left-hand side, you'll see multiple tabs such as Accounts, Lead Generation, Routes, My Team, Reports, and Tools.
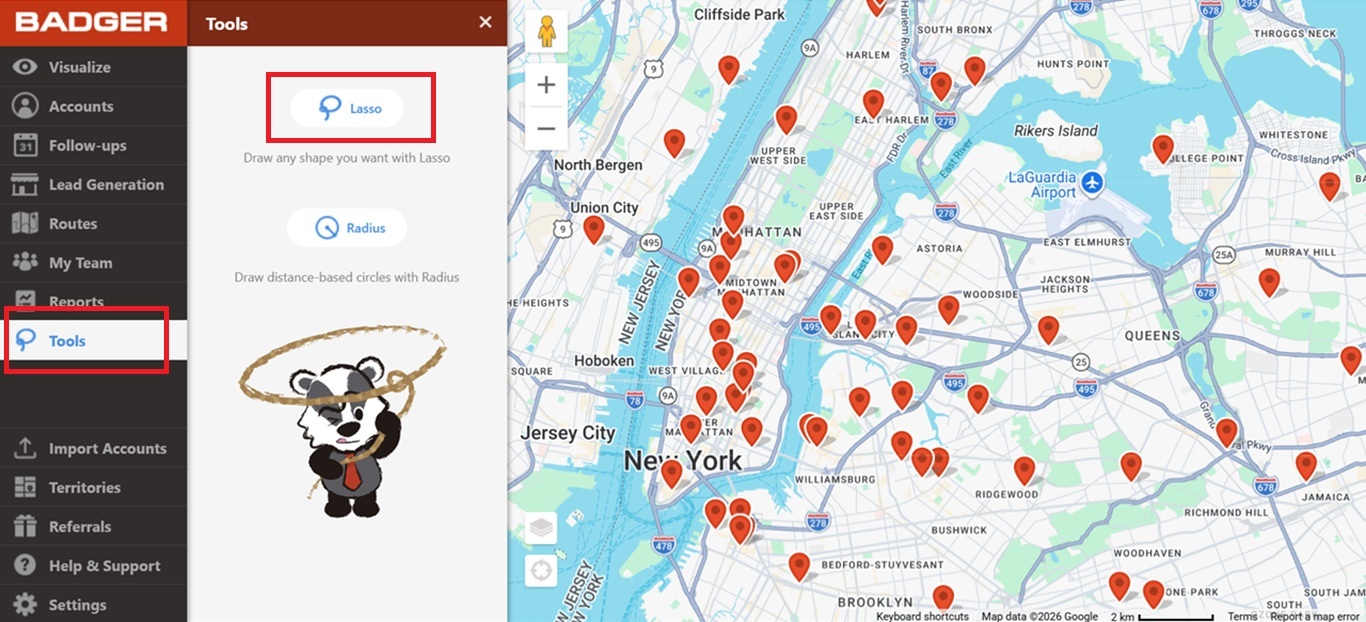
2. Go ahead and click Tools, then choose Lasso.
3. Draw a circle around the locations/accounts you wish to include to your route.
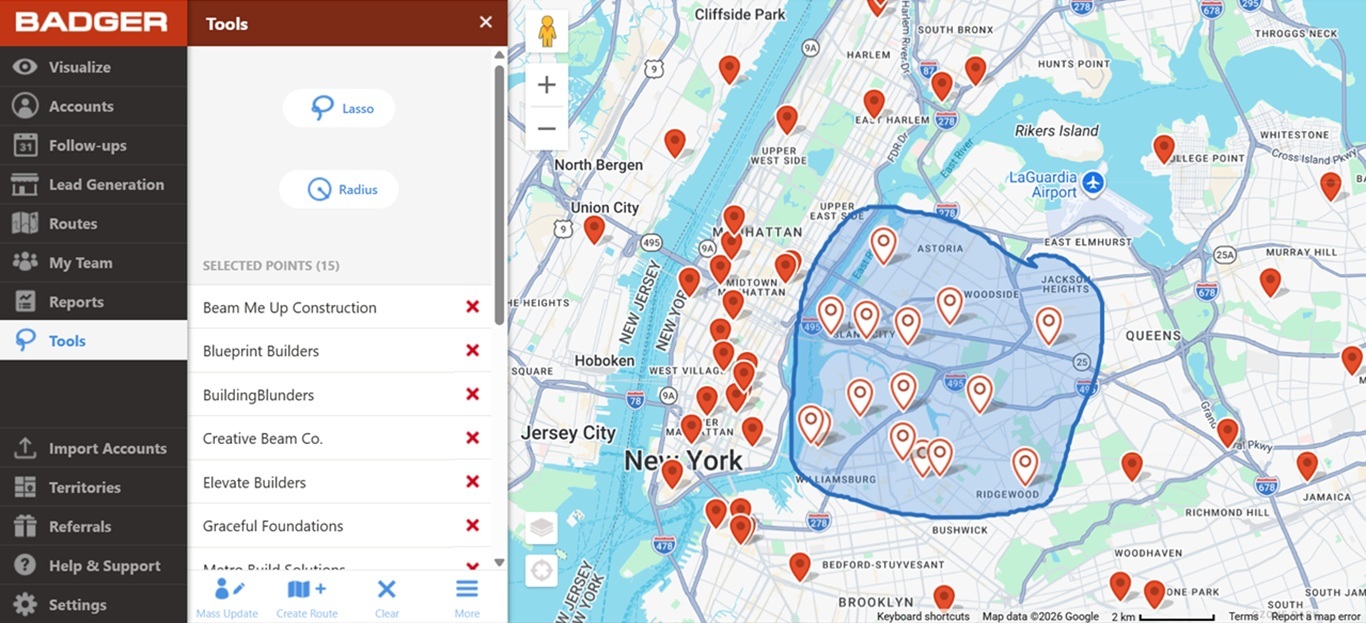
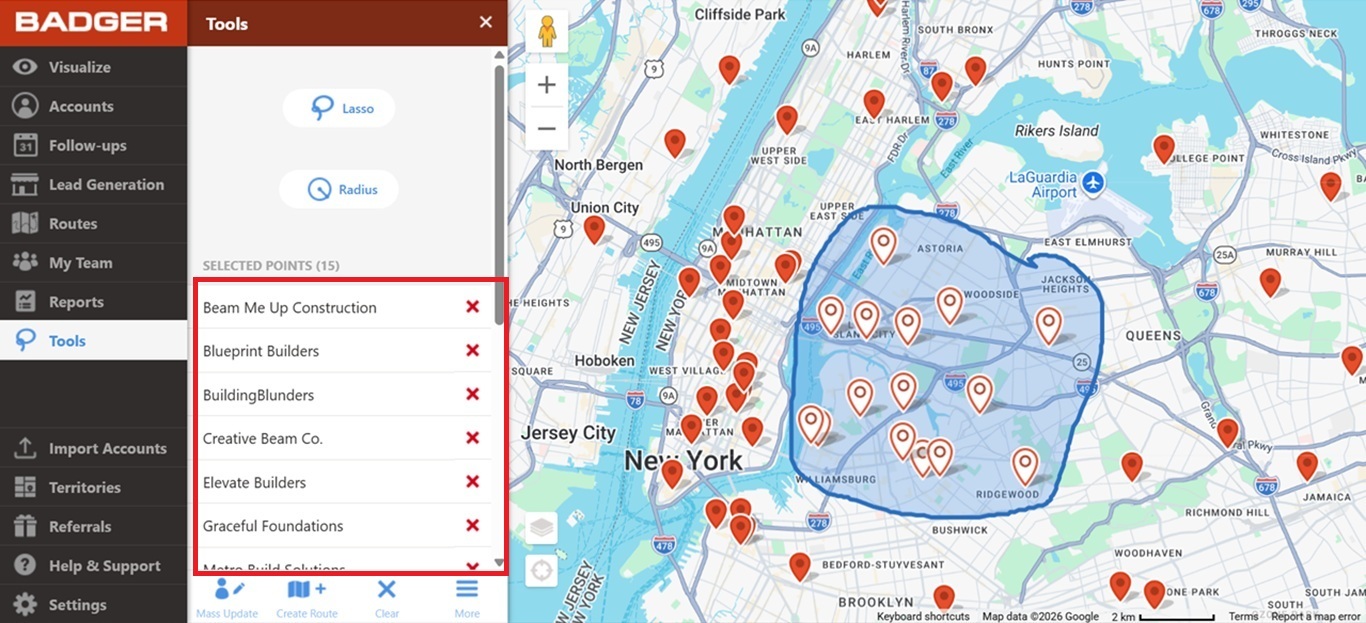
4. The accounts you have selected will then be listed on the Lasso panel.
5. Click on Create Route found at the bottom of the Lasso panel.

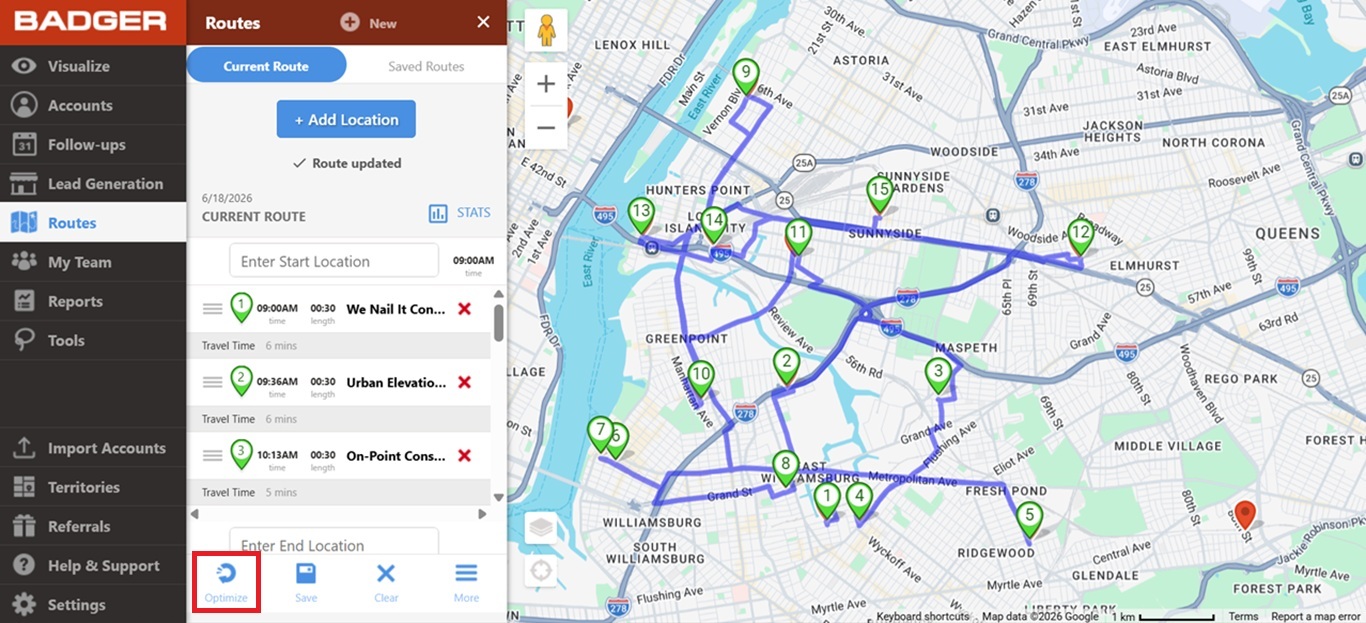
6. Click the Optimize icon in order for you to have the most efficient routes to get to your destinations.
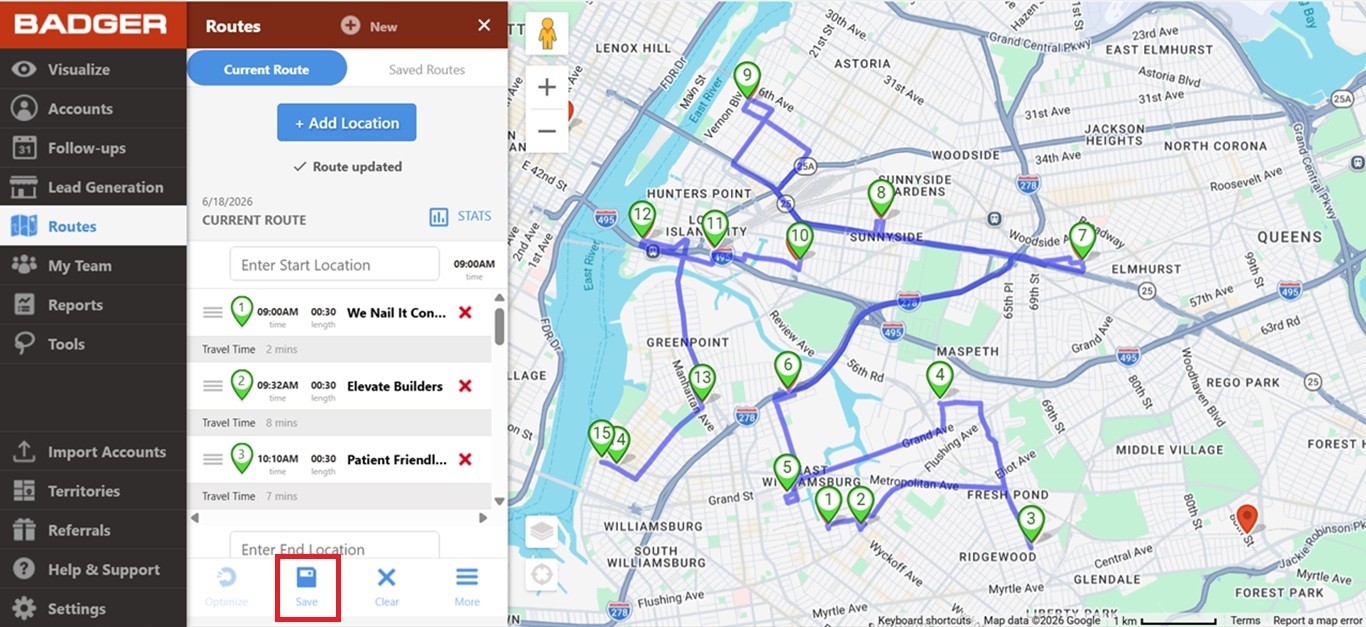
7. Then tap on the Save icon if you want your current route to be added on the list of your saved route.
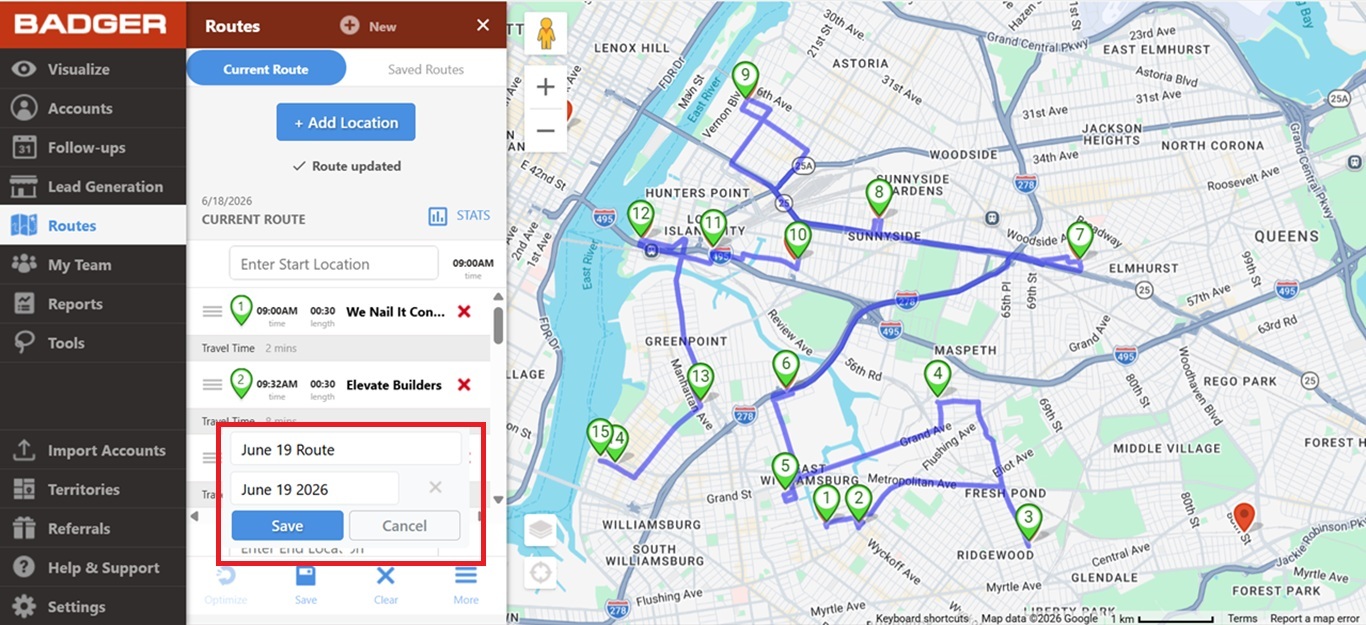
8. Enter the route name and date, click Save, and you’re all set.
Check this guide if you wanted to build a route based on a specific filter.
You can also watch this video:
Happy routing!
Looking for our logo?
Grab a Zip packed with our logo in PNG and EPS formats.