News: Now offering a 90-day money-back guarantee!
Learn more
News: Now offering a 90-day money-back guarantee!
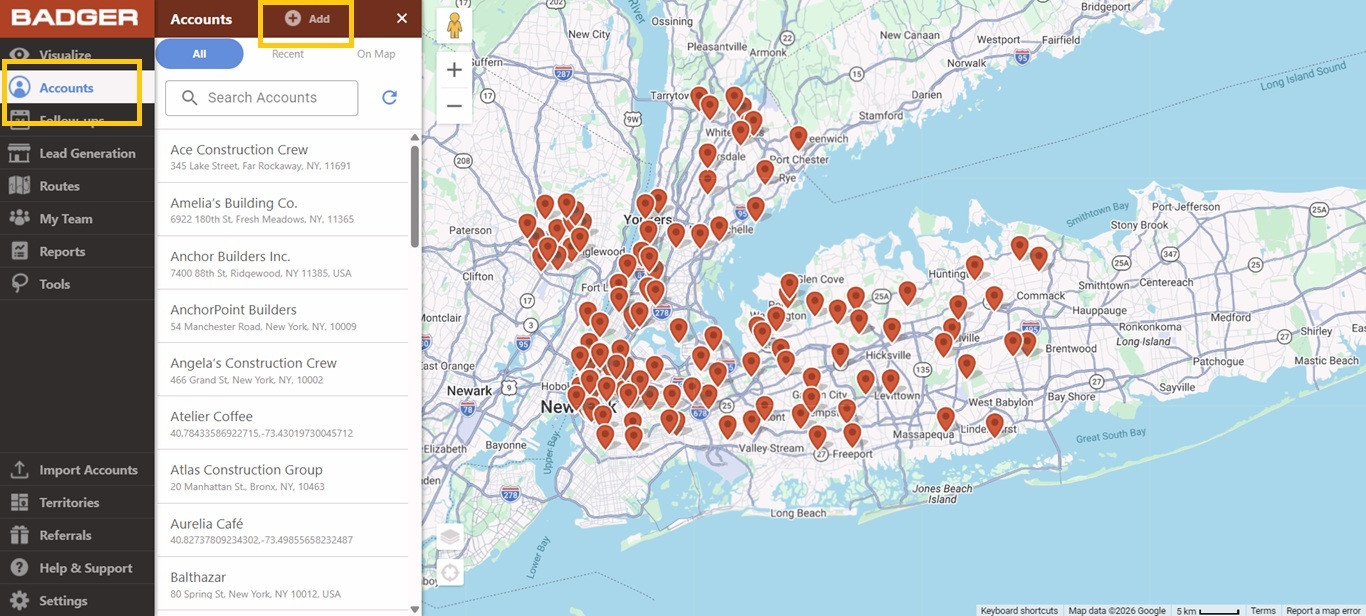
Learn moreBadger Maps offers you an option to add accounts individually on the web app. You don't necessarily need to have an Excel or CSV file. Adding or creating accounts is very easy with these simple steps.
1. On the web app, go to the Accounts menu found on the left panel, then click on the Add button.
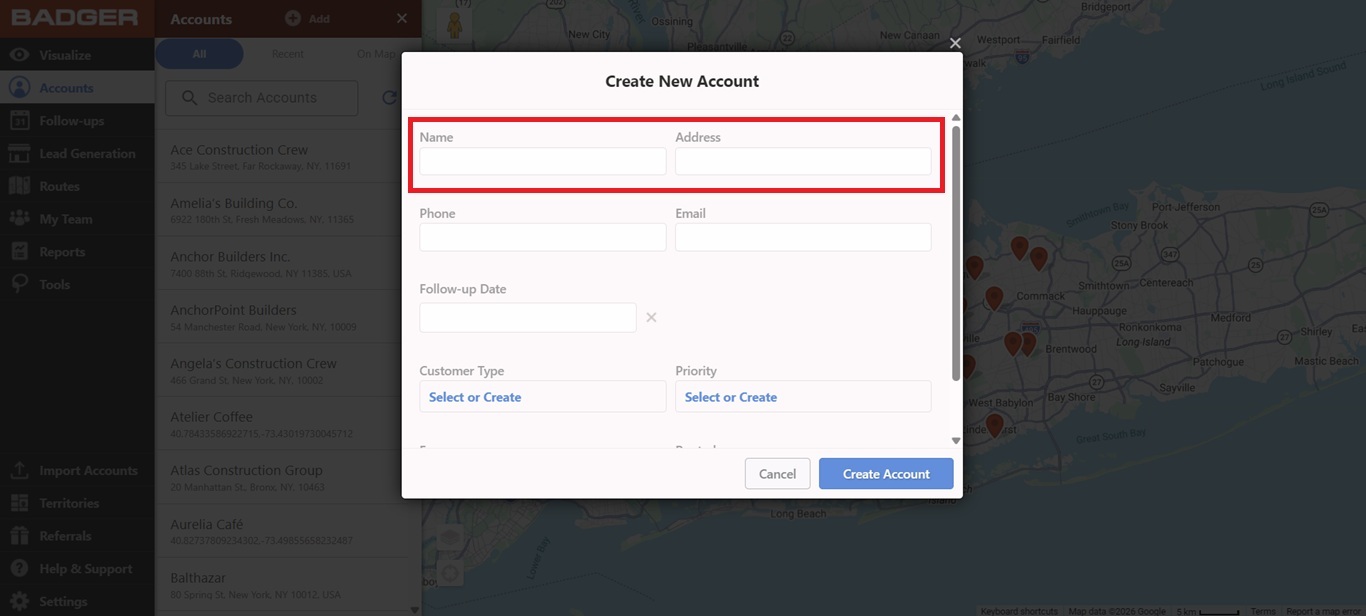
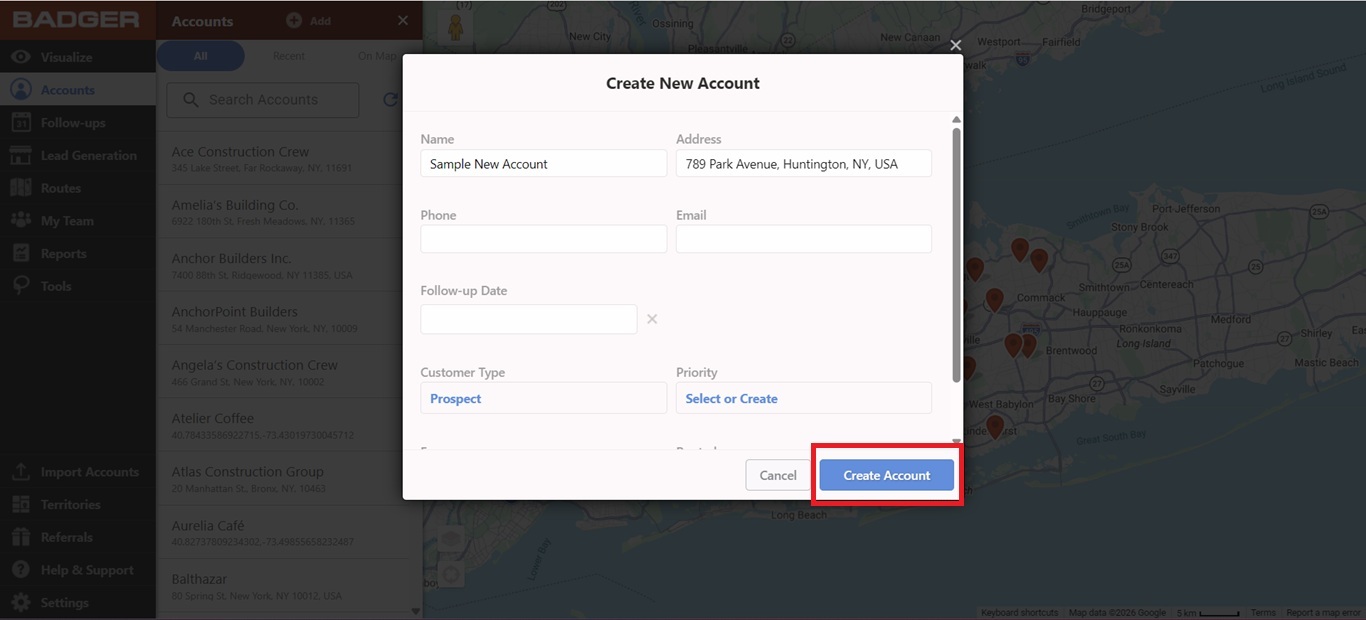
2. A pop-up window will appear where you are required to fill out the Name and Address fields. It's always best to have the complete address including the street name, city, state and zip code to accurately map your accounts.
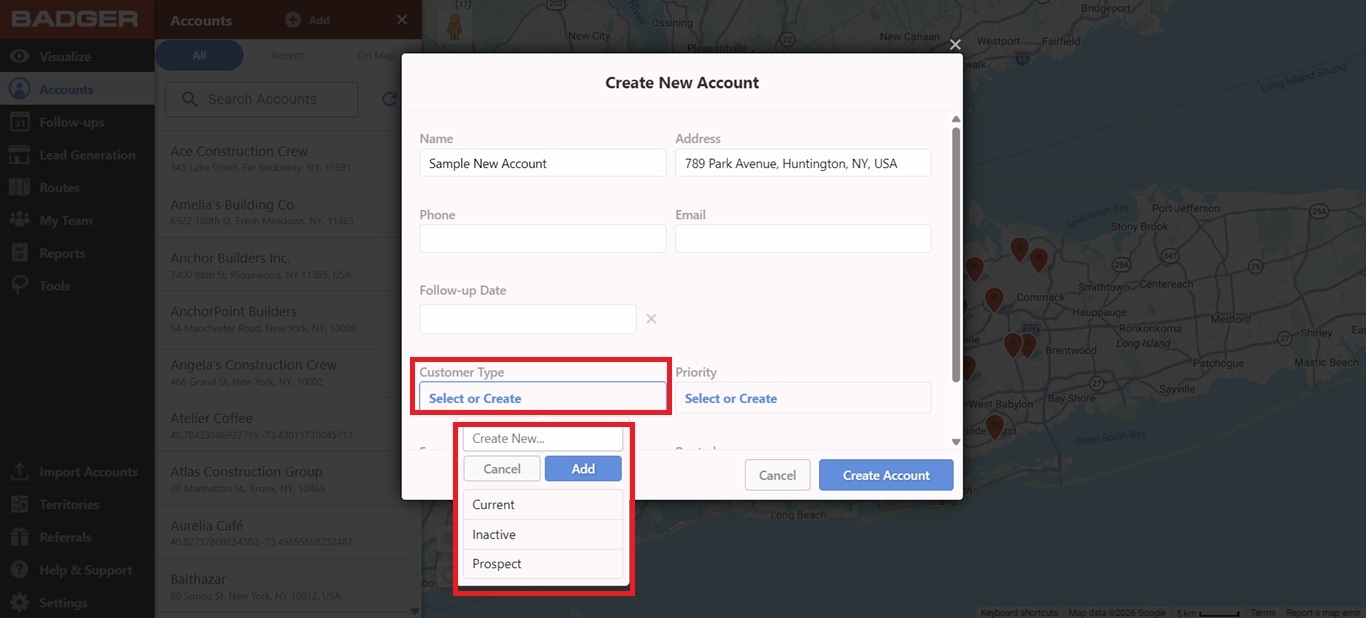
The additional fields that appear below are just part of the sample data. You can choose to add other fields or info that you like to see on the app. Check out this link for the step-by-step guide on how to add custom fields.
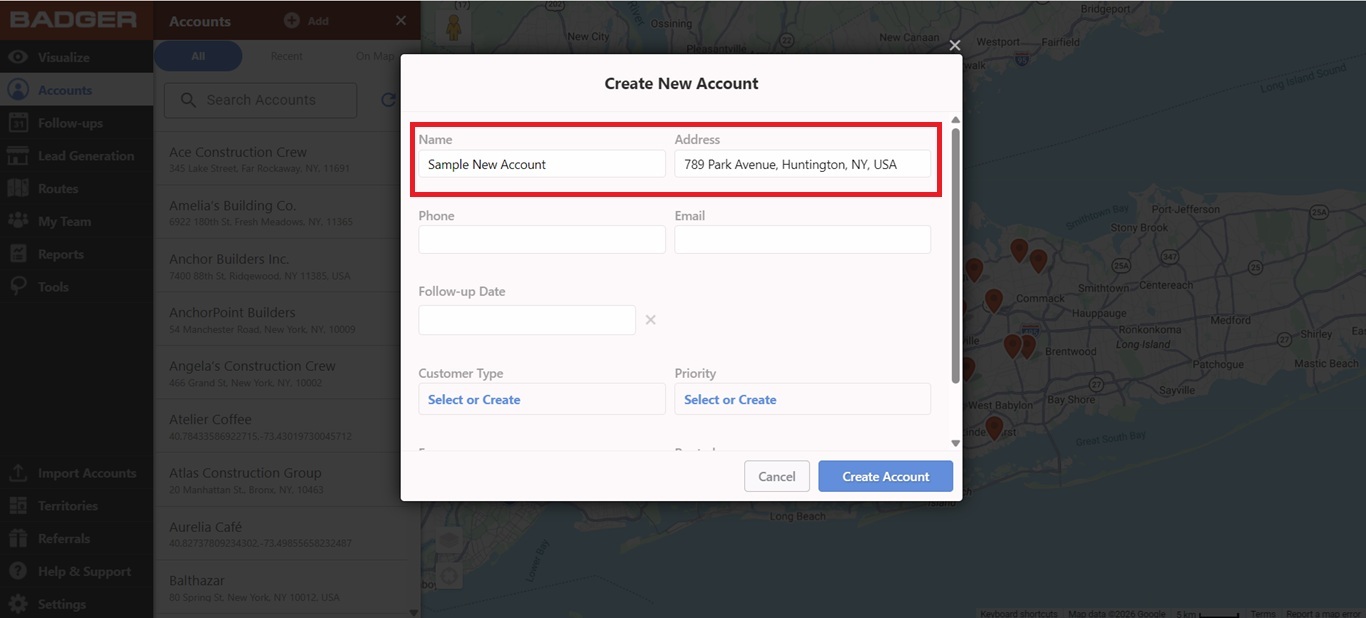
3. Save the account by clicking on Create Account.
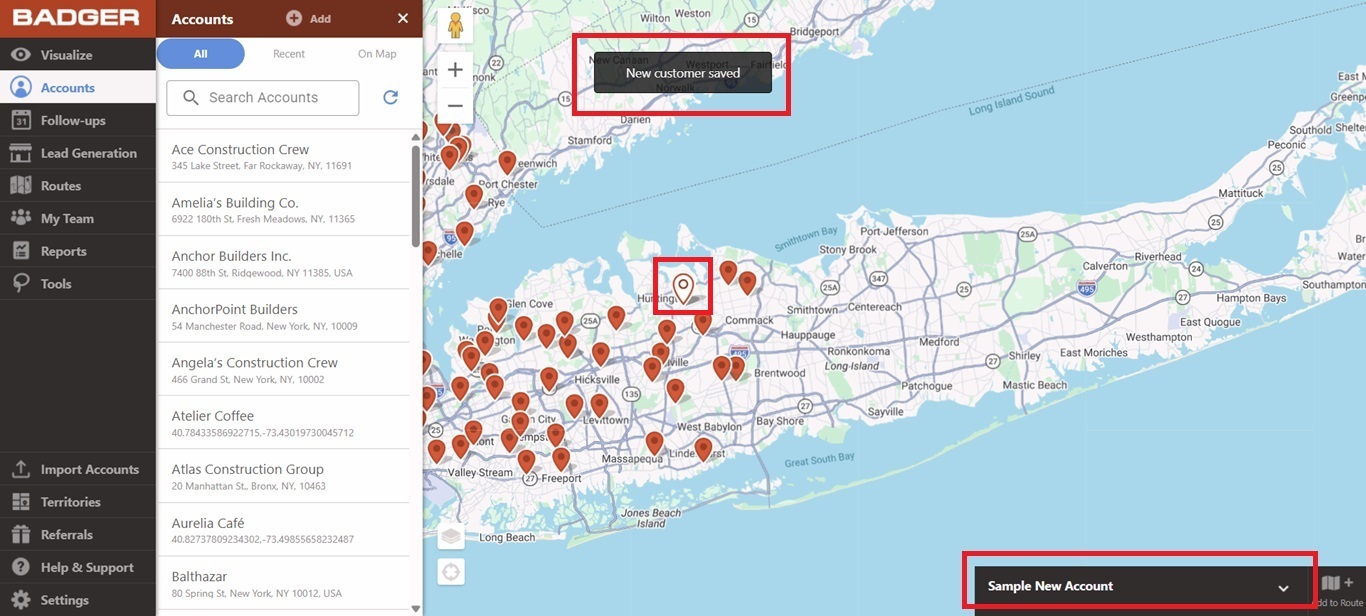
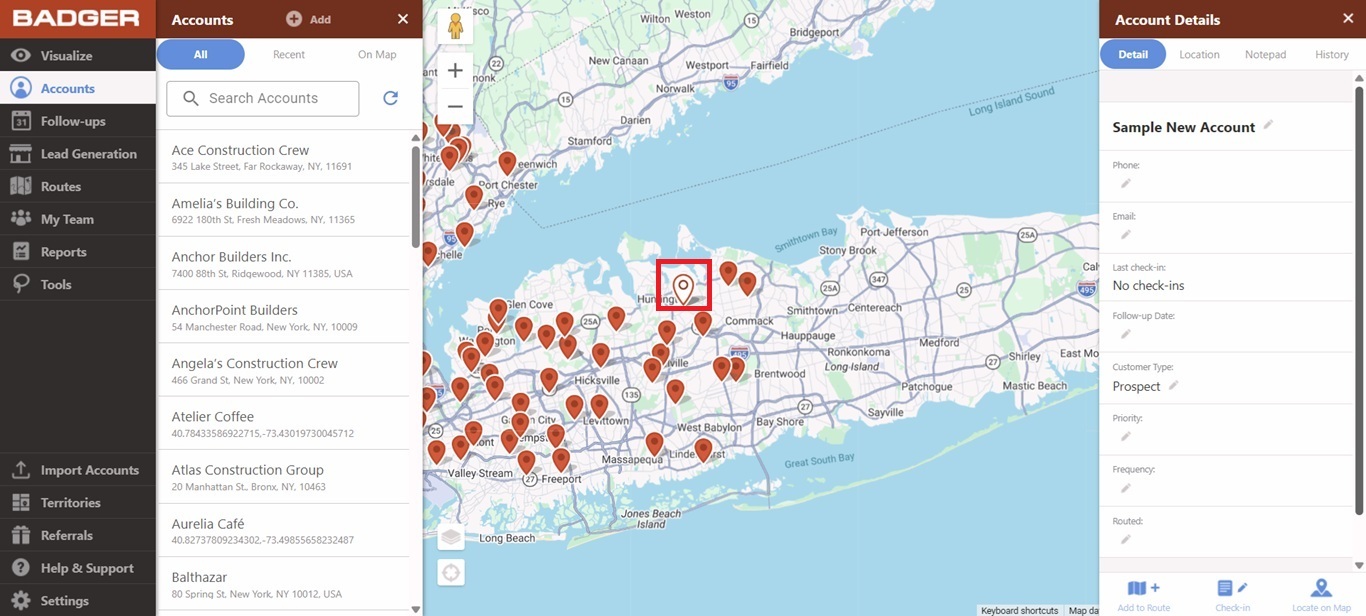
4. You will get a prompt stating New customer saved and a black tab with the account name will appear on the lower right side of the web app. Clicking on it will pull up the account details. The pin will also be highlighted like the one below.
Looking for our logo?
Grab a Zip packed with our logo in PNG and EPS formats.