News: Now offering a 90-day money-back guarantee!
Learn more
News: Now offering a 90-day money-back guarantee!
Learn moreBadger Maps lets you easily adjust your custom fields depending on your preference. Below are the steps to accomplish this.
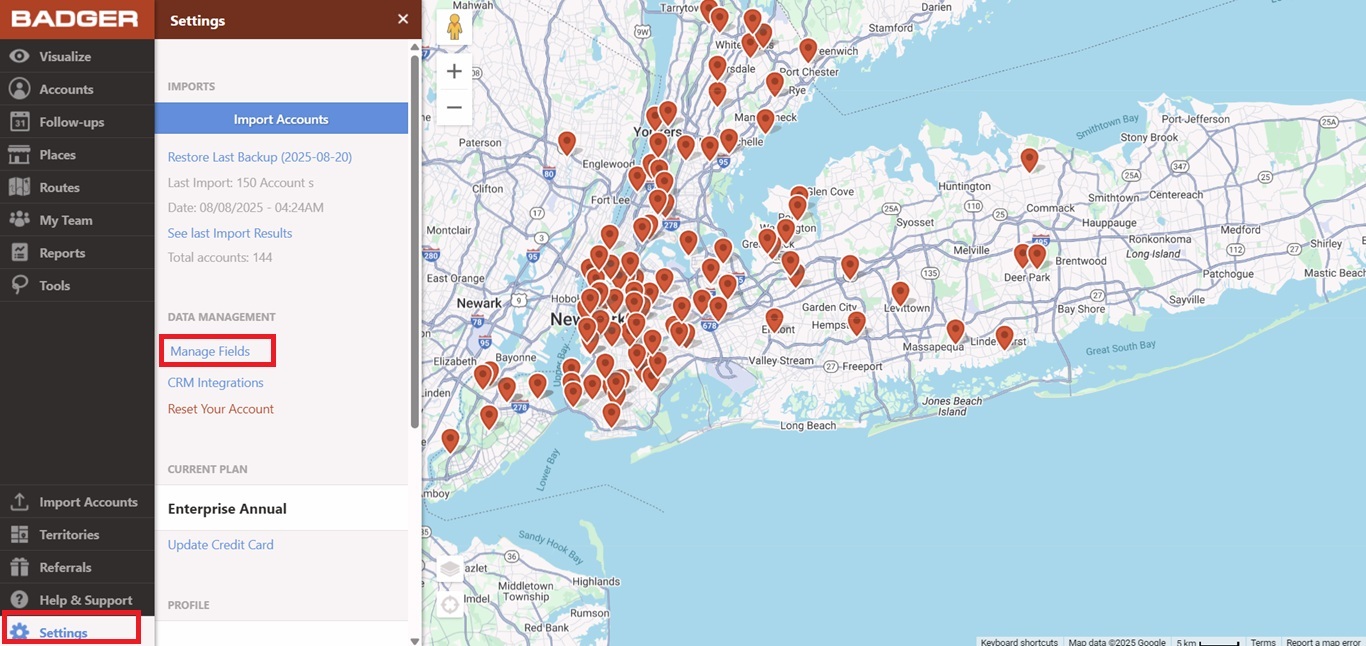
1. On the web app, go to the Settings menu and under Data Management, click on Manage Fields.
NOTE: If you're part of a team, please contact your Account Manager to manage your fields or contact us at support@badgermapping.com.
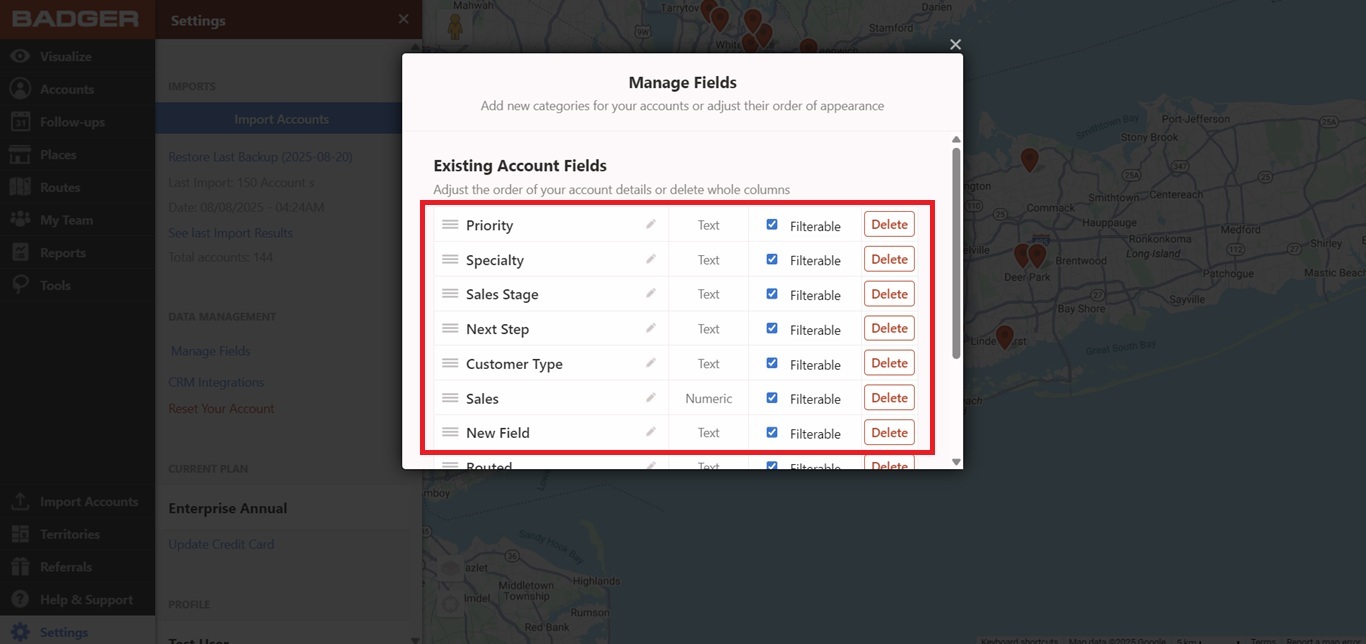
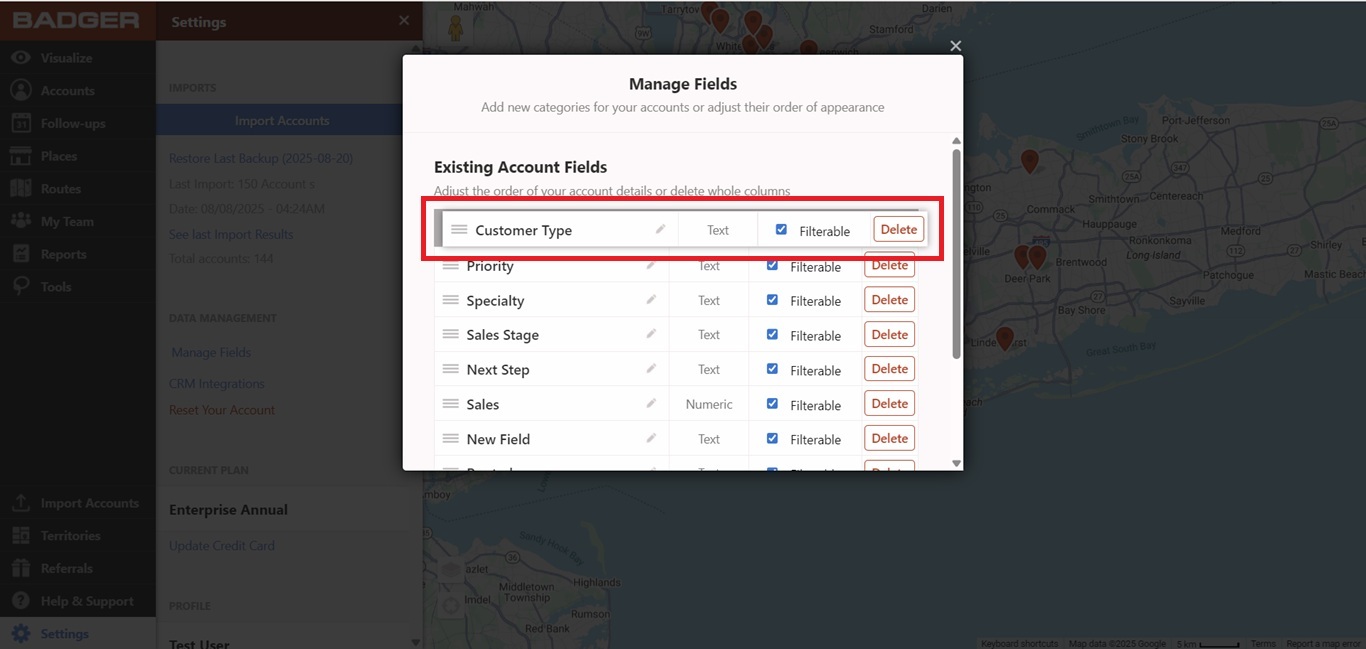
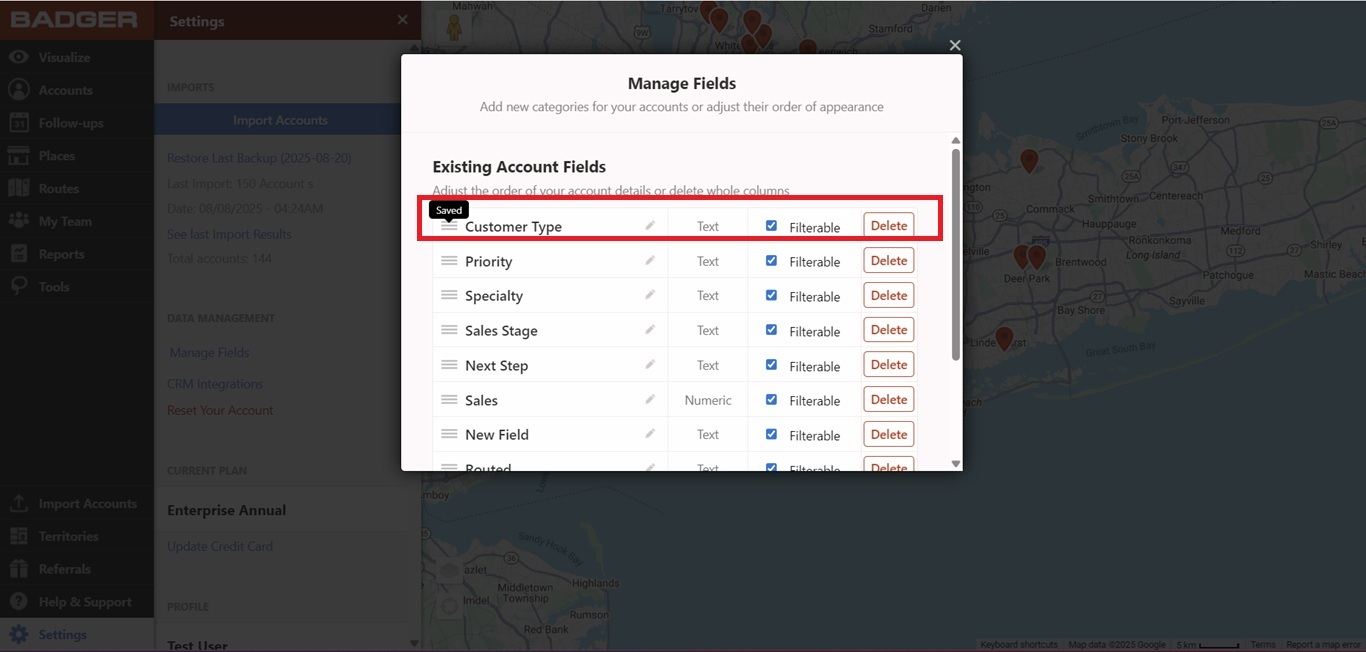
2. The Manage Fields box will then pop up with all your Existing Account Fields in it.
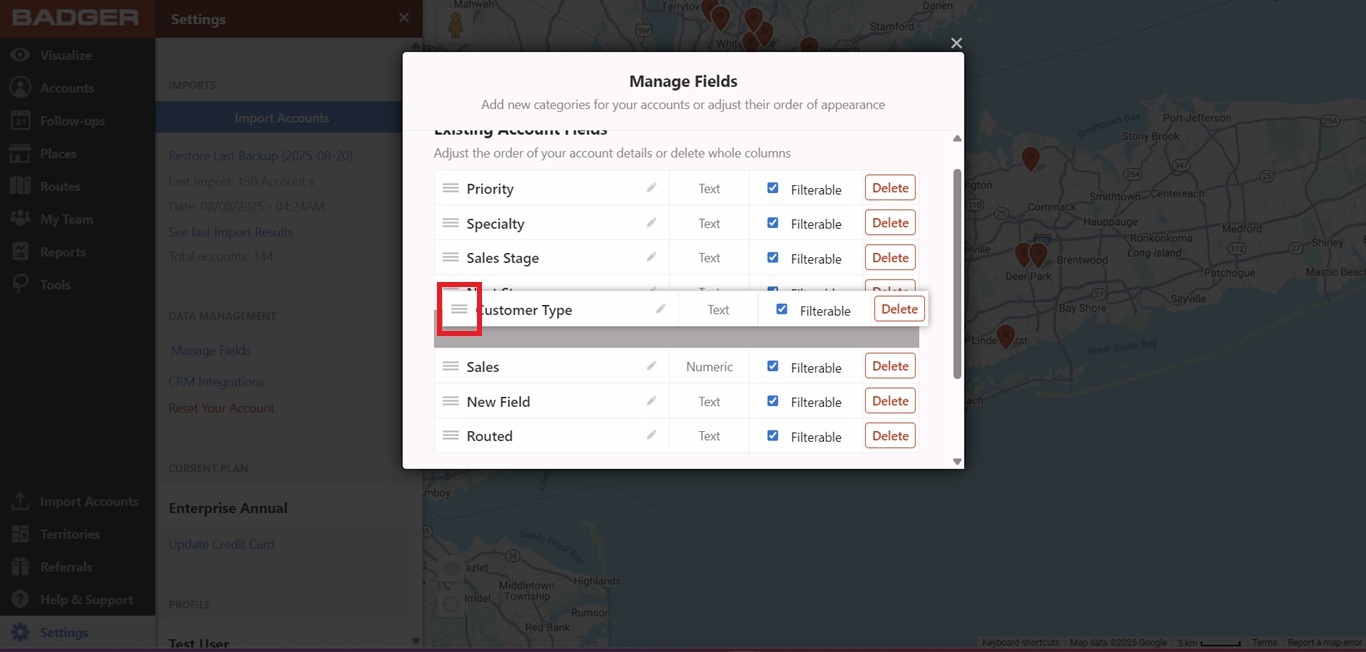
3. Now, click and hold the 3-line bar next to the field you want to move then drag it to where you want to place it.
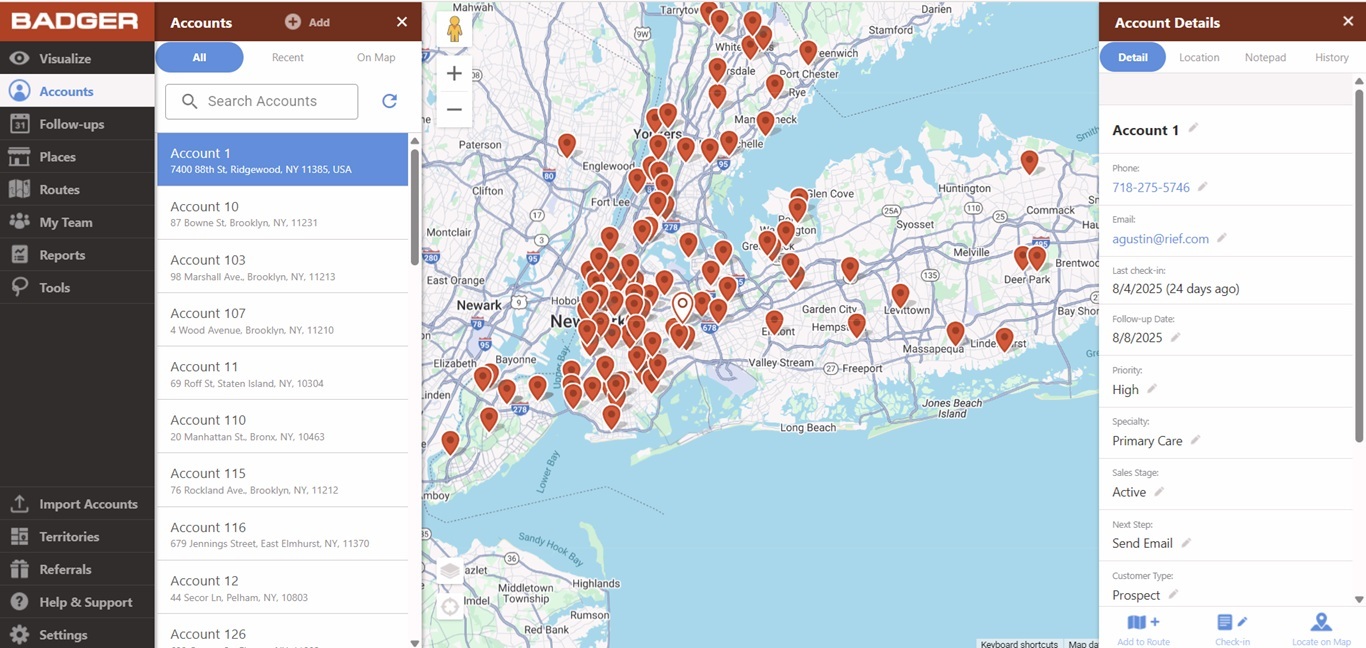
4. To view the changes, go back to the Accounts tab, open one of your accounts, and your Account Fields should now be updated.
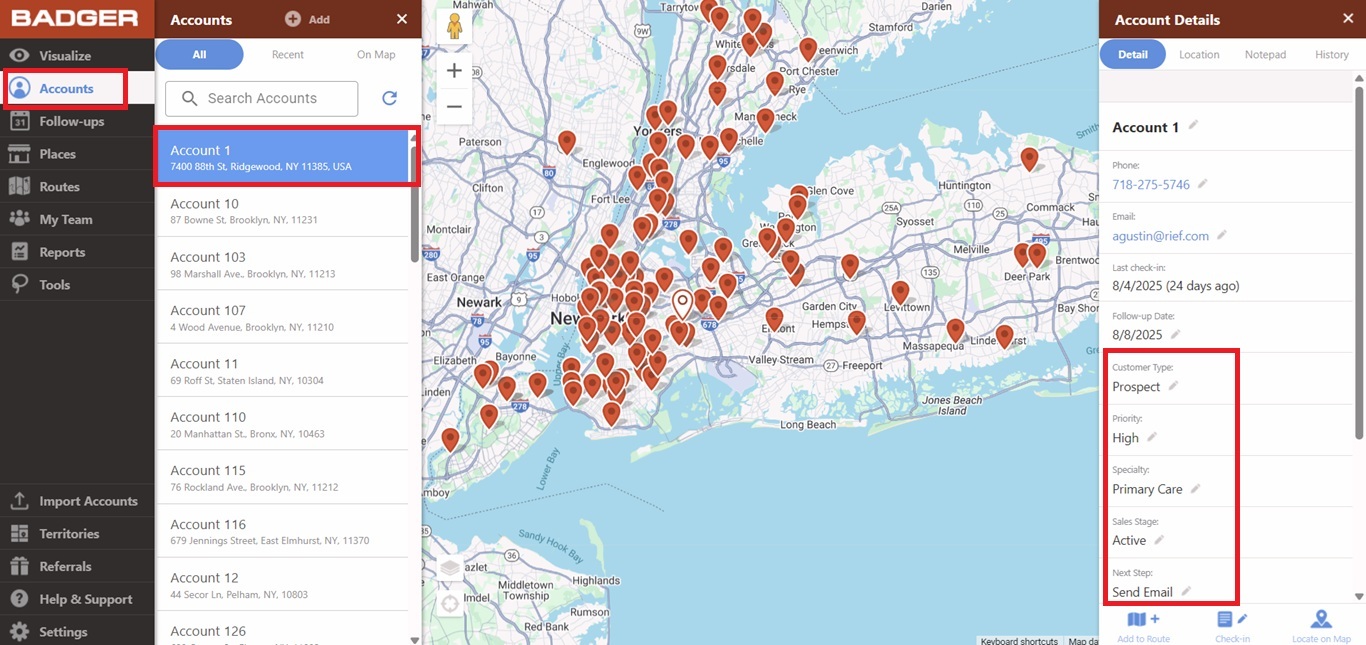
NOTE: The Last check-in and Follow-up Date fields are default. Also, this guide is only for custom fields. Core fields such as Name, Phone, and Email are not interchangeable.
And that’s it! You’ve successfully rearranged your custom fields.
Looking for our logo?
Grab a Zip packed with our logo in PNG and EPS formats.