News: Now offering a 90-day money-back guarantee!
Learn more
News: Now offering a 90-day money-back guarantee!
Learn moreTo export a route to your calendar on the iPad, follow these steps.
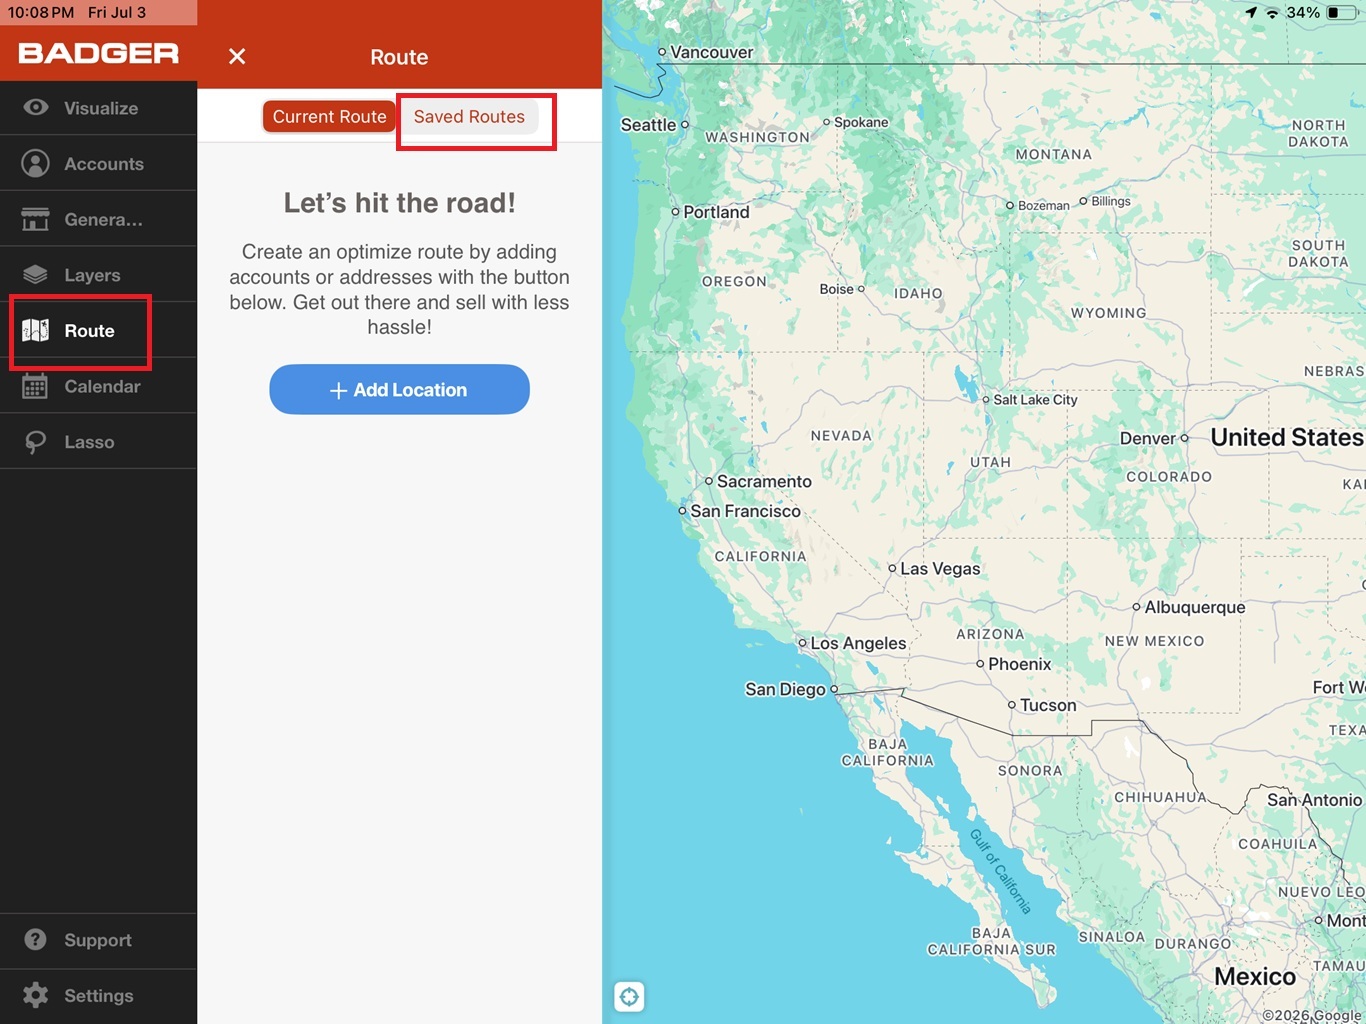
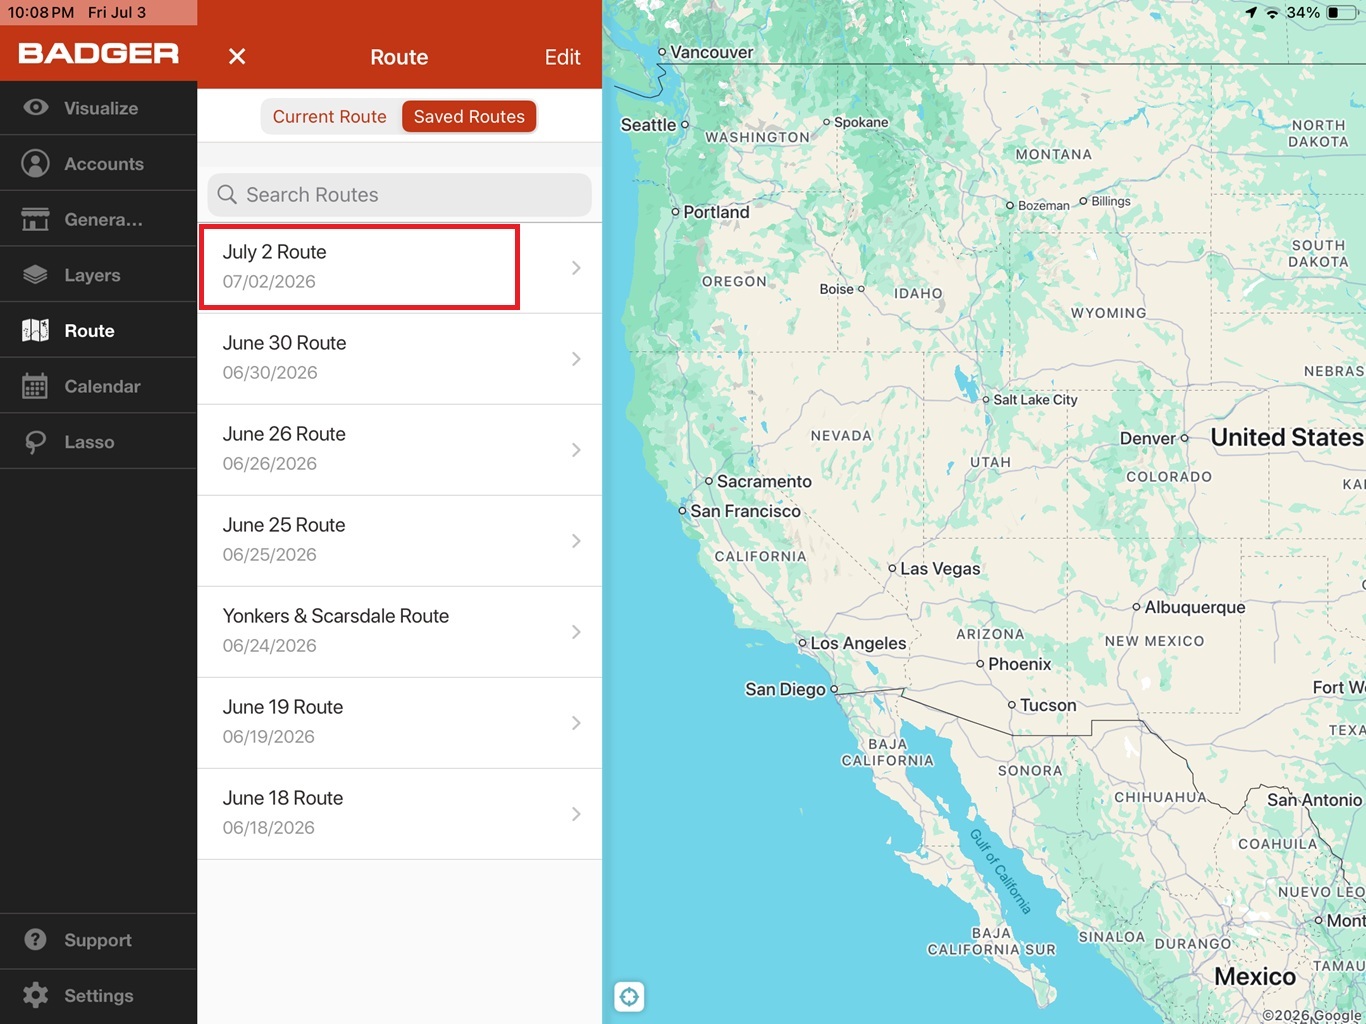
1. Click on Route, then tap Saved Routes, and select the route that you want to export. Once done, the app will load the route on the Current Route page.
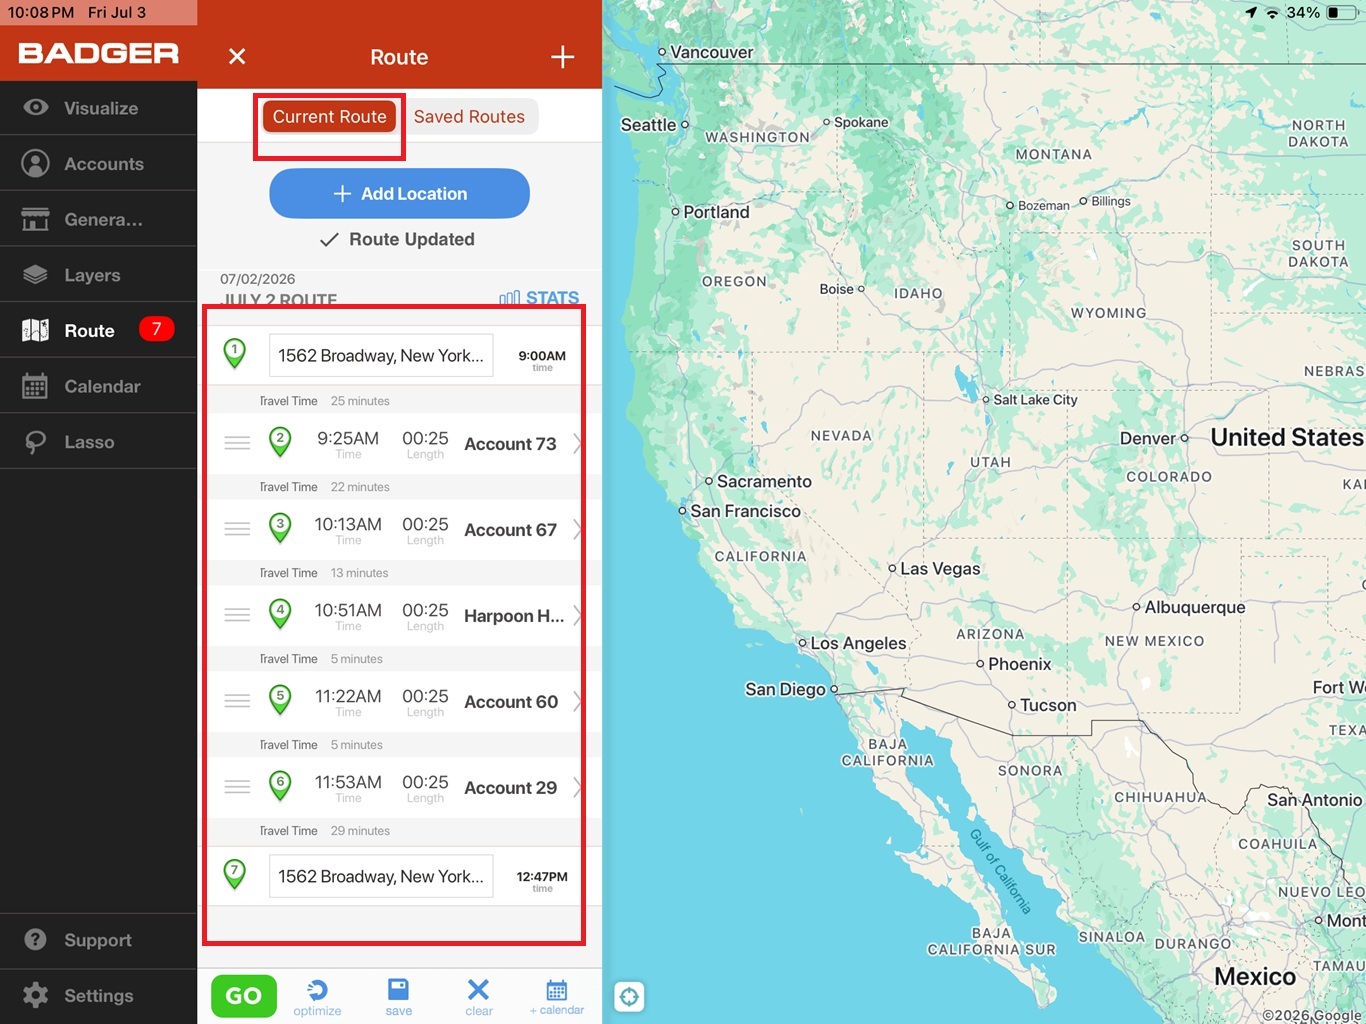
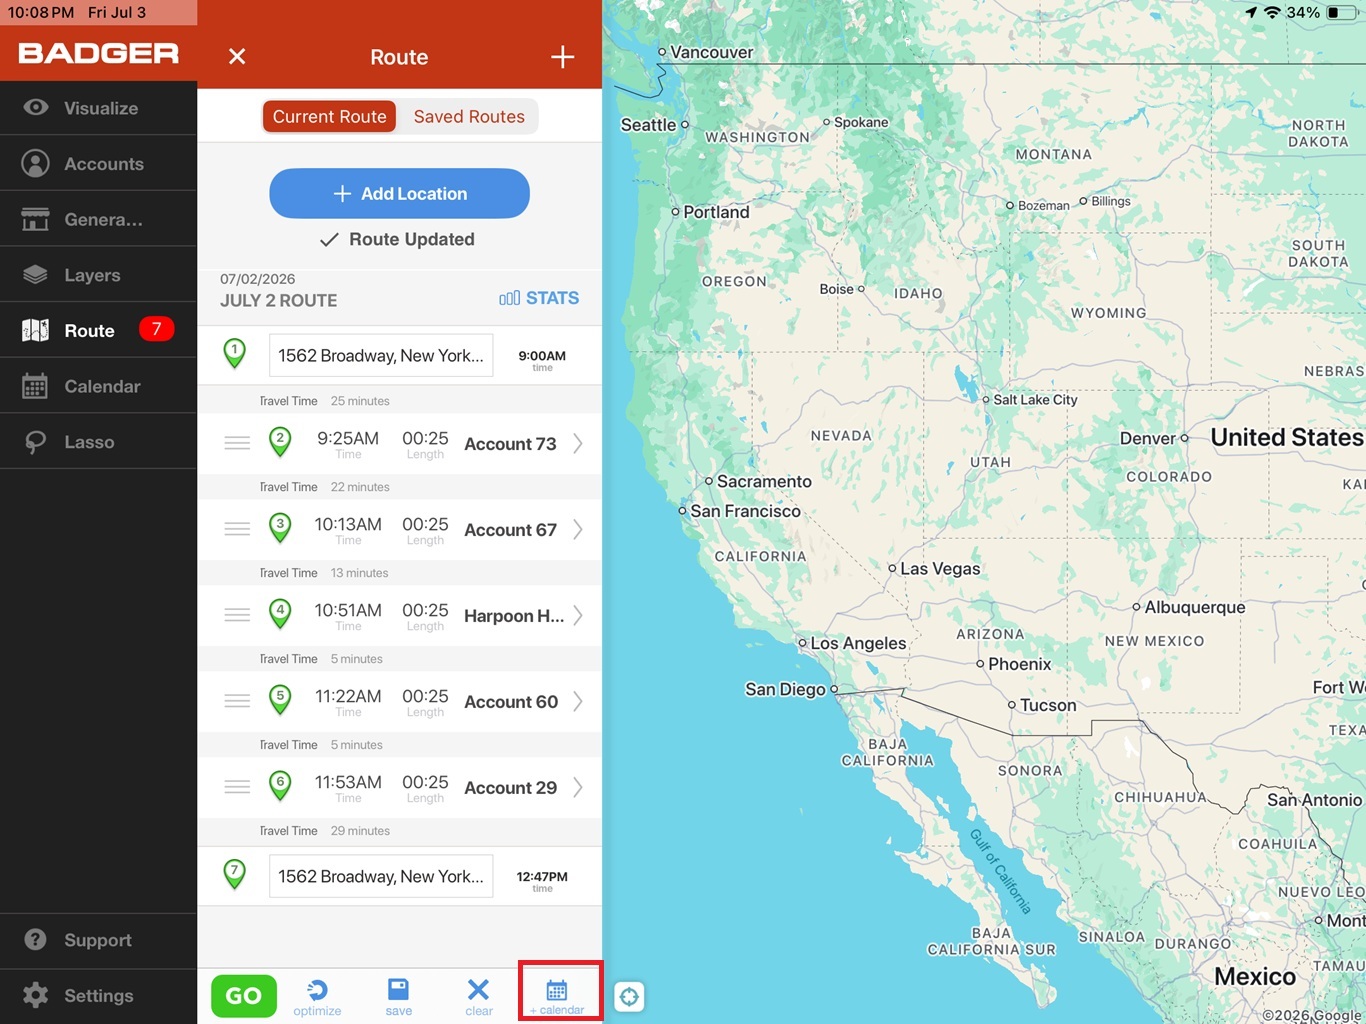
2. After that, click the +calendar button at the bottom of the screen.
3. This pop-up message will appear if you haven't yet granted Badger access to your calendar. Tap Continue to proceed.

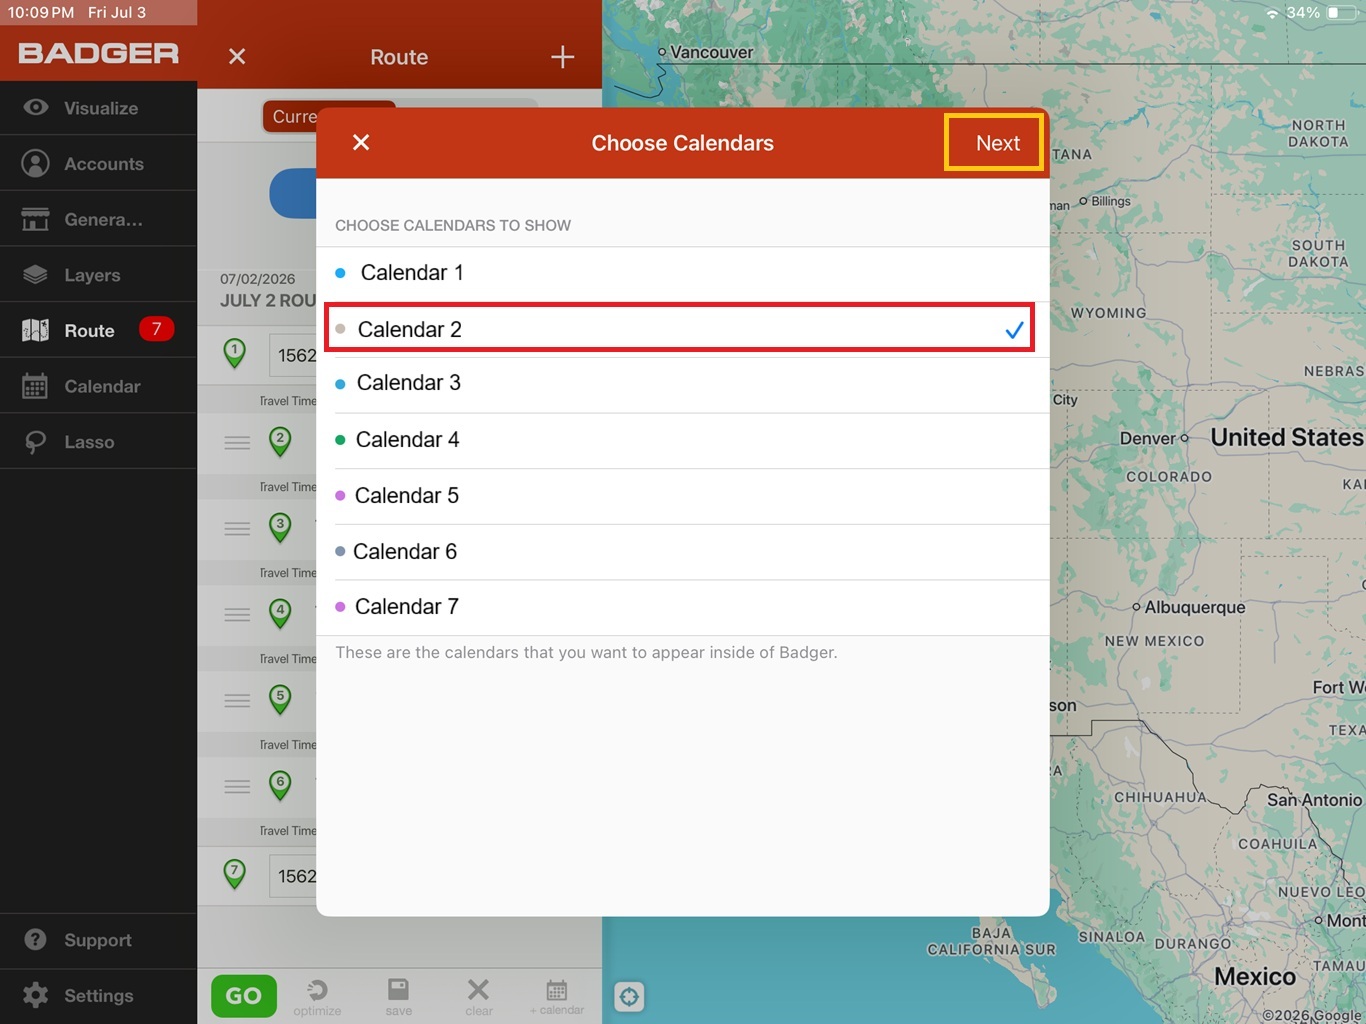
4. Then, select the calendar you want your route to export to on the Choose Calendars window. Click Next when you’re done selecting.
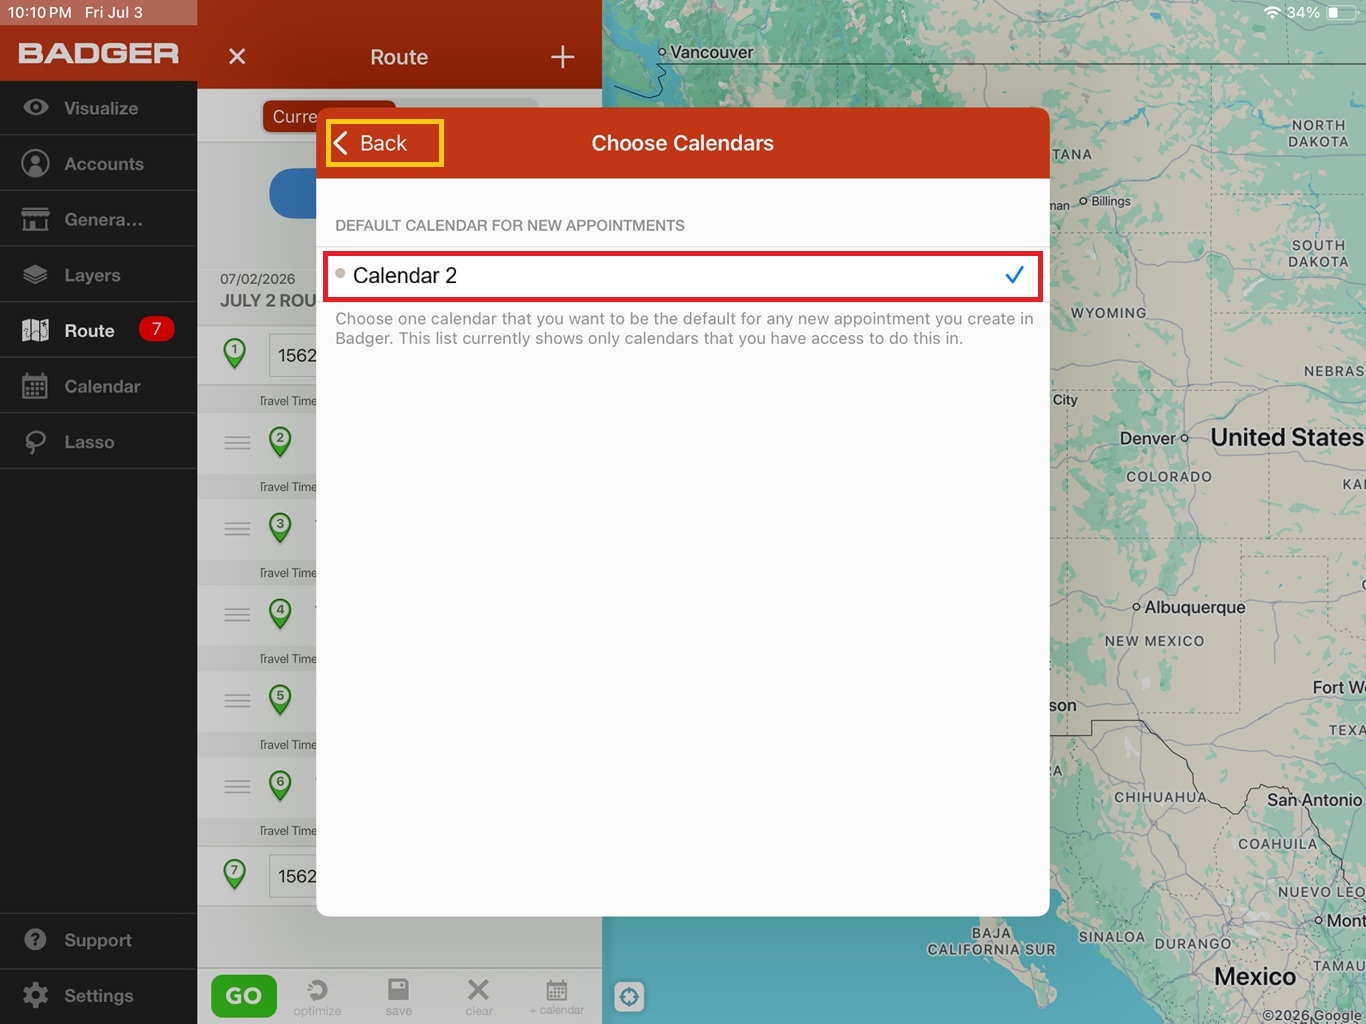
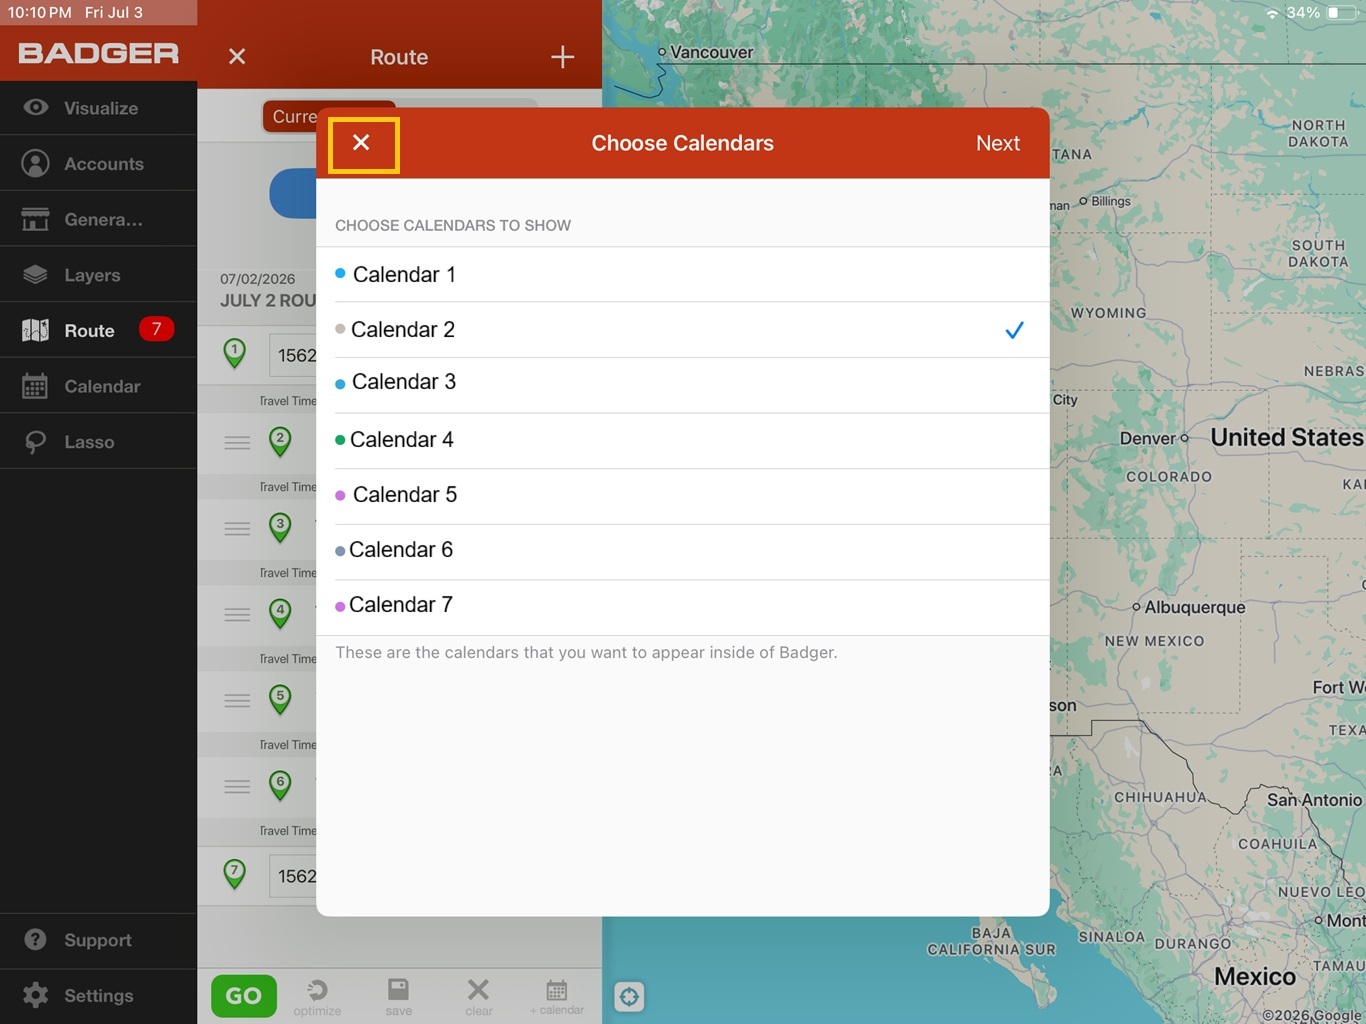
5. After that, choose the Default Calendar For New Appointments, tap Back, and tap the x button.
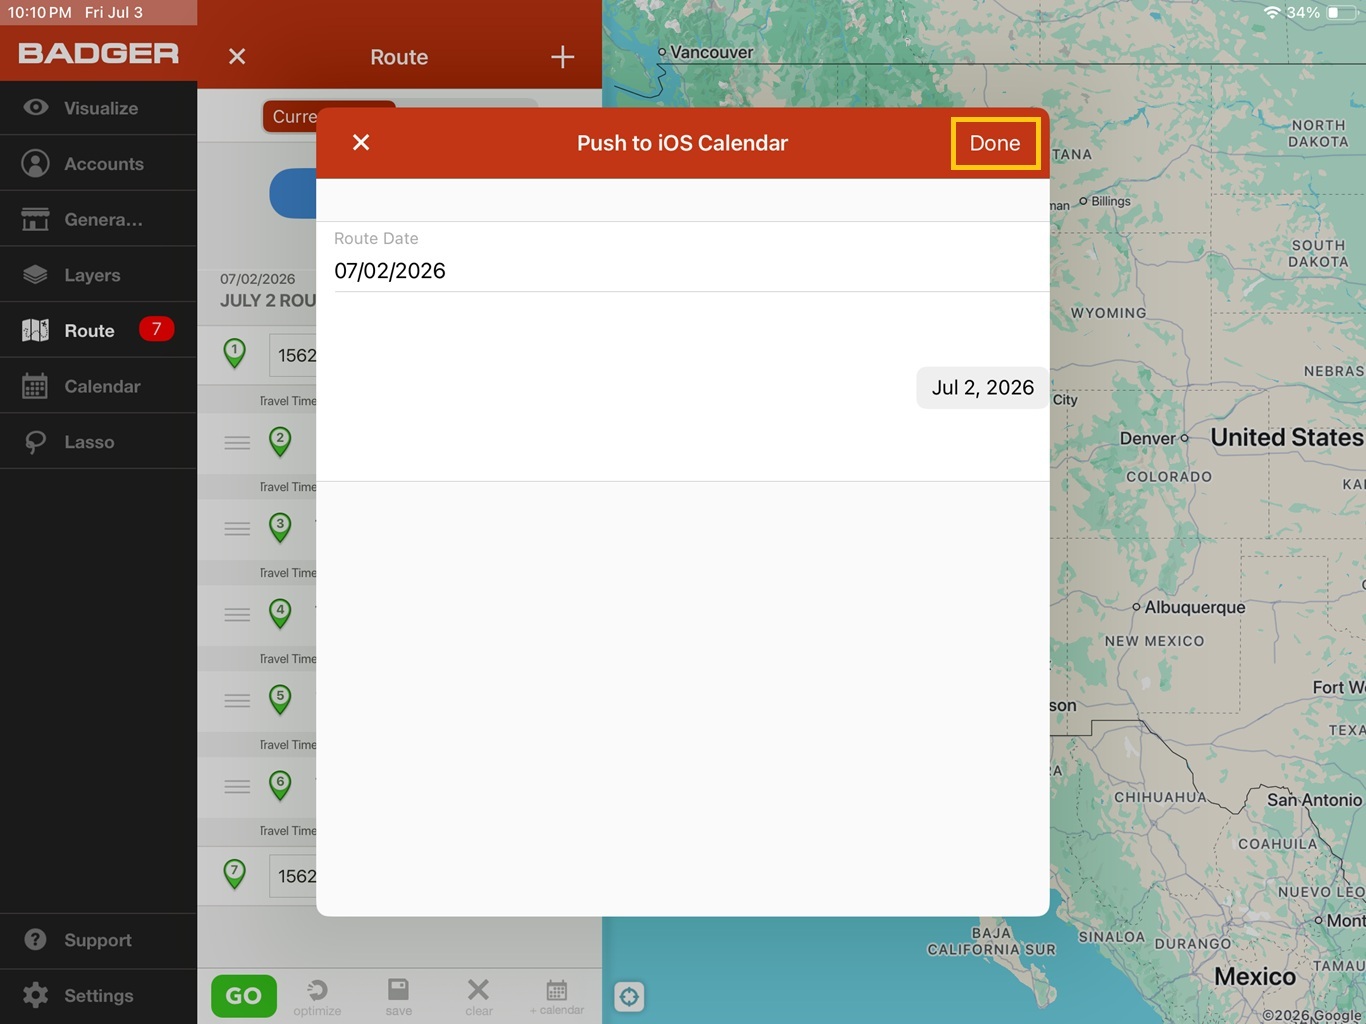
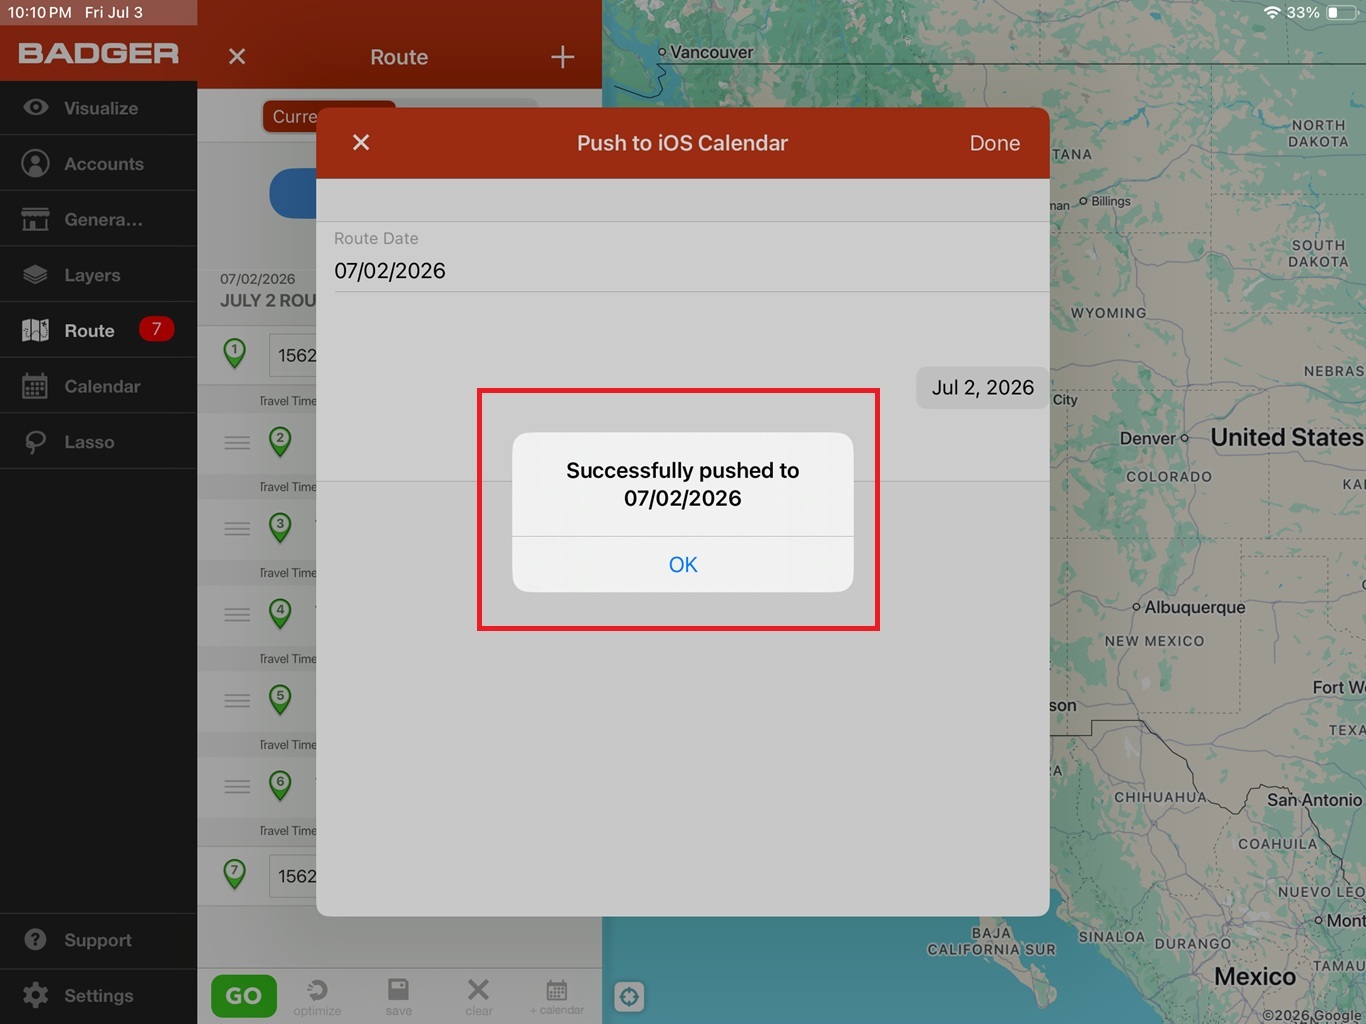
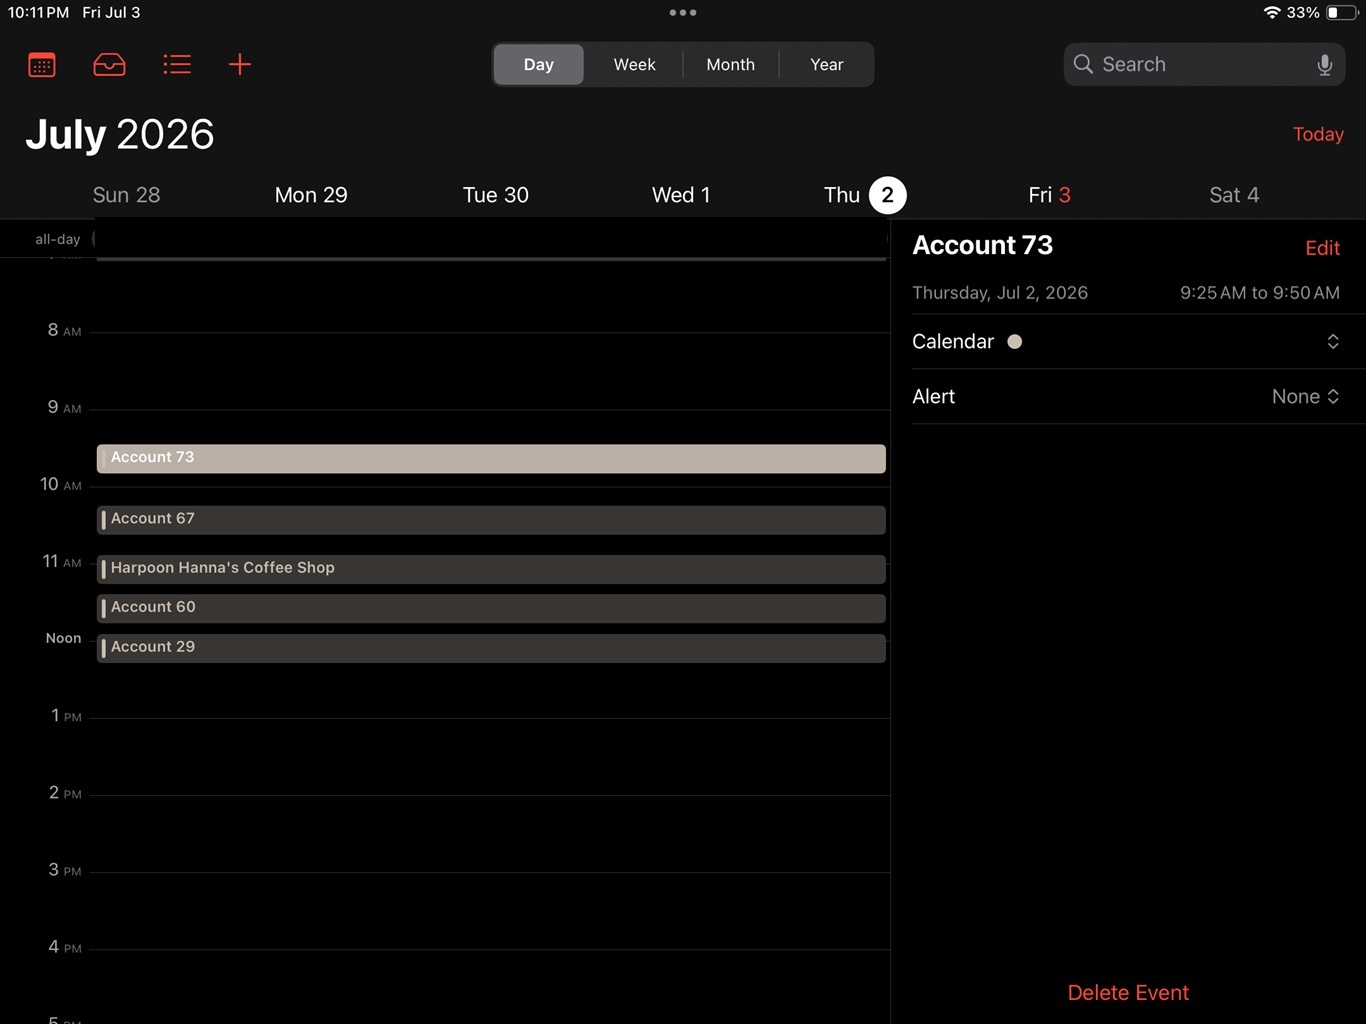
6. Then click the +calendar button again, tap Done on the Push to iOS Calendar window, and you’re good to go.

Note: After the first time, you can just click +calendar and it will automatically be added to the calendar you had chosen before.
Happy Routing!
Looking for our logo?
Grab a Zip packed with our logo in PNG and EPS formats.