News: Now offering a 90-day money-back guarantee!
Learn more
News: Now offering a 90-day money-back guarantee!
Learn moreBadger Maps allows you to create routes using our mobile apps. Here’s a quick guide on how you can build routes using your iPad.
1. The first step is to select your stops. There are different ways to do this.
A. Tap on the pin that you want to add to your route, then click the add to button, and select Add to Route.


B. Use the Lasso tool, draw around the pins you like to add, and choose Create Route.


C. Scroll through the Accounts tab and look for the account you want to add, or use the Search Accounts field. Then tap the account name to open up the Account Details screen. Click the add to icon, and select Add to Route.


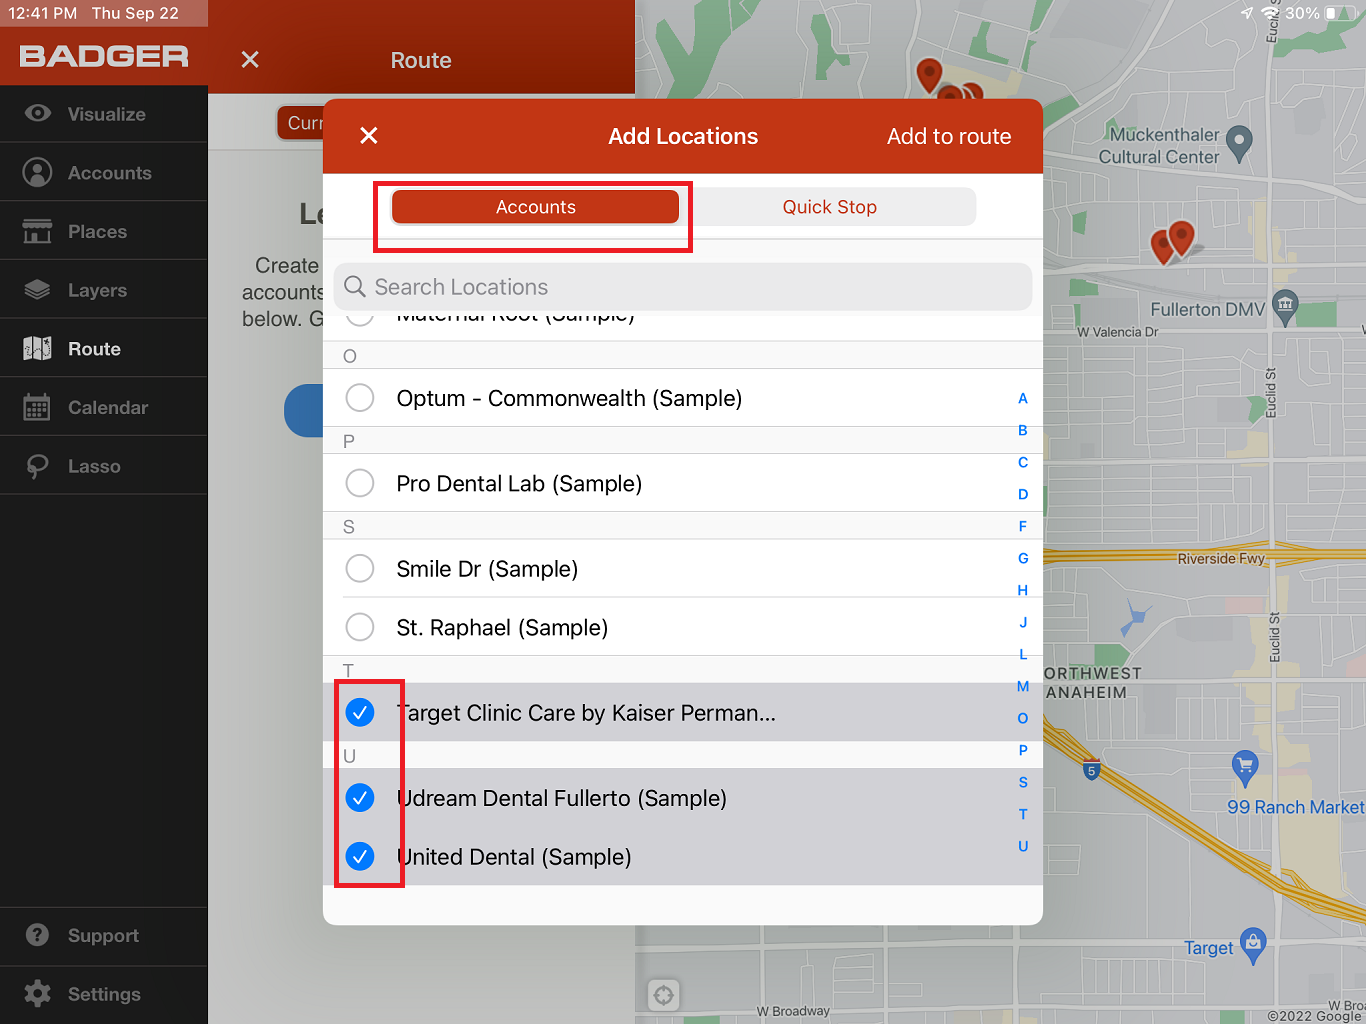
D. On the Route tab, tap +Add Location, then select if the stops are from Accounts or Quick Stop.


D.1. If the stops are from your account list, choose Accounts, click on the accounts that you want to add, and tap Add to Route.
D.2. If the stops are not from your account list, select Quick Stop, tap the Add an Address box, type in the address, and tap Add to Route.


2. Go back to the Current Route screen once you’re done choosing your stops. Tap the Enter Start Location and Enter End Location boxes to enter your start and end points.


3. Click Optimize, then tap on the Save icon beside it.

4. Assign a Route Name and Date, and tap the Save button on the upper right corner of the screen.


And that’s all. You just learned how to build routes using your iPad. Try this now.
Looking for our logo?
Grab a Zip packed with our logo in PNG and EPS formats.