News: Now offering a 90-day money-back guarantee!
Learn more
News: Now offering a 90-day money-back guarantee!
Learn moreHave you ever experienced your apps not functioning properly? One reason why it’s happening is because the app isn’t updated to its latest version. You can definitely update your apps manually. However, if you don’t like checking if you got the latest app every now and then, it’s best to set them to update automatically. Continue reading to find out how it’s done.
This is what you’ll do if you want to automatically update a specific app.
1. Open up Google Play Store, and tap the profile icon.


2. Go to Manage apps and device, and tap Manage.


3. Look for the app that you’d like to automatically update and tap it to open up the Details page


4. Tap the 3-dot icon and choose Enable auto update.


Now here’s what you’ll need to do if you’d like to automatically update all your apps.
1. Go to Google Play Store, and tap the profile icon at the top right of the screen.


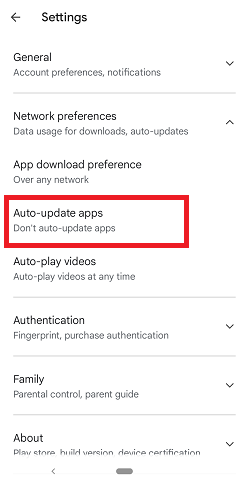
2. Then go to Settings, and tap Network preferences.


3. Select Auto-udpate apps, choose if the update should be done Over any network or Over Wi-Fi only, and tap Done.

Note: There’s a chance apps may not update automatically if an account on your device has a sign-in error.
Looking for our logo?
Grab a Zip packed with our logo in PNG and EPS formats.