News: Now offering a 90-day money-back guarantee!
Learn more
News: Now offering a 90-day money-back guarantee!
Learn moreAs a Business or Enterprise user, you already have access to advanced territory management features in your Badger Maps account.
Badger Maps works better as a team: management can see the entire organization’s account on one map, better realign territories and strategically target accounts. Sales reps drive less and sell more when they have an optimized route planner in their sales arsenal.
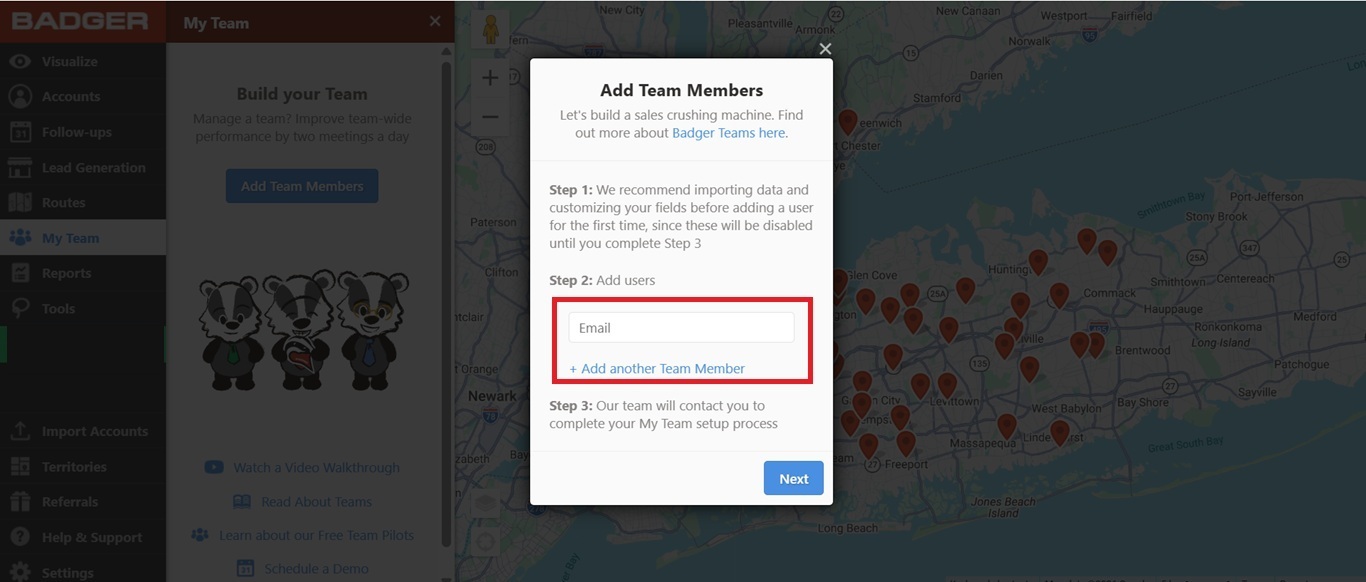
Here’s how you can bring your team members in Badger. Make sure you've imported your data before adding a user because this will be disabled once the process is completed.
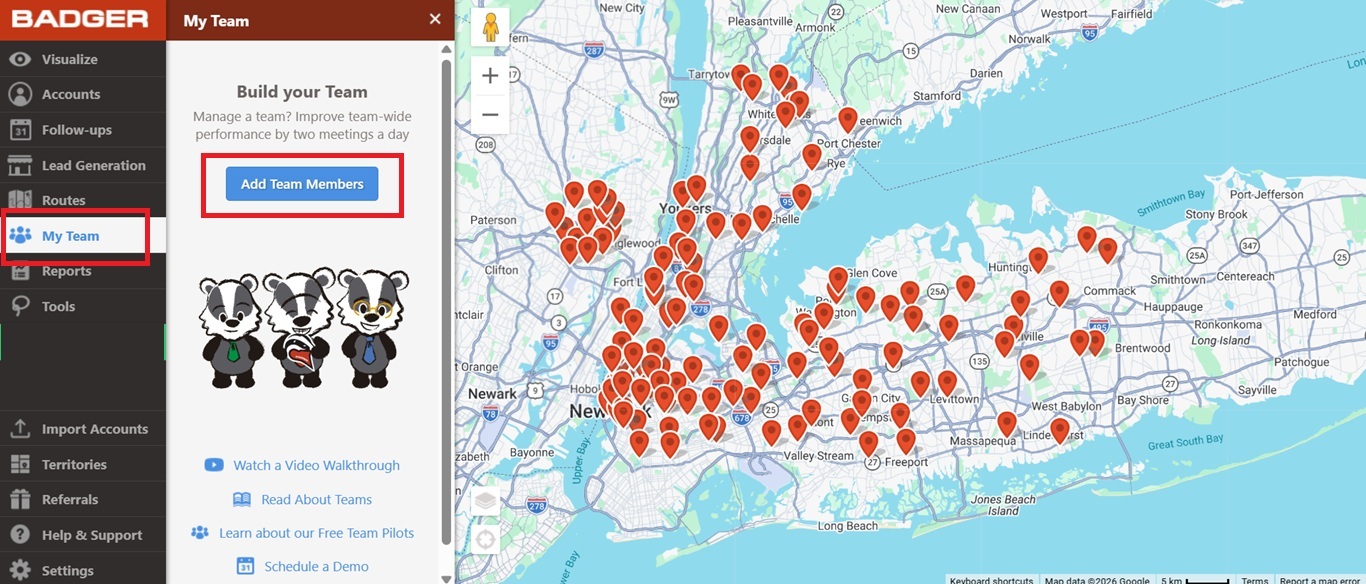
1. On the web app, go to the My Team menu found at the left side of the screen, then click Add Team Members.
2. Enter your additional team member’s email address in the text box. Make sure to include the “@” symbol when typing the email address and double-check the spelling. Click Add another Team Member if you want to add another user. Once done, click Next to go to the next step.
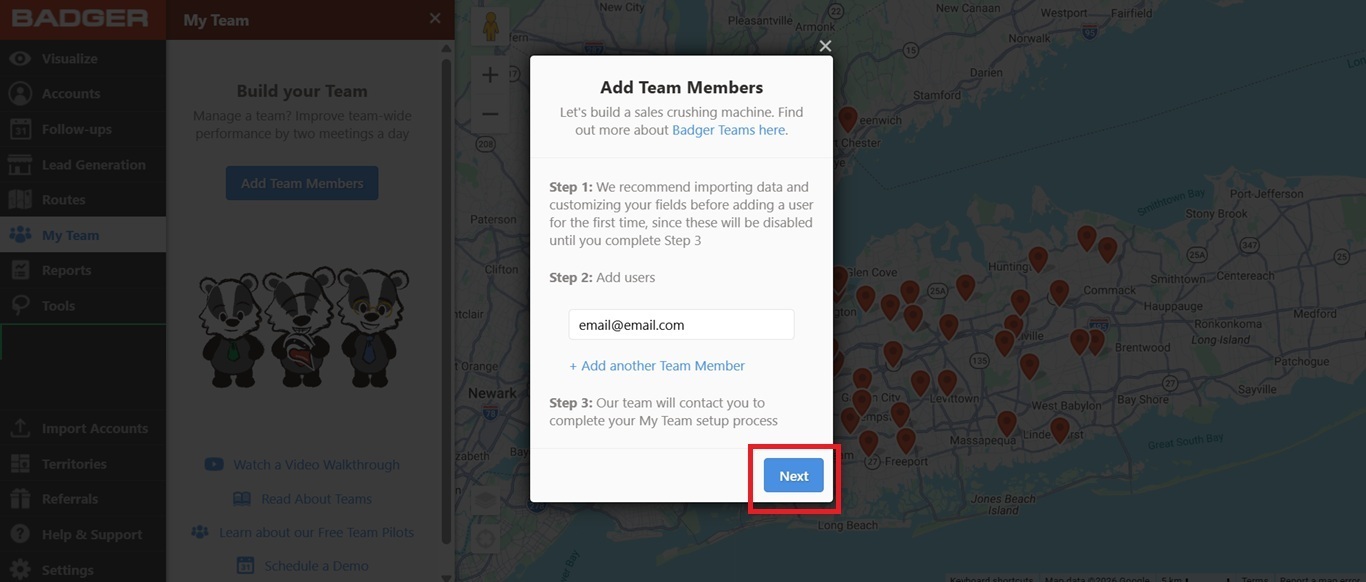
3. A pop-up window will show a summary of your added account/s as well as your total added bill. Click Next to proceed. If you need to make changes, click Previous and update the info.

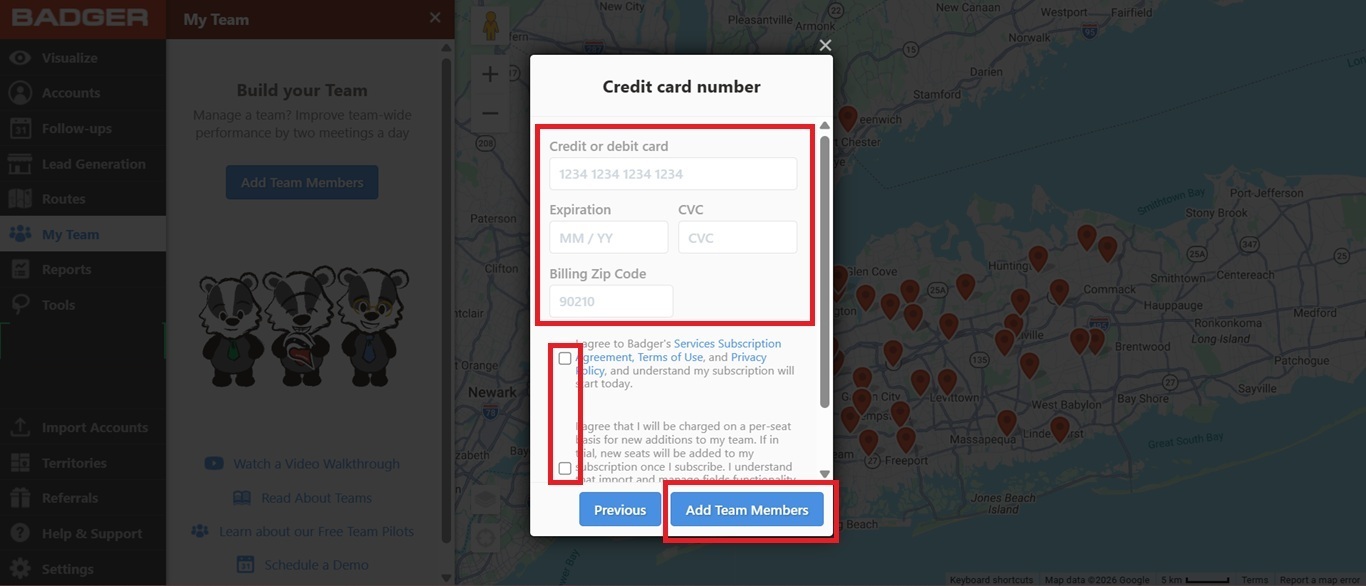
4. Enter your credit card details and check the Agree Terms of Service and Agree with Pricing boxes. Then click Add Team Members at the bottom right side to submit your request.
5. A pop-up window will appear confirming that you’ve successfully added your added team member/s and your subscription will be updated.
One of our Team Specialists will reach out to you in 2 to 3 business days to and finalize your team setup.
Here's a video of how to create and manage a team in the Badger Maps WebApp:
Looking for our logo?
Grab a Zip packed with our logo in PNG and EPS formats.