News: Now offering a 90-day money-back guarantee!
Learn more
News: Now offering a 90-day money-back guarantee!
Learn moreAside from syncing with the iOS calendar and others, you can also connect Routes in Badger with your Google calendar, and here are the steps how to do it:
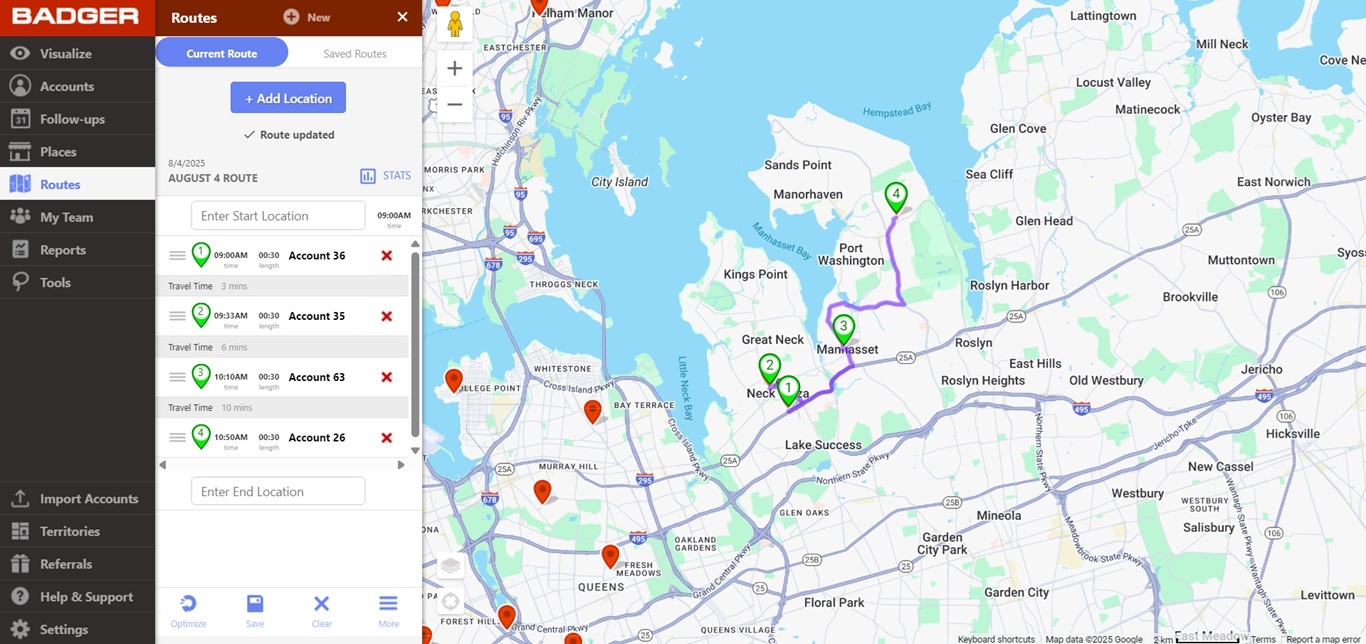
1. Log in to the Badger Maps web app, and load the route that you wish to export.
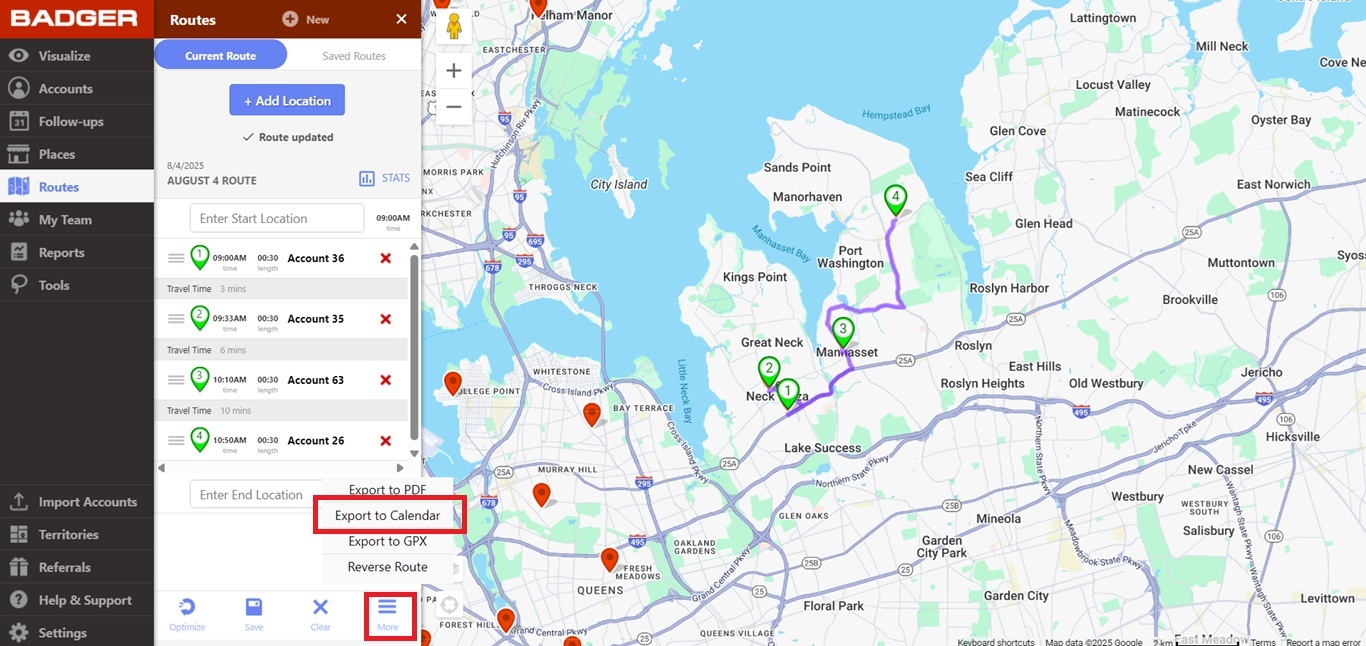
2. Go to More, and click Export to Calendar.
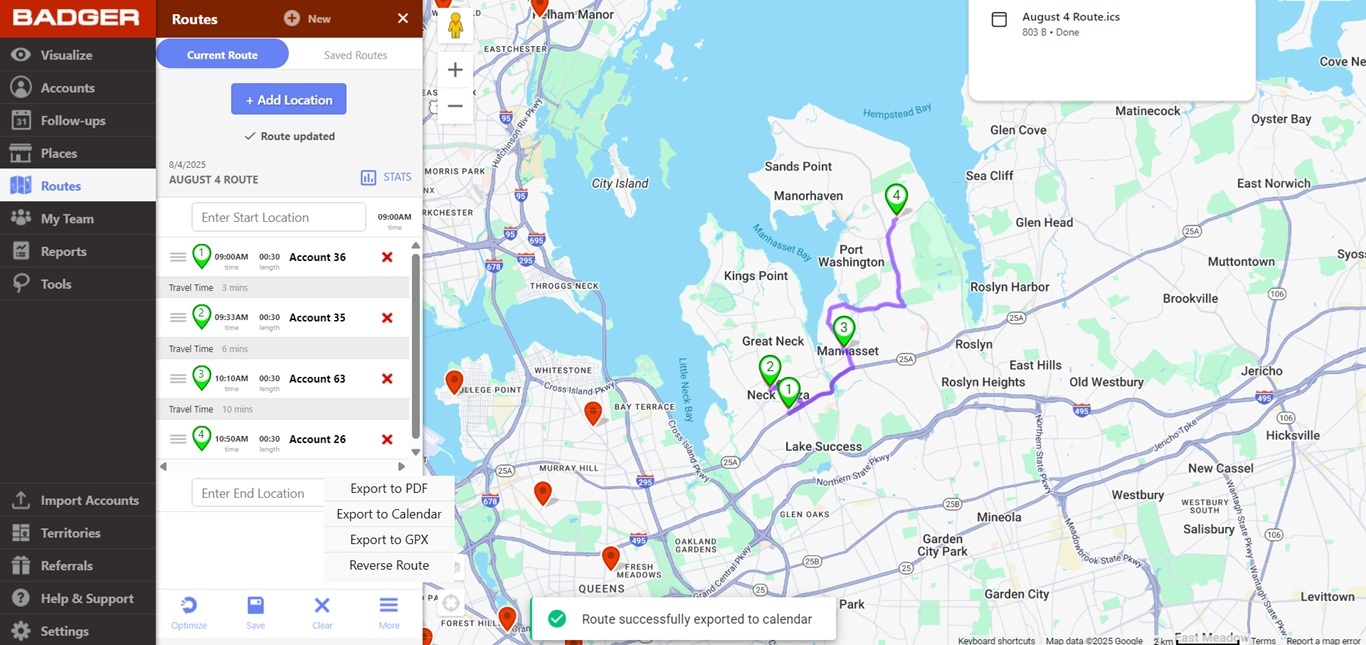
3. After that, an .ics file will be downloaded on your computer. Note that you don't need to open the file at this point.
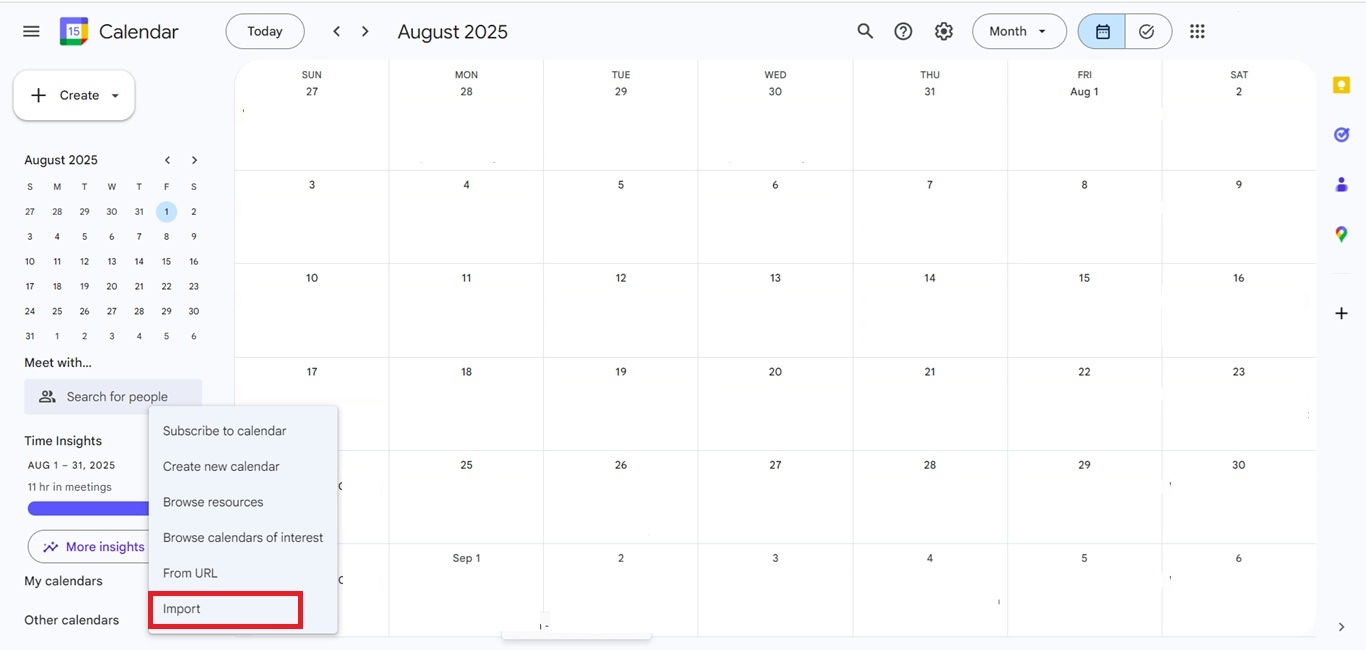
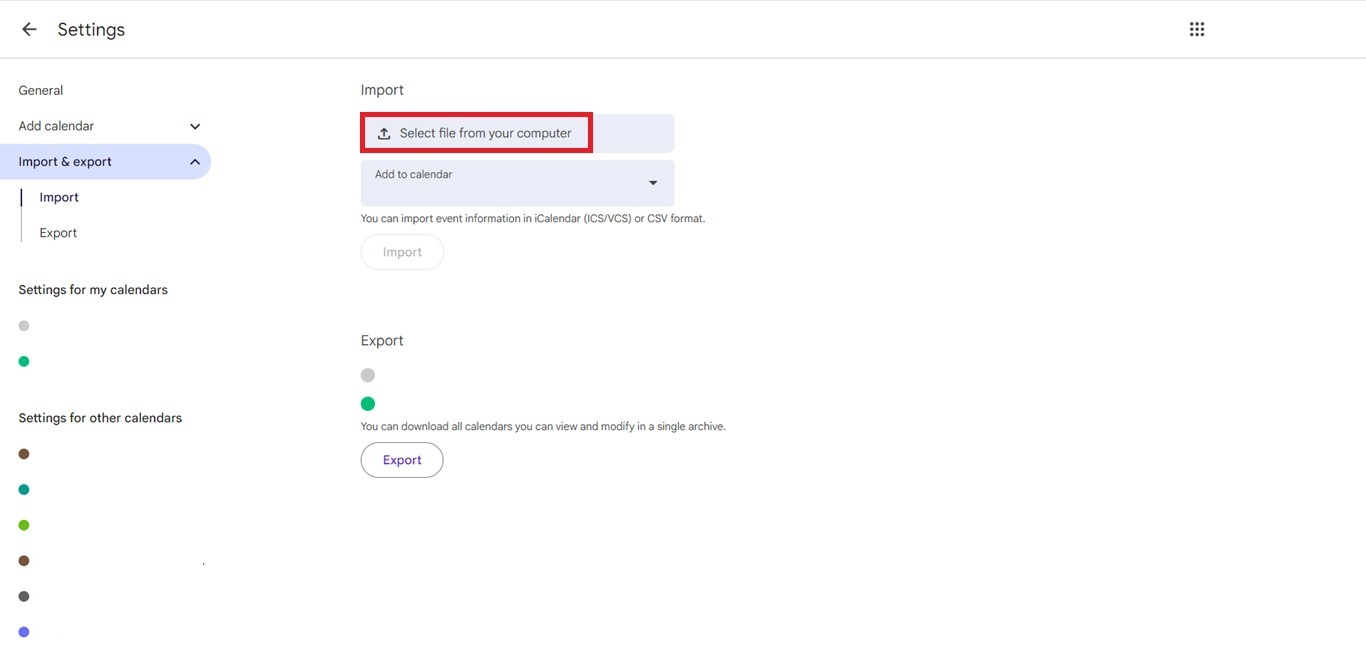
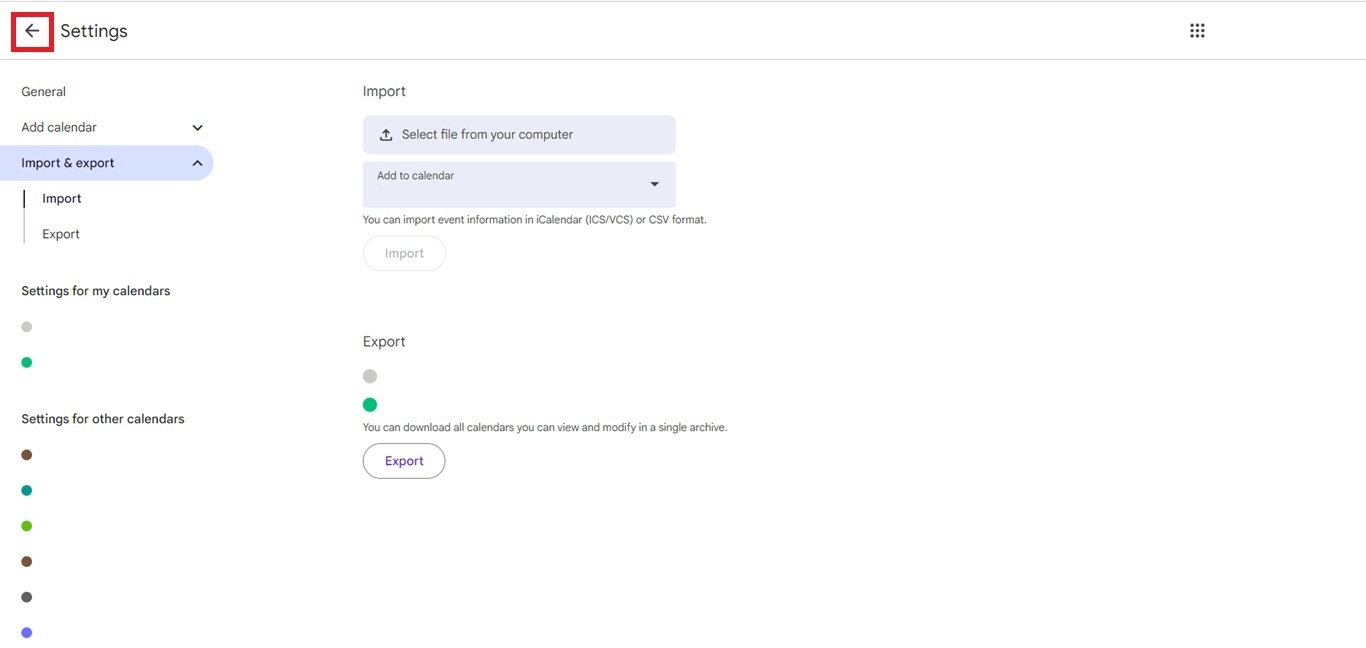
4. Next, go to the Google calendar that you wish to sync your route with. Click the + sign beside Other calendars, then choose Import.

5. You’ll be taken to the Settings page. Click Select file from your computer.
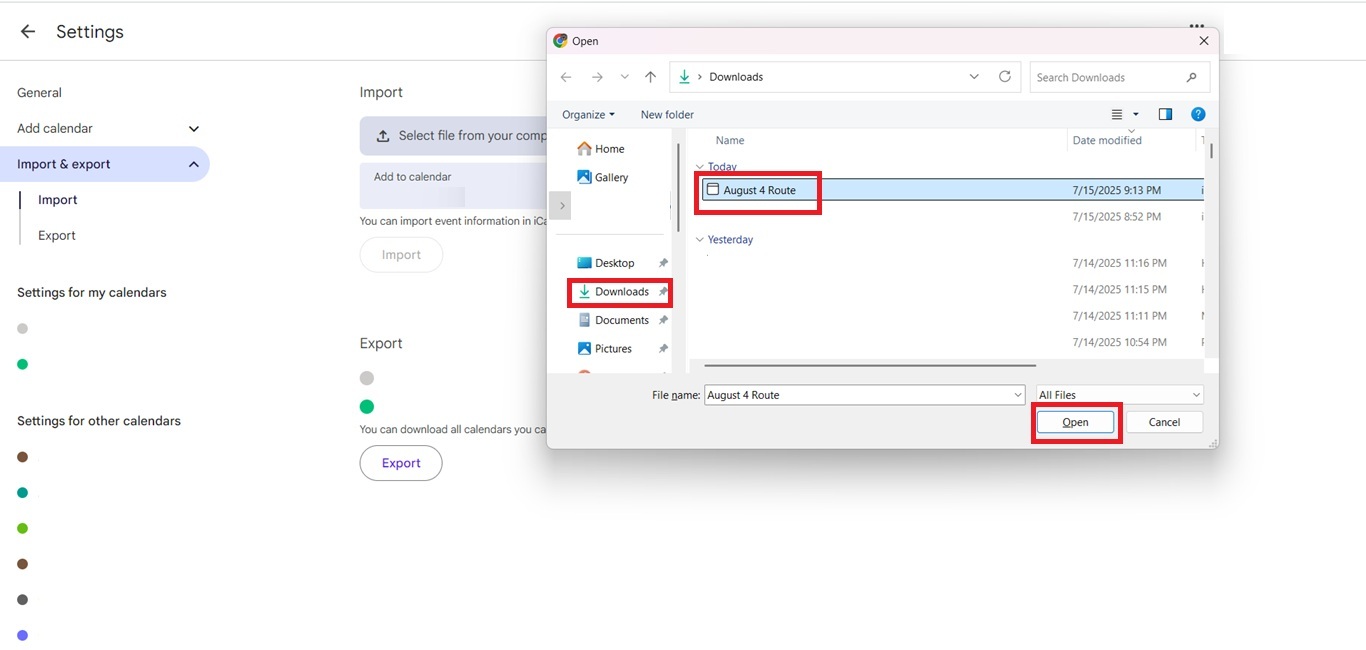
6. Then go to Downloads and choose the calendar you’ve just exported. Click Open.
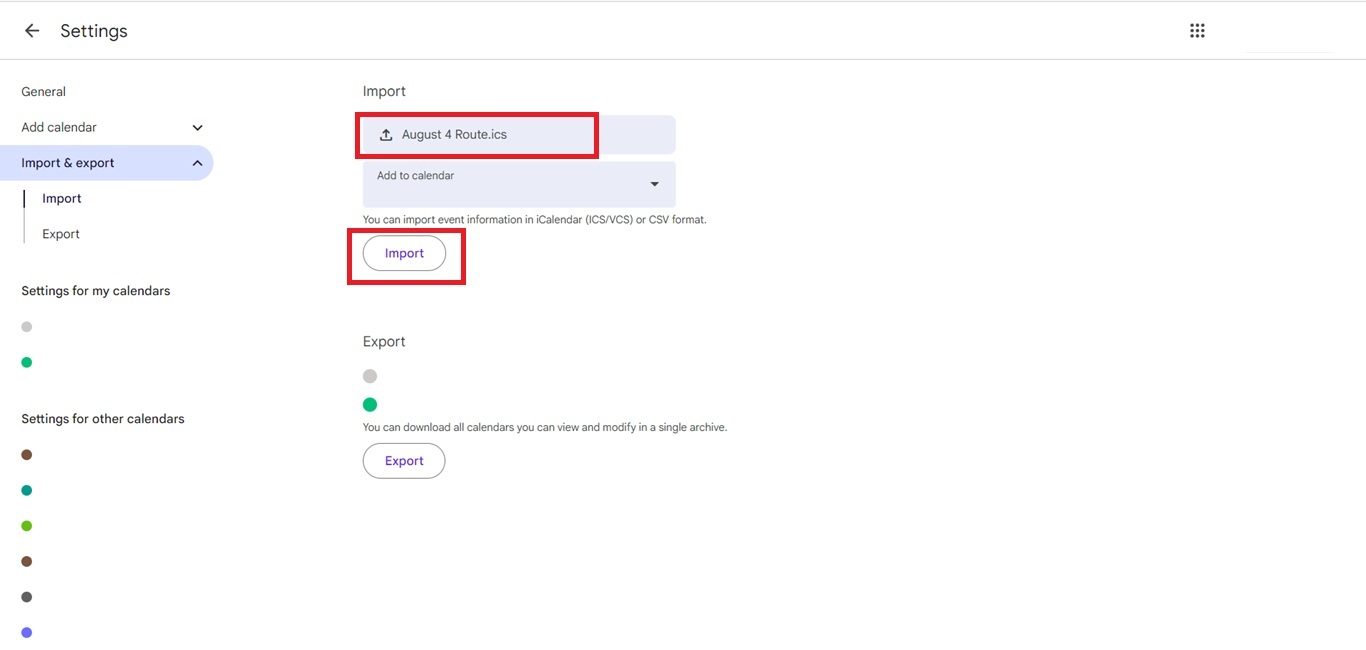
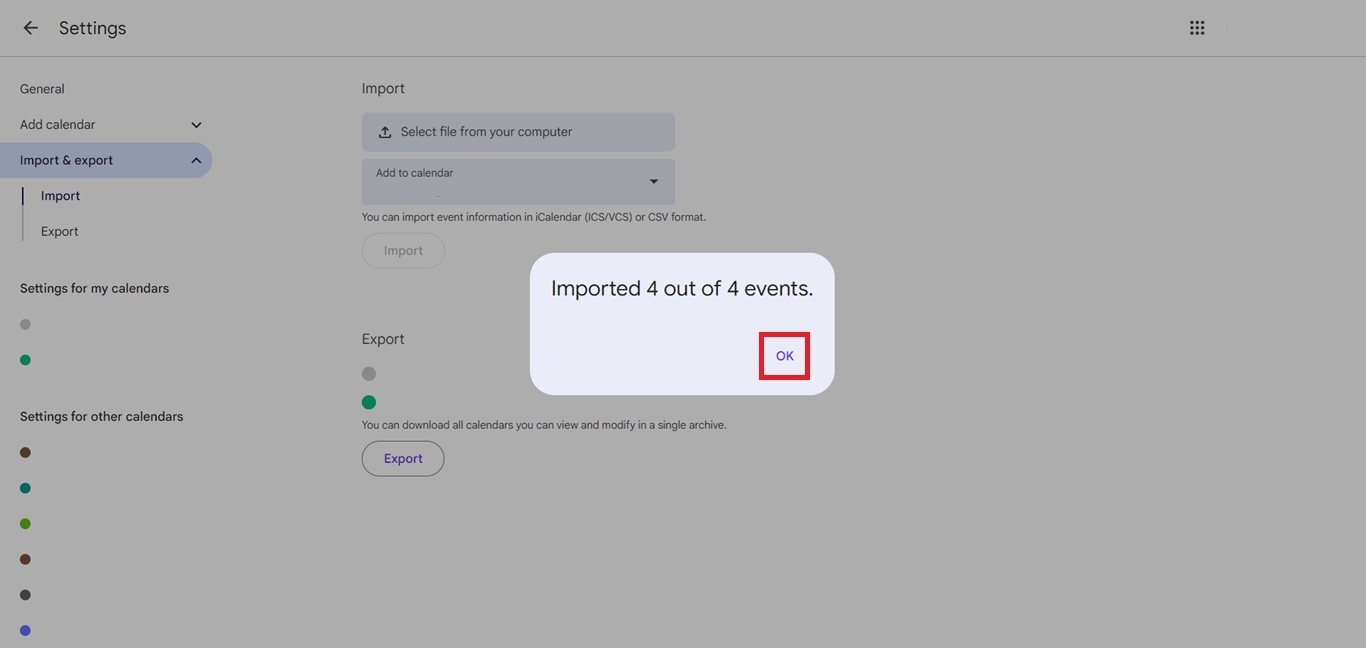
7. You’ll be taken back to the Settings page, and you’ll see that the file you’ve opened is now on the Import box. Click the blue Import button below it to sync your route to your Google Calendar. You’ll then get a pop-up message that your import was successful, then click OK.
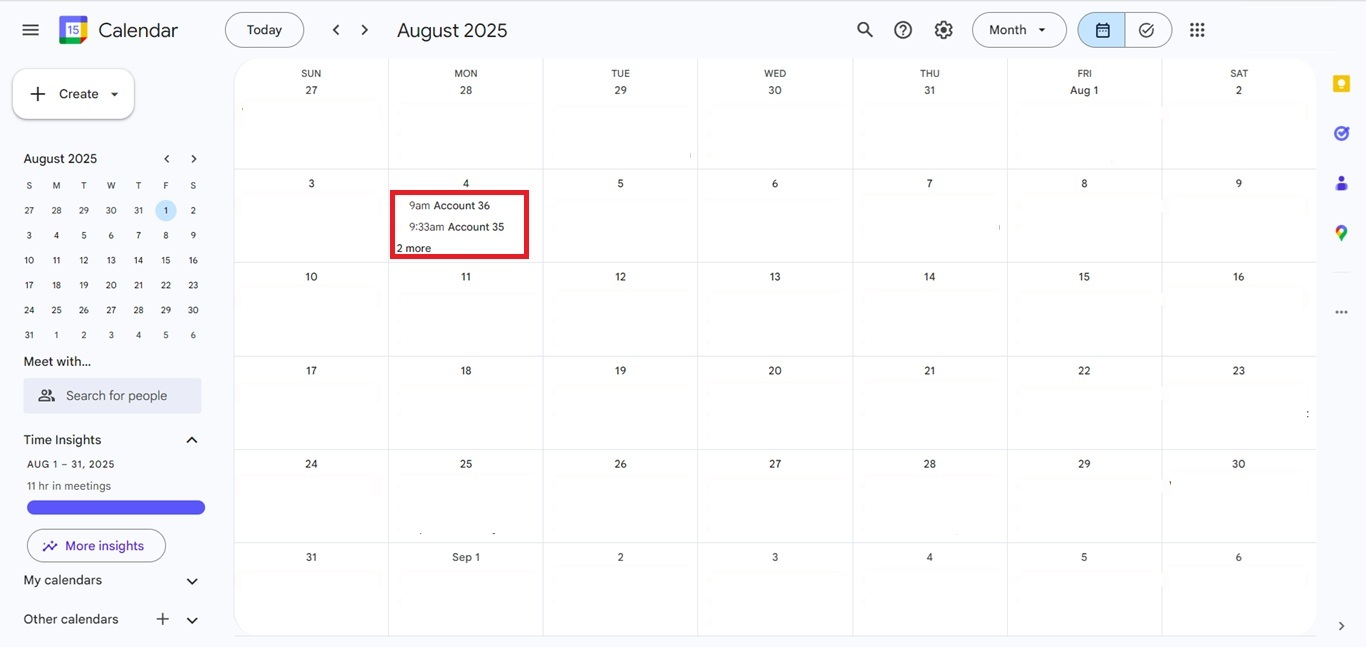
8. Click the 'back' arrow to go back to your calendar.
9. You’ll now be able to see that the appointments from your created route will appear on your calendar. Repeat the process for every route that you’d like to see on your calendar.
Looking for our logo?
Grab a Zip packed with our logo in PNG and EPS formats.