News: Now offering a 90-day money-back guarantee!
Learn more
News: Now offering a 90-day money-back guarantee!
Learn moreBadger Maps allows you to conveniently edit the details of your accounts. There's no need to start over. Only go to a specific account, make the edits, and the changes will take effect right away.
Here are easy steps to follow.
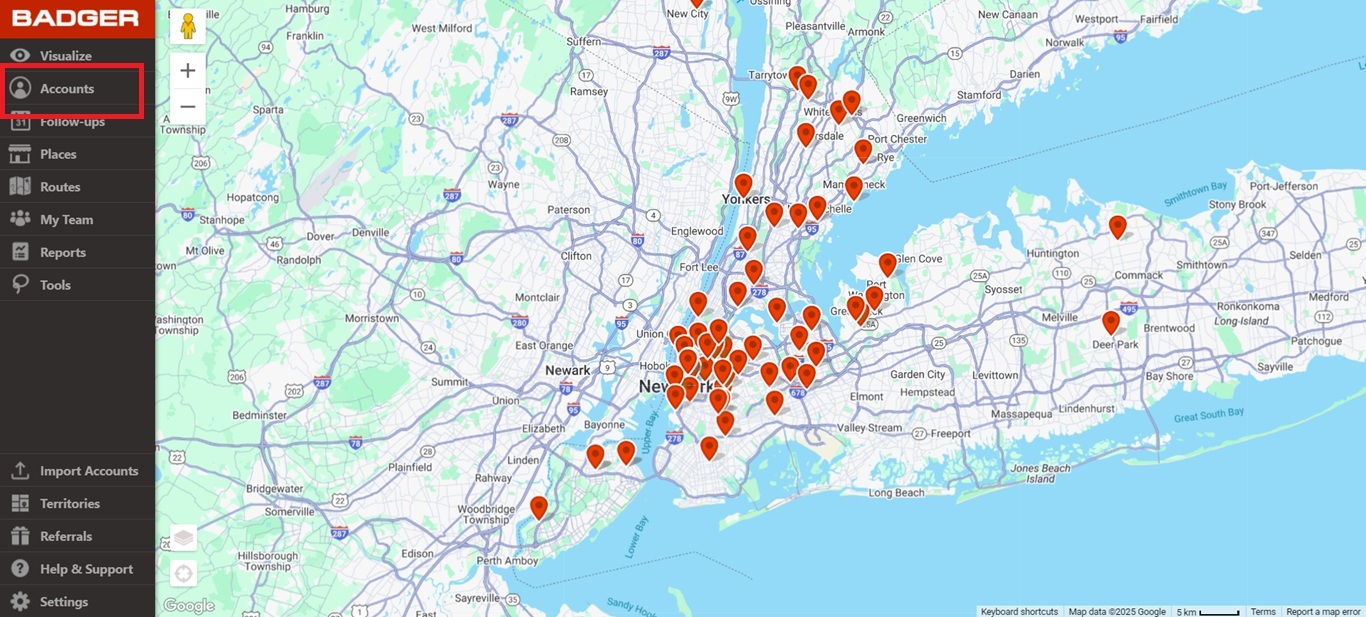
1. On the web app, go to the Accounts tab found on the left panel.
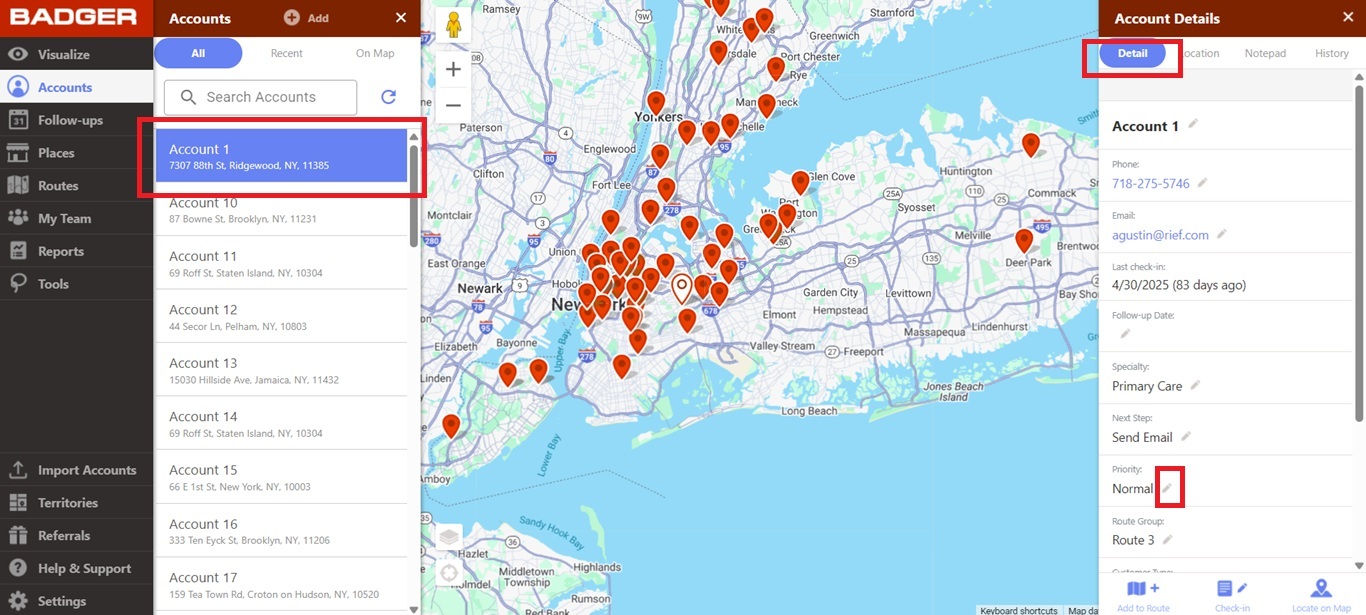
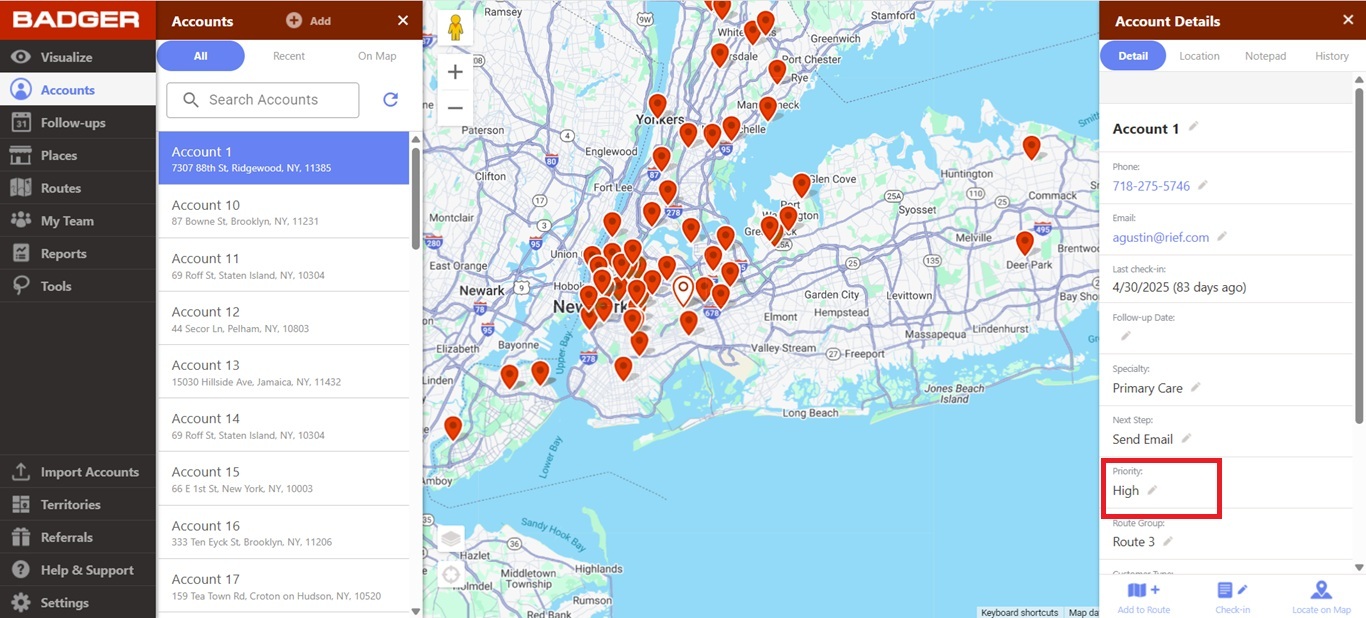
2. Choose the account you want to edit, and the Account Details panel will appear on the right side of the web app. Just click on the pencil-like icon found on the right side of each field value, and save the changes.

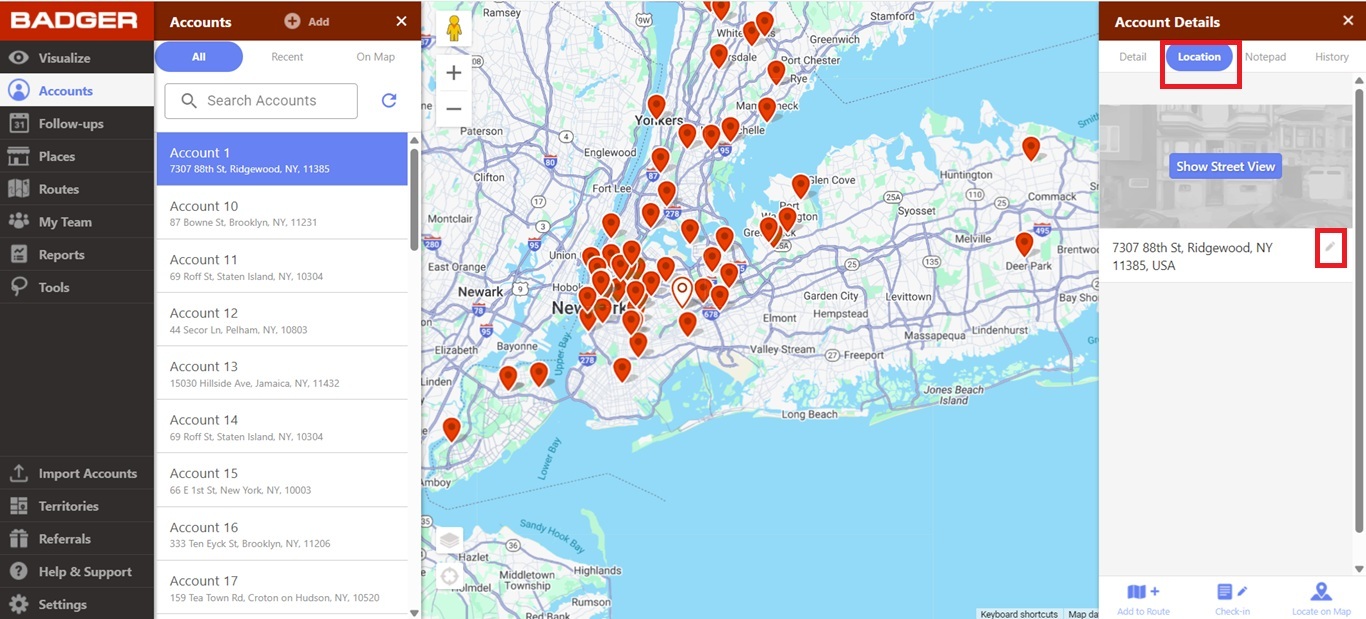
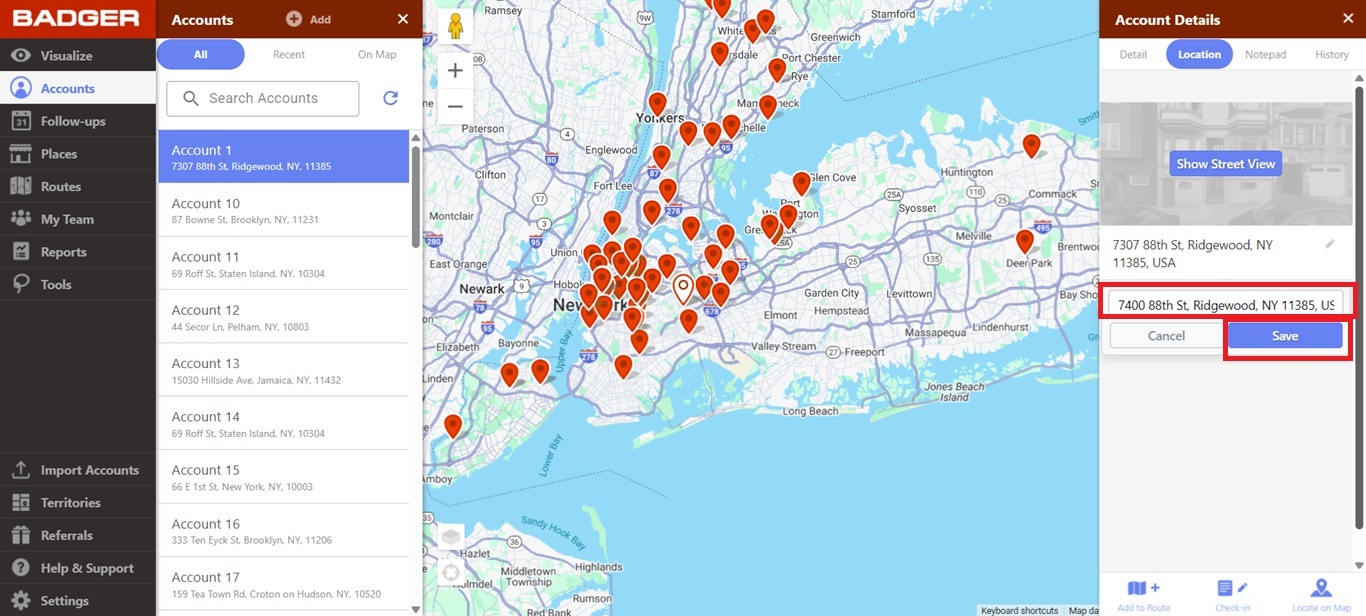
3. Click on Location under the Account Details tab to edit the address.
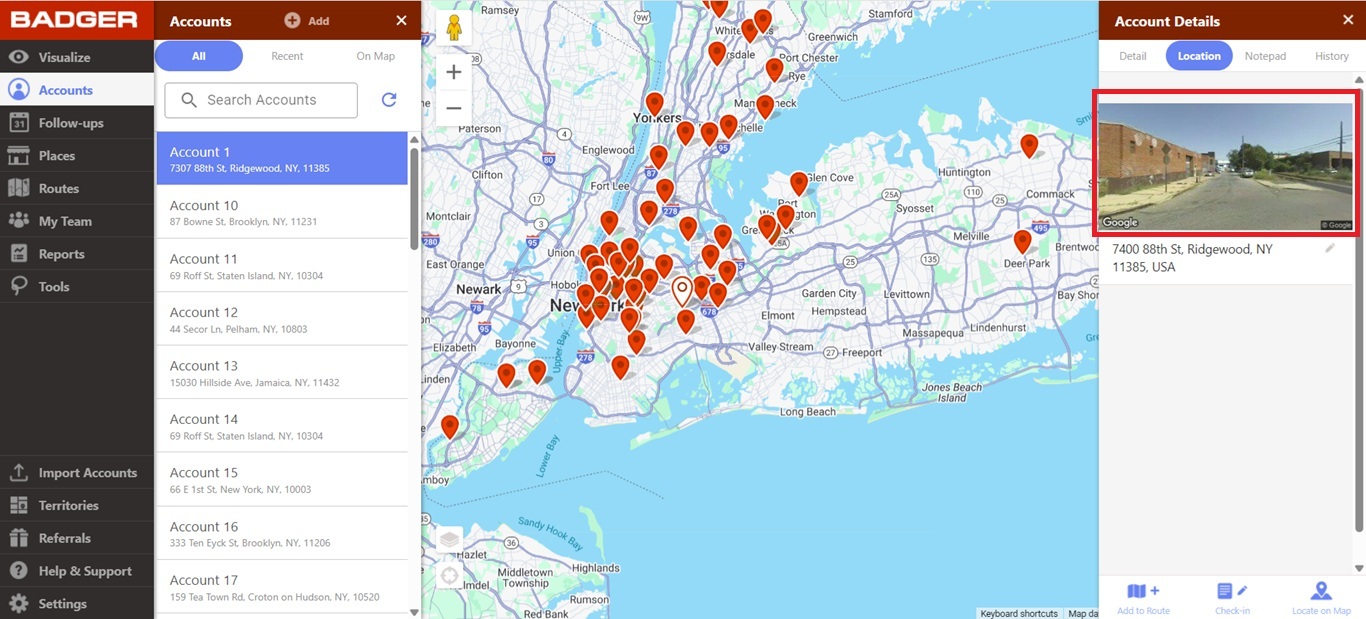
Here's how it will look like when you click on Show Street View.
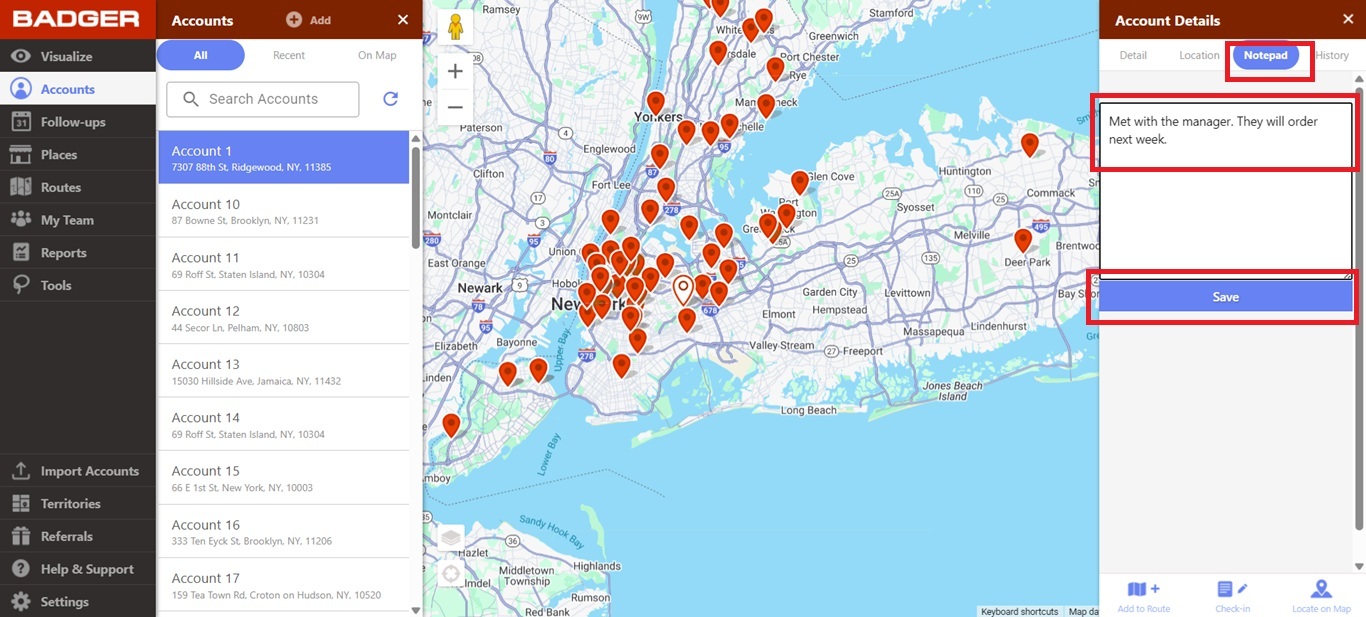
4. Go to the Notepad tab to add any notes that you'd like to save on the account, then click Save.
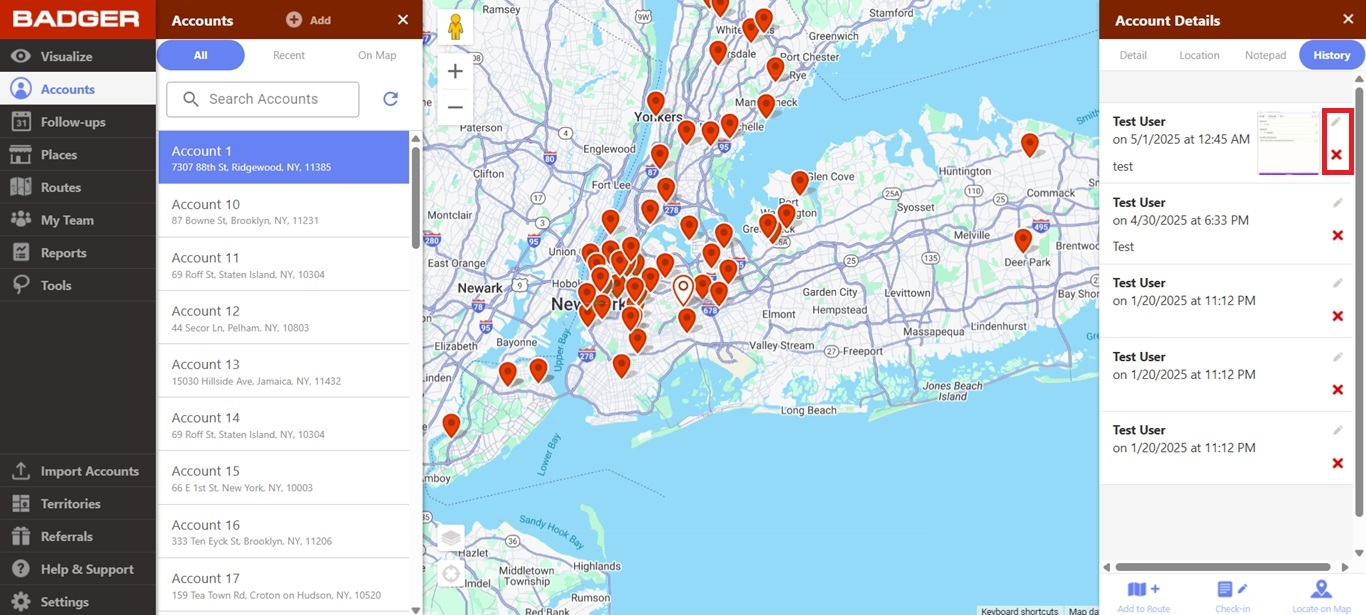
5. All check-ins can be viewed on the History tab. Click the pencil icon to edit the entry, or the "x" icon to delete. Note that a deleted check-in can no longer be retrieved.
You can also watch this video on how to edit an account:
Looking for our logo?
Grab a Zip packed with our logo in PNG and EPS formats.