Jak importować pliki Excel / CSV do swojego konta z komputera (WebApp)
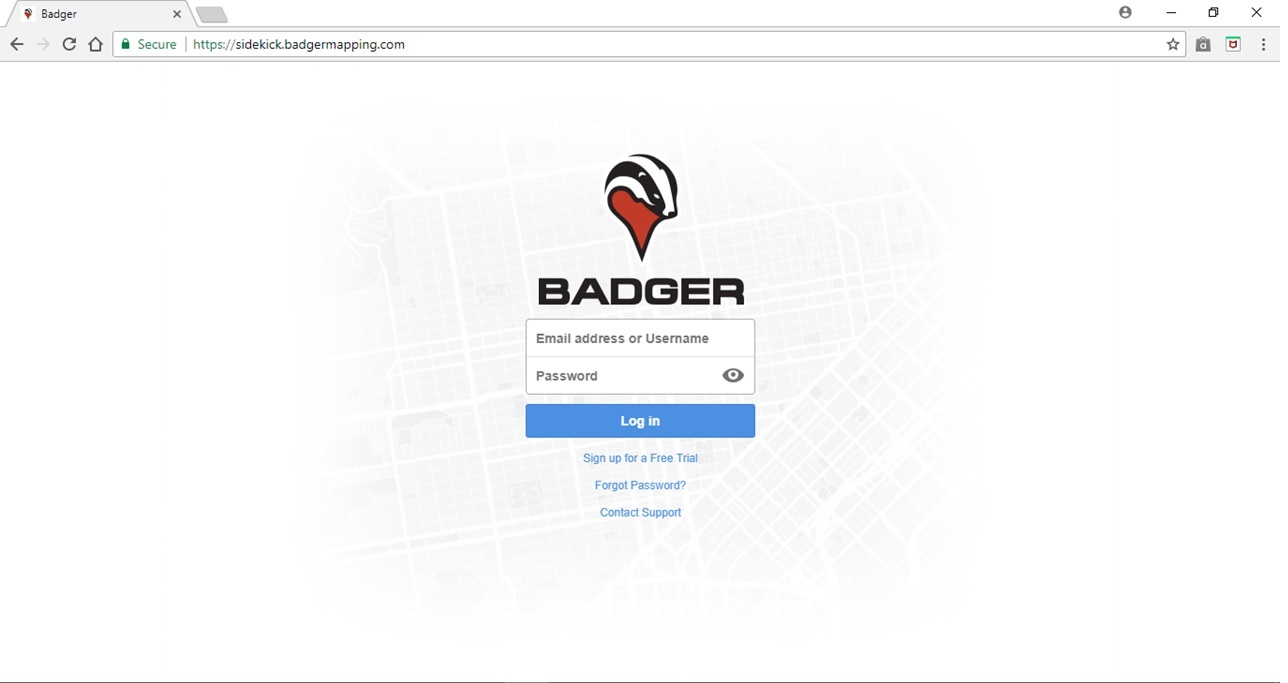
1. Logon to: https://sidekick.badgermapping... (Badger actually works best in Chrome, but it should work fine with other browsers too.)
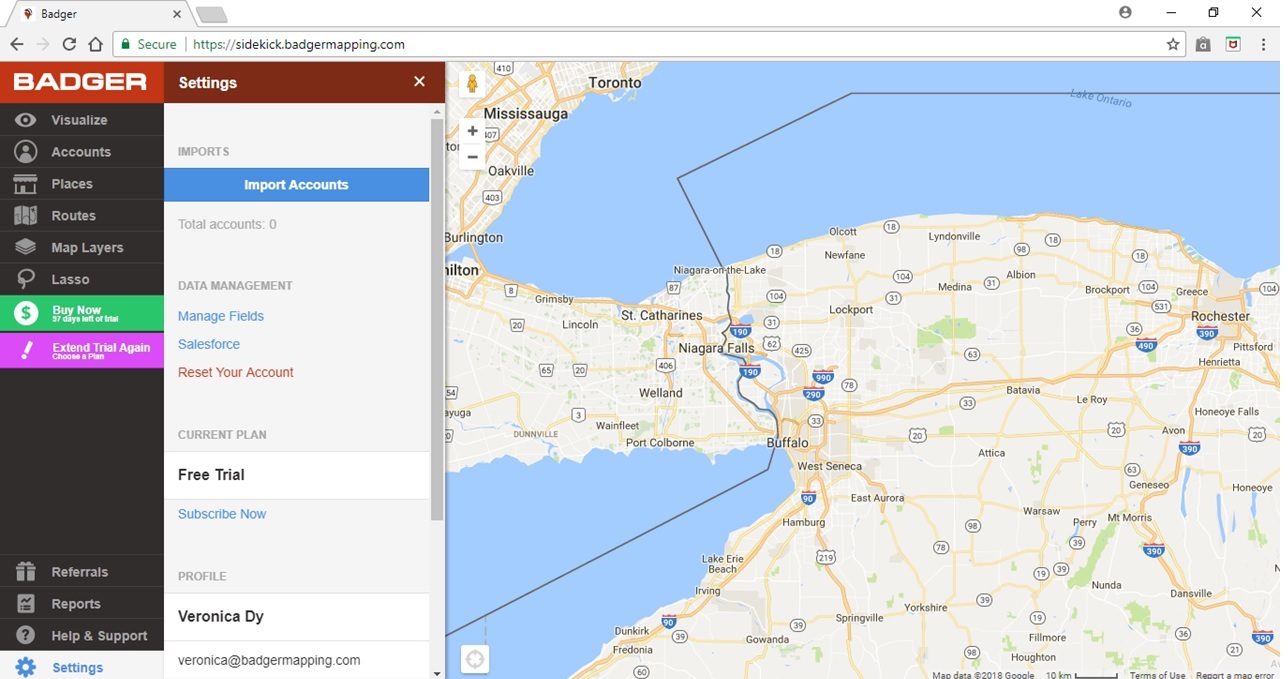
2. Go to "Setings".

3. Click "Import Accounts".
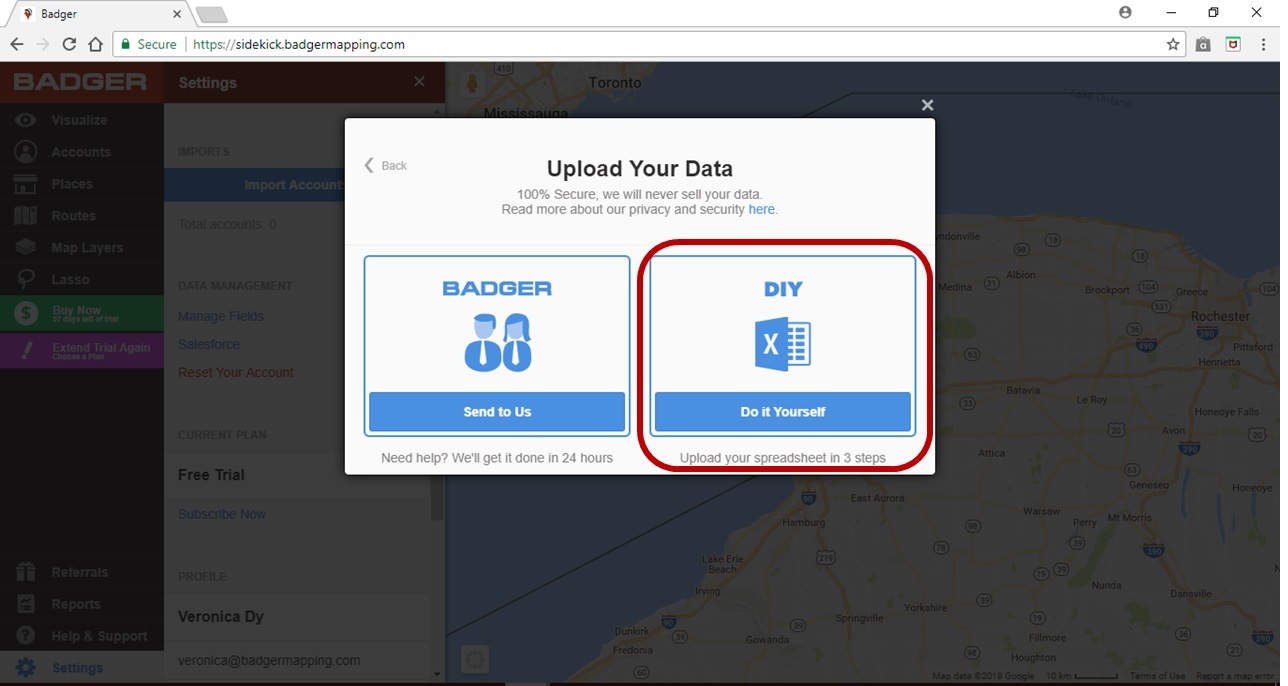
4. Select "Import Excel/CSV".

5. Choose "Do It Yourself".
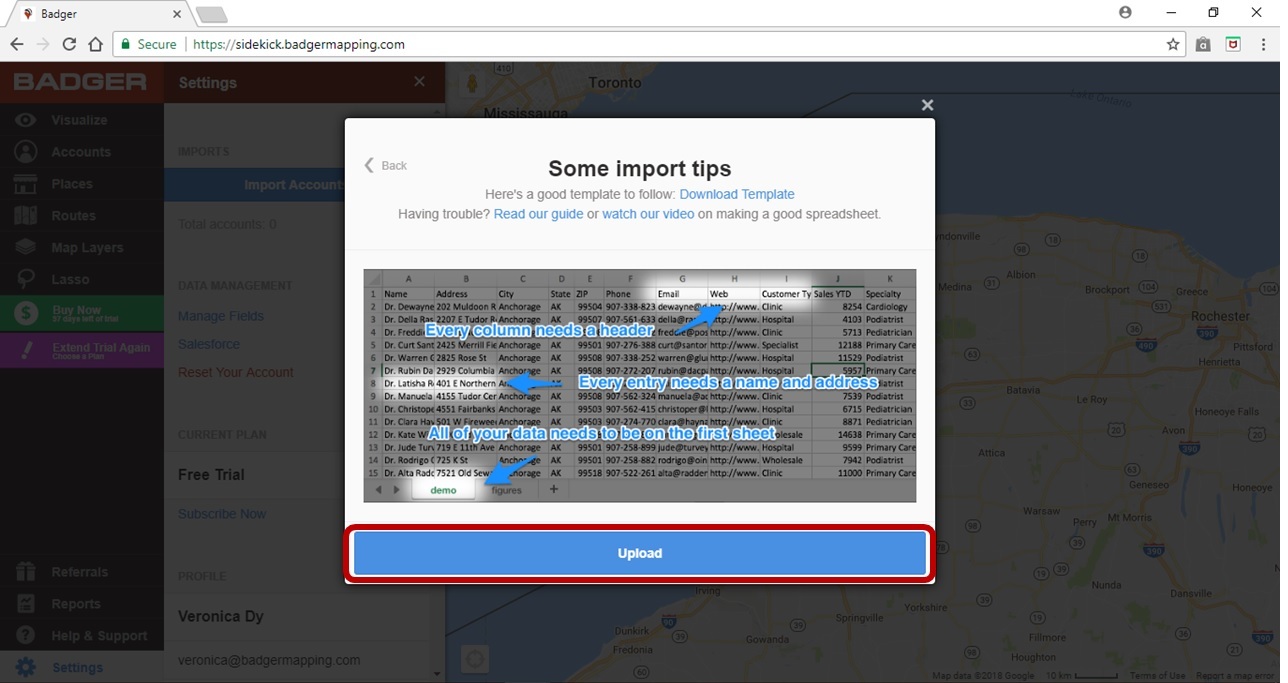
6. Click "Upload" then choose the file you wish to import.
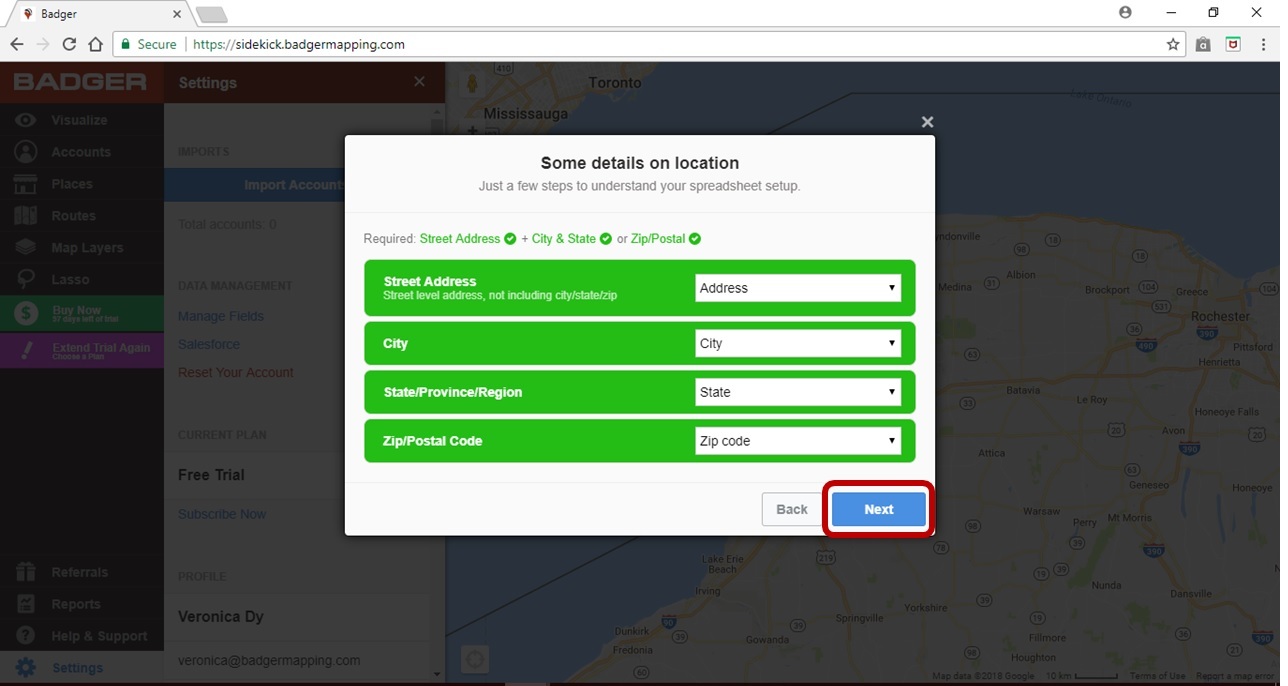
7. Choose the address details. You can either select Addresses, Lat/Long, or Both, then click Next.

8. If you're using address, you'd need to select whether they're written in single column or multiple columns, then click Next.

9. Assign the address headers to the appropriate fields. If a field should be blank, choose "Not Applicable from the drop-down list. Click on "Next".
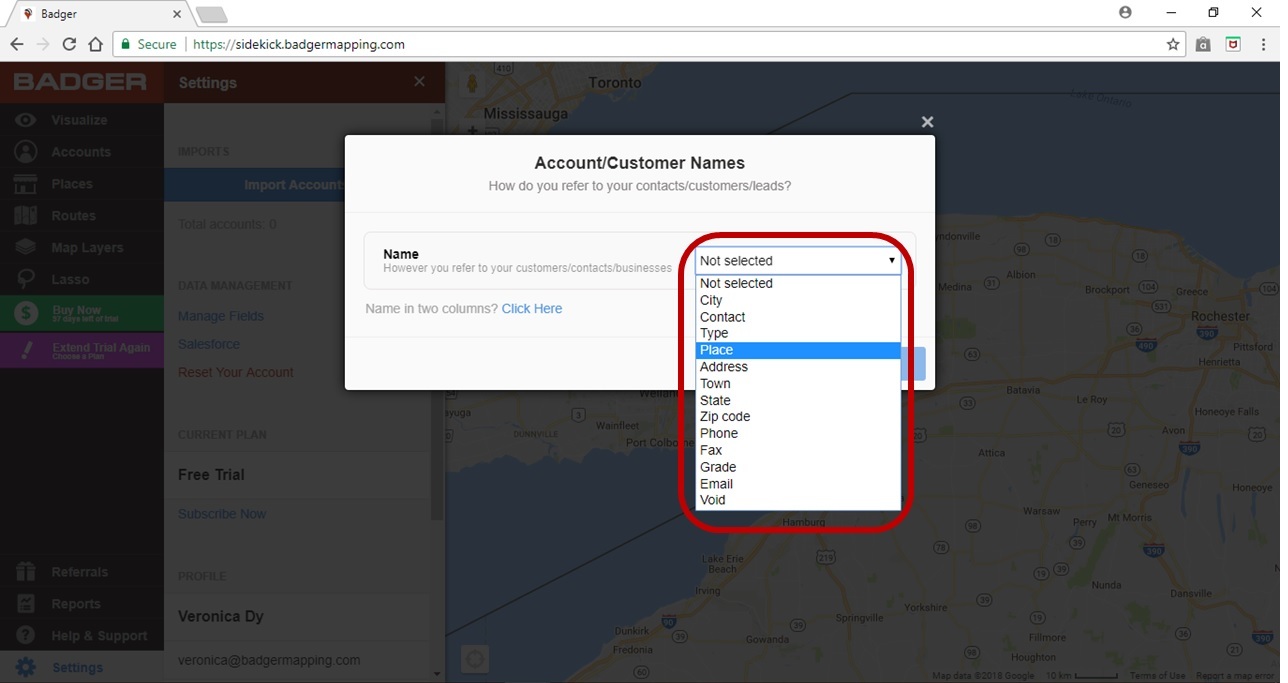
10. Assign the Account/Customer Name you prefer and click "Next".
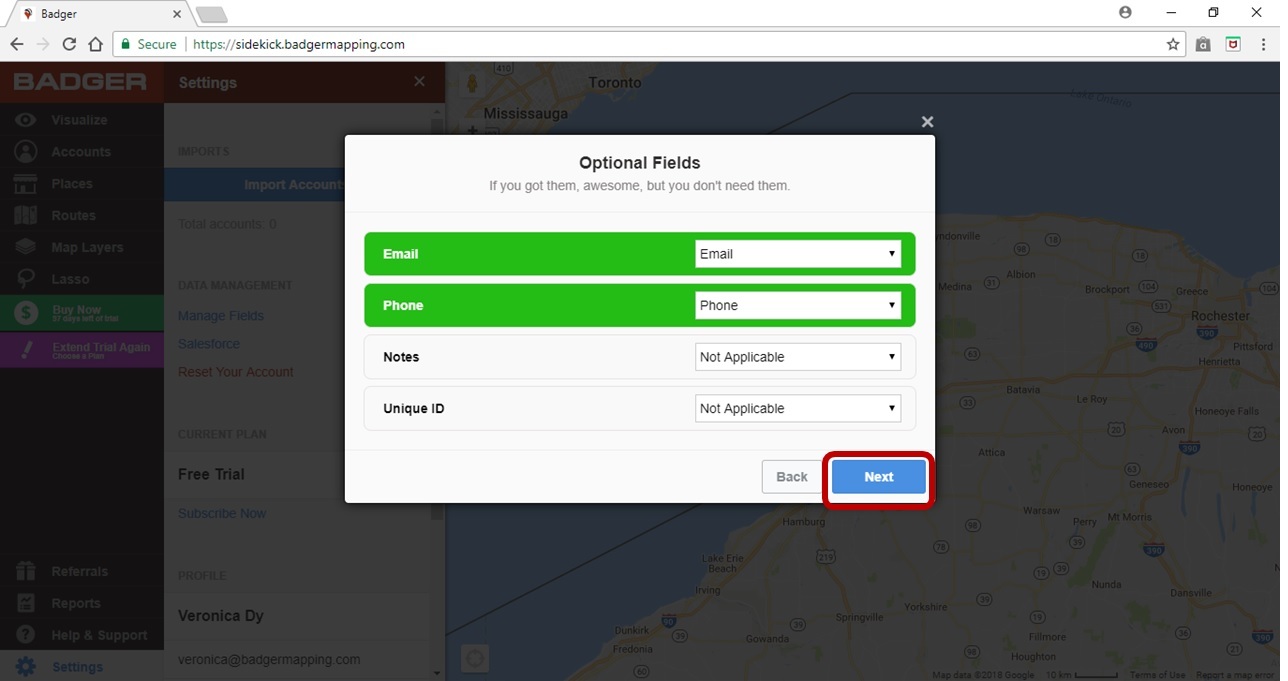
11. You'll also have the option to assign the appropriate field for Phone, Email, Notes, and Customer ID's. Choose "Not Applicable" from the drop-down list if a field is blank. Once done, click "Next".
12. A summary of your import details will pop-up, then click on "Map It!". You'll also find the number of custom fields being imported under "New Custom Fields" (Note: The app allows up to 30 custom fields). Your data set will be uploaded in a couple of minutes, and you should be good to to go.

To help you import your data you can download our template here.